surroundings
Introduction
We have introduced the use of requests to perform http operations before. This article introduces another third-party library httpx with very similar functions. It provides synchronous and asynchronous API , and supports HTTP/1.1 and HTTP/2 at the same time. It is a full-featured HTTP client.
Install
Install using pip , execute the command
pip install httpx
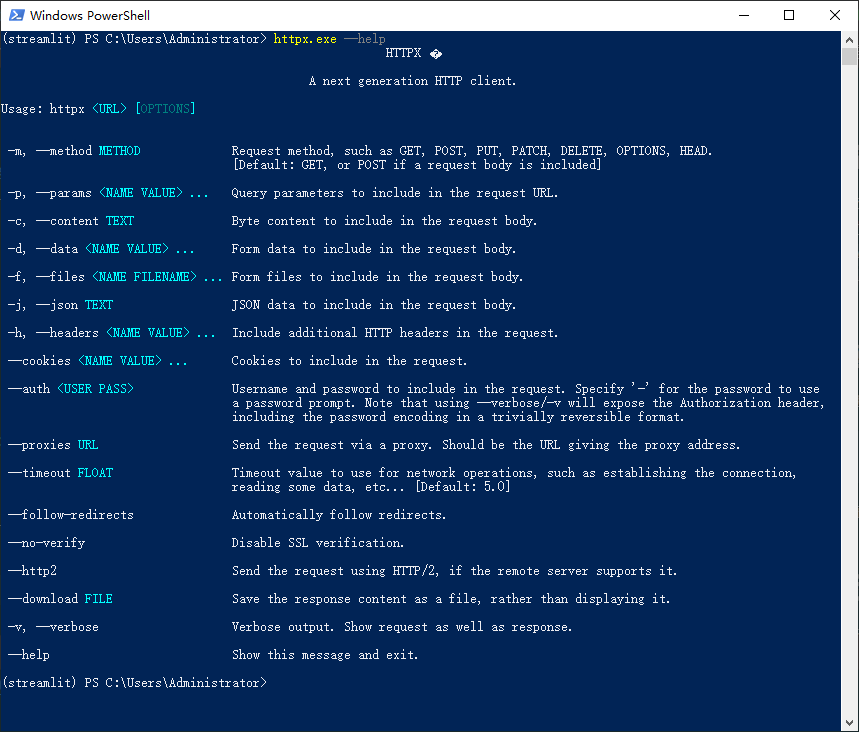
Along with installing the python library, the command line tool httpx.exe is also installed

Let’s look at a few simple examples
# get方法请求url httpx.exe https://github.com -m get # post方法请求url,同时上传一个文本文件httpx.exe https://domain.com -m post -f test.txt
basic use
Let’s take the previous example of the flask backend.
from flask import Flask, jsonify, request from flask_restful import Api, Resource, reqparse USERS = [ {"name": "zhangsan"}, {"name": "lisi"}, {"name": "wangwu"}, {"name": "zhaoliu"} ] class Users(Resource): def get(self): return jsonify(USERS) def post(self): args = reqparse.RequestParser() \ .add_argument('name', type=str, location='json', required=True, help="名字不能为空") \ .parse_args() if args['name'] not in USERS: USERS.append({"name": args['name']}) return jsonify(USERS) def delete(self): USERS = [] return jsonify(USERS) class UserId(Resource): def __init__(self): self.parser = reqparse.RequestParser() self.parser.add_argument('name', type=str) self.parser.add_argument('age', type=int) def get(self, userid): datas = self.parser.parse_args() return jsonify( {"name": USERS[int(userid)].get('name'), "age": datas.get('age')} ) def post(self, userid): file = request.files['file'] file.save('flask_file.txt') return jsonify({ 'msg' : 'success' }) app = Flask(__name__) api = Api(app, default_mediatype="application/json") api.add_resource(Users, '/users') api.add_resource(UserId, '/user/<userid>') app.run(host='0.0.0.0', port=5000, use_reloader=True, debug=True)
After starting the backend service, let’s take a look at the client’s request. The basic usage of httpx is almost the same as requests . In many cases, you only need to replace requests in the original code with httpx .
import httpx # 使用get方法r = httpx.get('http://127.0.0.1:5000/users') # http返回码print(r.status_code) # http头print(r.headers['content-type']) # 也可以使用r.headers.get('content-type') # 接口返回的json print(r.json())

import httpx import json param = {'name': 'xugaoxiang'} headers = {"Content-type": "application/json"} # post请求r = httpx.post('http://127.0.0.1:5000/users', data=json.dumps(param), headers=headers) print(r.status_code) print(r.json())

import httpx # delete请求r = httpx.delete('http://127.0.0.1:5000/users') print(r.json()) print(r.status_code)

In addition, requests like put , head , and options methods are similar, so I won’t give an example here.
r = httpx.put(url, data={'key': 'value'}) r = httpx.head(url) r = httpx.options(url)
Advanced usage
The usage in the above example is the top-level API provided by httpx , which is not a big problem when writing some test scripts or making system prototypes, but if you really want to use it in actual projects, there will be performance problems. This is because httpx will re-establish a link every time it makes a request, that is, the original link is not reused, which is particularly inefficient in the case of high concurrency.
Similar to the Session in the requests module, httpx provides a Client , which uses the http connection pool, which greatly reduces the number of link re-establishments, reduces cpu usage, reduces network congestion, and improves system efficiency.
The use of Client is relatively simple. The recommended practice is to use Client as the context manager, see the following example
import httpx with httpx.Client() as client: # 请求部分,将原来的httpx 换成client 就可以了,参数是一样的r = client.get('http://127.0.0.1:5000/users') print(r.json()) print(r.status_code)
Synchronous and Asynchronous Requests
By default, httpx provides a standard synchronous API . If you want to use asynchronous requests, you can do this
import httpx import asyncio async def make_async_request(): async with httpx.AsyncClient() as client: r = await client.get('http://127.0.0.1:5000/users') print(r.json()) print(r.status_code) asyncio.run(make_async_request())

http2 support
To enable http2 , we need to additionally install the library httpx[http2]
# 这个包名取的太奇怪了pip install httpx[http2]
Then add http2 support when initializing the client
with httpx.Client(http2=True) as client: r = client.get('http://127.0.0.1:5000/users')
Topics in Python Practical Modules
More useful python modules, please move
https://xugaoxiang.com/category/python/modules/
This article is reprinted from https://xugaoxiang.com/2022/07/31/python-module-33-httpx/
This site is for inclusion only, and the copyright belongs to the original author.