Original link: https://leovan.me/cn/2023/03/gpu-machine-learning-environment-configuration-under-windows-with-wsl2-and-ubuntu/
This article is mainly for friends who want to use the graphics card for scientific careers during the idle time of the game
.
This article takes the Windows 11 22H2 version as an example, and it does not ensure that it is fully applicable to other versions of the system.
terminal
If a worker wants to do a good job, he must first sharpen his tools. Development is inseparable from the black frame, so we need to make this black frame better and more usable. Windows Terminal is a new app that supports PowerShell and WSL bash, installed directly from the app store .
It is recommended to install the latest version of PowerShell as the command line environment. For details on downloading and configuration, please refer to the official website .
In order to better display Chinese, English and icons in the terminal, it is recommended to use Sarasa Term SC Nerd as the terminal display font.
WSL
Open PowerShell or Windows Command Prompt in administrator mode, enter the following command, and restart the computer:
wsl --install
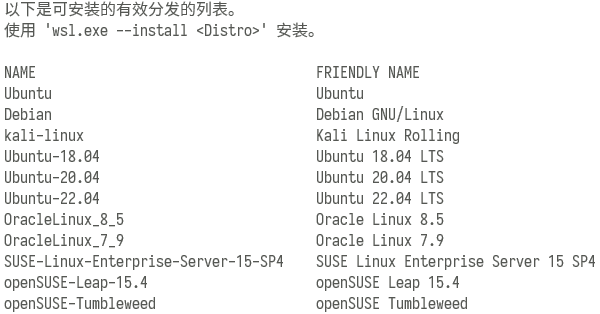
This command enables WSL and installs the Ubuntu distribution of Linux. You can view all Linux distributions through wsl -l -o :

Other distributions of Linux can be installed via wsl --install <发行版名称> . You can view the currently running WSL version through wsl -l -v :

New installs of Linux via wsl are already set to WSL 2 by default.
Enter the Ubuntu command line and enter the following command to install the necessary system dependencies:
sudo apt install gcc
Install zsh as Ubuntu’s default shell:
sudo apt install zsh
Install Oh My Zsh to improve the usability of zsh.
graphics card
drive
Download and install the latest driver for Windows from Nvidia official website ( https://www.nvidia.cn/geforce/drivers ). Enter the Windows command line and enter nvidia-smi command to view the graphics card status:

It is no longer necessary to install additional graphics card drivers in Ubuntu. Enter the Ubuntu command line and enter nvidia-smi command to check the status of the graphics card:

It is not difficult to see that, apart from the different versions of nvidia-smi tool, the graphics driver and CUDA versions are the same.
CUDA
Download CUDA for WSL Ubuntu from Nvidia’s official website ( https://developer.nvidia.com/cuda-toolkit-archive ), the version selected here is 11.8.0 (for details, please refer to the dependent versions of required tools such as Tensorflow ), the relevant platform options are as follows:
- Operating System: Linux
- Architecture: x86_64
- Distribution: WSL-Ubuntu
- Version: 2.0
- Installer Type: runfile (local)
After the download is complete, run the following command to install:
sudo sh cuda_11.8.0_520.61.05_linux.run --toolkit
Where --toolkit means to install only the CUDA toolkit.

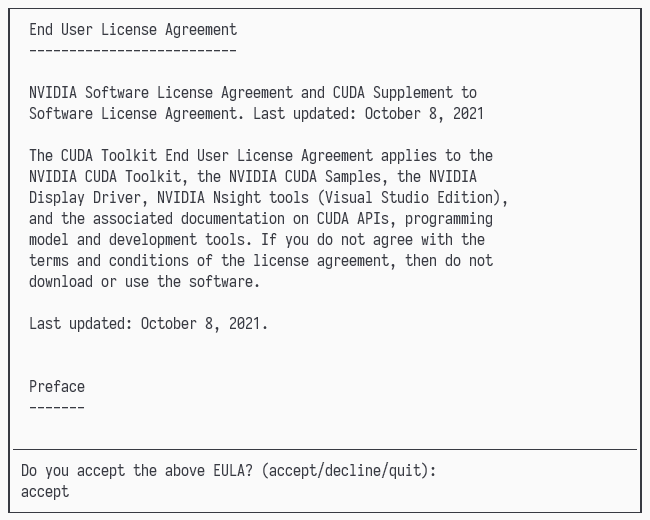
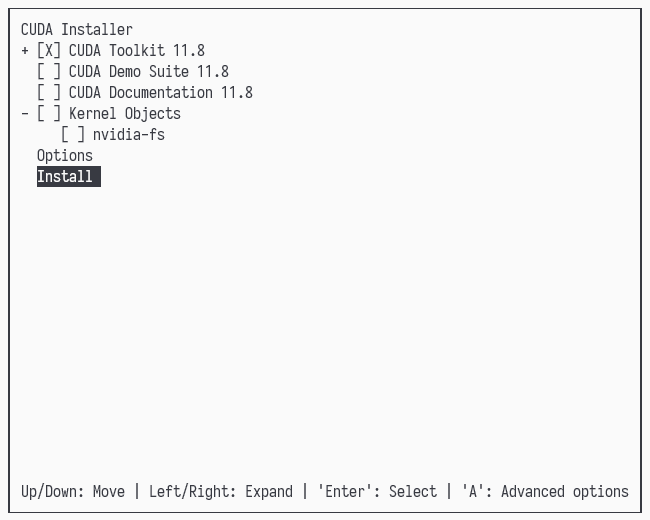
Enter accept in the pop-up EULA interface to enter the installation option interface:

Just keep CUDA Toolkit 11.8 , switch to Install and hit enter to install.
Add the following content to the end of the ~/.bashrc file:
export PATH=/usr/local/cuda/bin:$PATH export LD_LIBRARY_PATH=/usr/local/cuda/lib64:$LD_LIBRARY_PATH
Make the path effective immediately by source ~/.bashrc or source ~/.zshrc . Enter nvcc -V to view the CUDA compiler driver version:

cuDNN
Download cuDNN for Linux and the above CUDA version from Nvidia official website ( https://developer.nvidia.com/rdp/cudnn-archive ), the version selected here is v8.8.0 for CUDA 11.x , the installation package format For Local Installer for Linux x86_64 (Tar) .
Note: cuDNN needs to register an account before downloading.
After the download is complete, run the following command to decompress:
tar -xvf cudnn-linux-x86_64-8.8.0.121_cuda11-archive.tar.xz
Move it to the CUDA directory by running the following command:
sudo mv cudnn-*-archive/include/cudnn*.h /usr/local/cuda/include sudo mv -P cudnn-*-archive/lib/libcudnn* /usr/local/cuda/lib64 sudo chmod a+r /usr/local/cuda/include/cudnn*.h /usr/local/cuda/lib64/libcudnn*
machine learning environment
Python
Ubuntu 22.04 system has installed Python 3.10 version, and Python 3.10 has good compatibility in common machine learning libraries. Therefore, taking the Python 3.10 version as an example, use venv to create a machine learning virtual environment. Install venv at the system level and create a virtual environment:
sudo apt install python3.10-venv mkdir ~/sdk python3.10 -m venv ~/sdk/python310 source ~/sdk/python310/bin/activate
PyTorch
The highest CUDA supported by PyTorch version 2.0 is 11.8. Enter the following command to install PyTorch:
pip install torch torchvision torchaudio --index-url https://download.pytorch.org/whl/cu118
Surprised to find that the PyTorch installation package torch-2.0.0+cu118-cp310-cp310-linux_x86_64.whl exceeds 2GB. After the installation is complete, it is found that PyTorch is embedded with CUDA and cuDNN. The advantage of embedding is that it can be installed and used immediately, but if it is inconsistent with the system CUDA and cuDNN versions that other packages depend on, it is prone to various unexpected problems. Run the following command in Python to verify whether PyTorch can call the graphics card normally:
import torch # PyTorch 版本torch.__version__ # 2.0.0+cu118 # CUDA 是否可用torch.cuda.is_available() # True # GPU 数量torch.cuda.device_count() # 1 # GPU 名称torch.cuda.get_device_name(0) # NVIDIA GeForce RTX 3070 Ti
Tensorflow
Enter the following command to install Tensorflow:
pip install tensorflow
Run the following command in Python to verify whether Tensorflow can call the graphics card normally:
import tensorflow as tf # Tensorflow 版本tf.__version__ # 2.11.0 # CUDA 是否可用tf.test.is_gpu_available() # True # GPU 数量len(tf.config.experimental.list_physical_devices('GPU')) # 1 # GPU 名称tf.test.gpu_device_name() # /device:GPU:0
This article is transferred from: https://leovan.me/cn/2023/03/gpu-machine-learning-environment-configuration-under-windows-with-wsl2-and-ubuntu/
This site is only for collection, and the copyright belongs to the original author.