This render was generated by the Kami API and may have typographical issues, for the best experience go to:https://www.miaoer.net/posts/network/wepe-install-catwrt
commencement
For the full range of CatWrt, as well as LEDE/QWRT, I find this method to be more standardized
There are several ways to install CatWrt on a soft-route x86_64 (AMD64) platform
- New Installation (PE)
- Upgrade system (overwrite partition on existing system)
- Containers (LXC, Docker)
The PE method is used here and is suitable for most people including virtual machine users, physical machine users.
However, virtual machines can be directly imported into the hard disk; directly imported VMDK files are easy to be corrupted during power failure, VMware users are recommended to choose the PE installation method in this article; PVE, UNRAID, etc. can be directly imported into the virtual hard disk files.
intend
- 脑子
- U 盘
- 键鼠
- VentoyDownload Source: Github Ventoy
- 微 PEDownload Source: Shandong University Source
- IMG Disk Writer ToolDownload Source: roadkil.net
- Floppy Disk Drivedownloading
- CatWrtblog (loanword)
Let’s start by downloading the image from the CatWrt distribution blog. Here we recommend the EFI boot option
Because newer machines basically support UEFI, soft routes that don’t support UEFI are likely to be very old or even 32-bit devices, and CatWrt doesn’t provide a 32 image.
If you don’t understand the file suffix difference, see ?
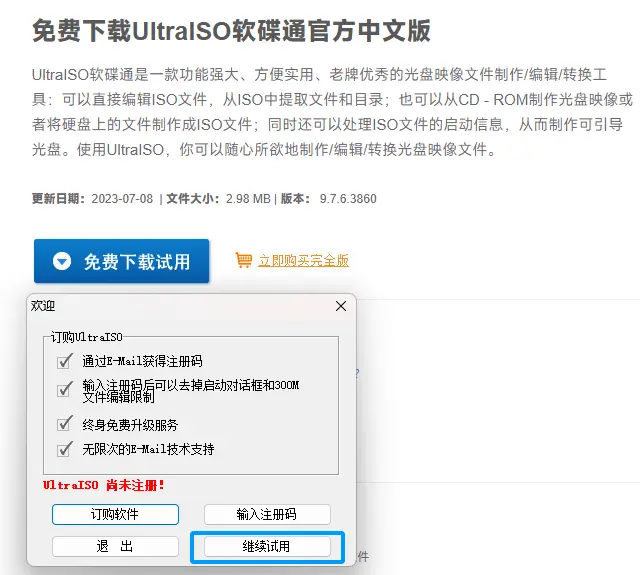
I here on a simple demonstration, the first need to install the floppy disk pass here is nothing to note directly next; open the floppy disk pass, if the pop-up unsubscribed on the choice of the继续试用;
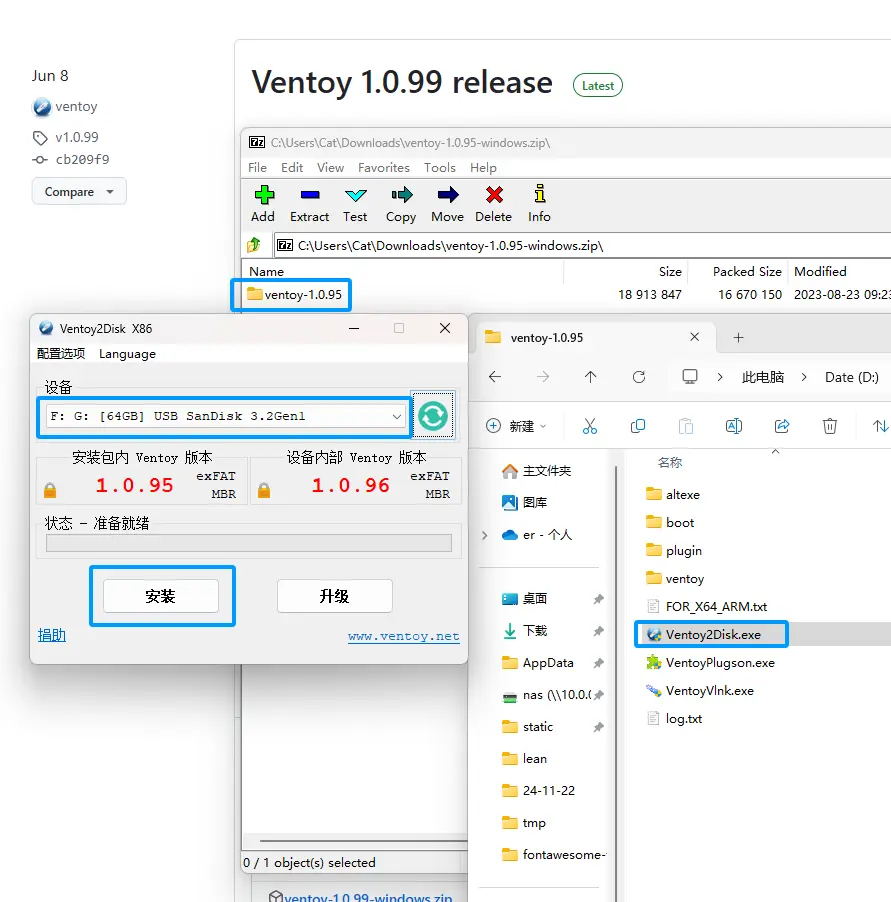
Next, unzip Ventoy and open theVentoy2Disk.exeSelect your USB flash drive to install, which will format your USB flash drive, please make a good backup of your data.
Open the WEPE Toolbox and select Other Installation in the lower right corner.生成可启动 ISO;
Select Generate ISO
Generate settings
Generation complete
In the upper left corner of Floppy Disk Drive, select Open File, select the just generated wepe.iso file or open the just generated iso file directly using Floppy Disk Drive to open the same reason.
Then we put in the IMG Write Disk tool and the CatWrt img image, here I recommend the EFI firmware for new machines don’t ask why, when everything is taken care of the file structure looks like this.
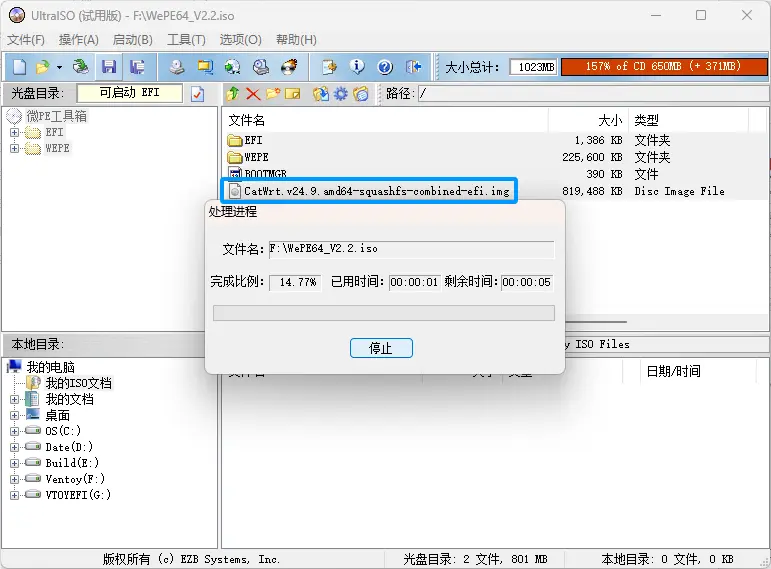
| WEPE.ISO
.
├── EFI
├── WEPE
├── BOOTMGR
├── DiskImage_1_6_WinAll.exe
├── CatWrt.v24.9.amd64-squashfs-combined-efi.img
刷写
Plug the keyboard and mouse USB flash drive into the machine, plug in the chicken, choose to use the USB flash drive to boot, in the Ventoy interface, select the WEPE we have just dealt with enter enter enter enter enter enter, there is nothing to pay attention to here.
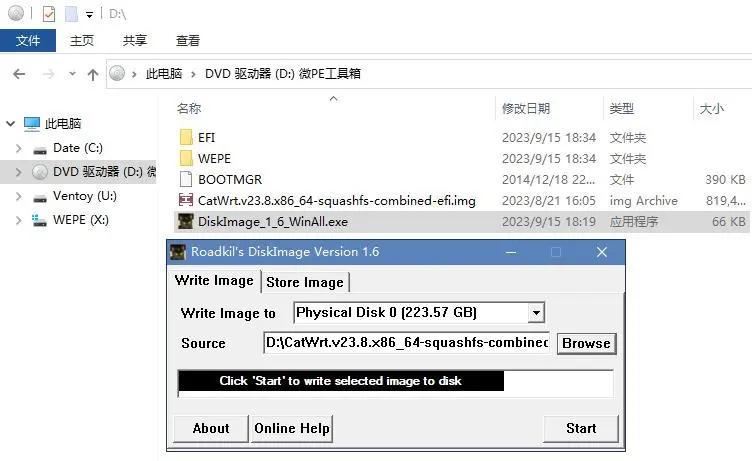
Go to the desktop and we open this computer (File Manager) and find the DVD drive that says “Micro PE Toolkit”, open the IMG Write Disk UtilityDiskImage_1_6_WinAll.exeWrite Image to select our hard diskPhysical Disk 0(223.57 GB)Note that it is wrong to include the partition selection partition here.
If another system is already installed on the hard disk, writing directly to the img will result in an error 2048.
It is recommended to use a partition management tool to clear the corresponding hard disk partition before continuing.
Then select the Source File hereBrowseLocate the IMG mirror and clickStartMake sure to write the disk, and then reboot and pull out the USB flash drive after writing the disk.
Regarding the EFI firmware, it is recommended to contact the manufacturer of the industrial computer to ask how to turn on UEFI and disable secure boot.
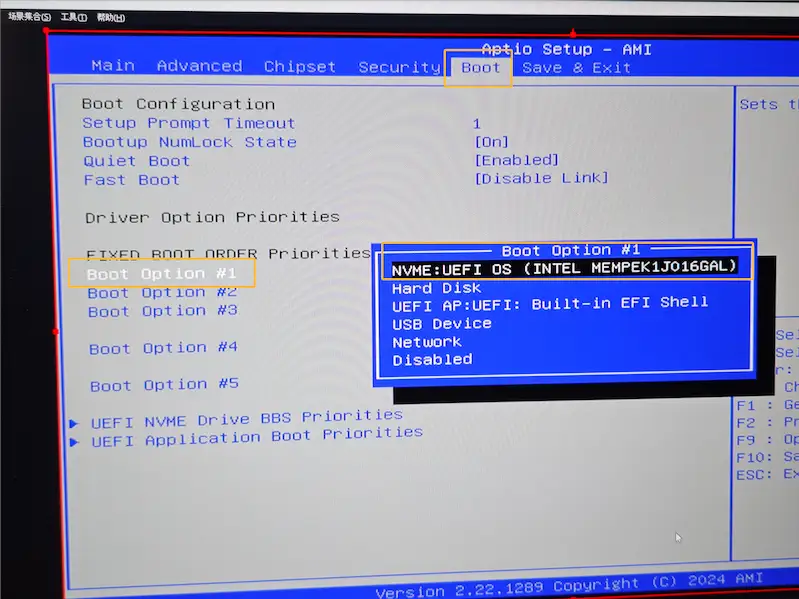
Some machines need to go into the BIOS and change the first boot to the hard disk that was just written to such as.
配网
If you are using DHCP for Internet access see ?.
If you are using PPPoE (dial-up) for Internet access, see ?.