Using this method, the web application you build on the LAN (especially NAS) can support public network access, which is low cost and easy to operate!
If it is a blog, it can also effectively prevent DDOS attacks!
It may not be very friendly to China Unicom users. As far as Gugu knows, China Unicom users in many areas cannot access Cloudflare nodes.
1. Video
The text is relatively brief, and it is highly recommended to eat it with the video!
YouTube: https://youtu.be/Q_xB3433WTg
Bilibili: https://www.bilibili.com/video/BV1pj411C78j/
2. Preparation
- A domain name (it is recommended to register with Namesilo , enter the discount code
laodadeorgugugeeto save $1) - A foreign currency credit card or PayPal
3. Configure domain name
3.1 Register Namesilo

3.2 Register CloudFlare
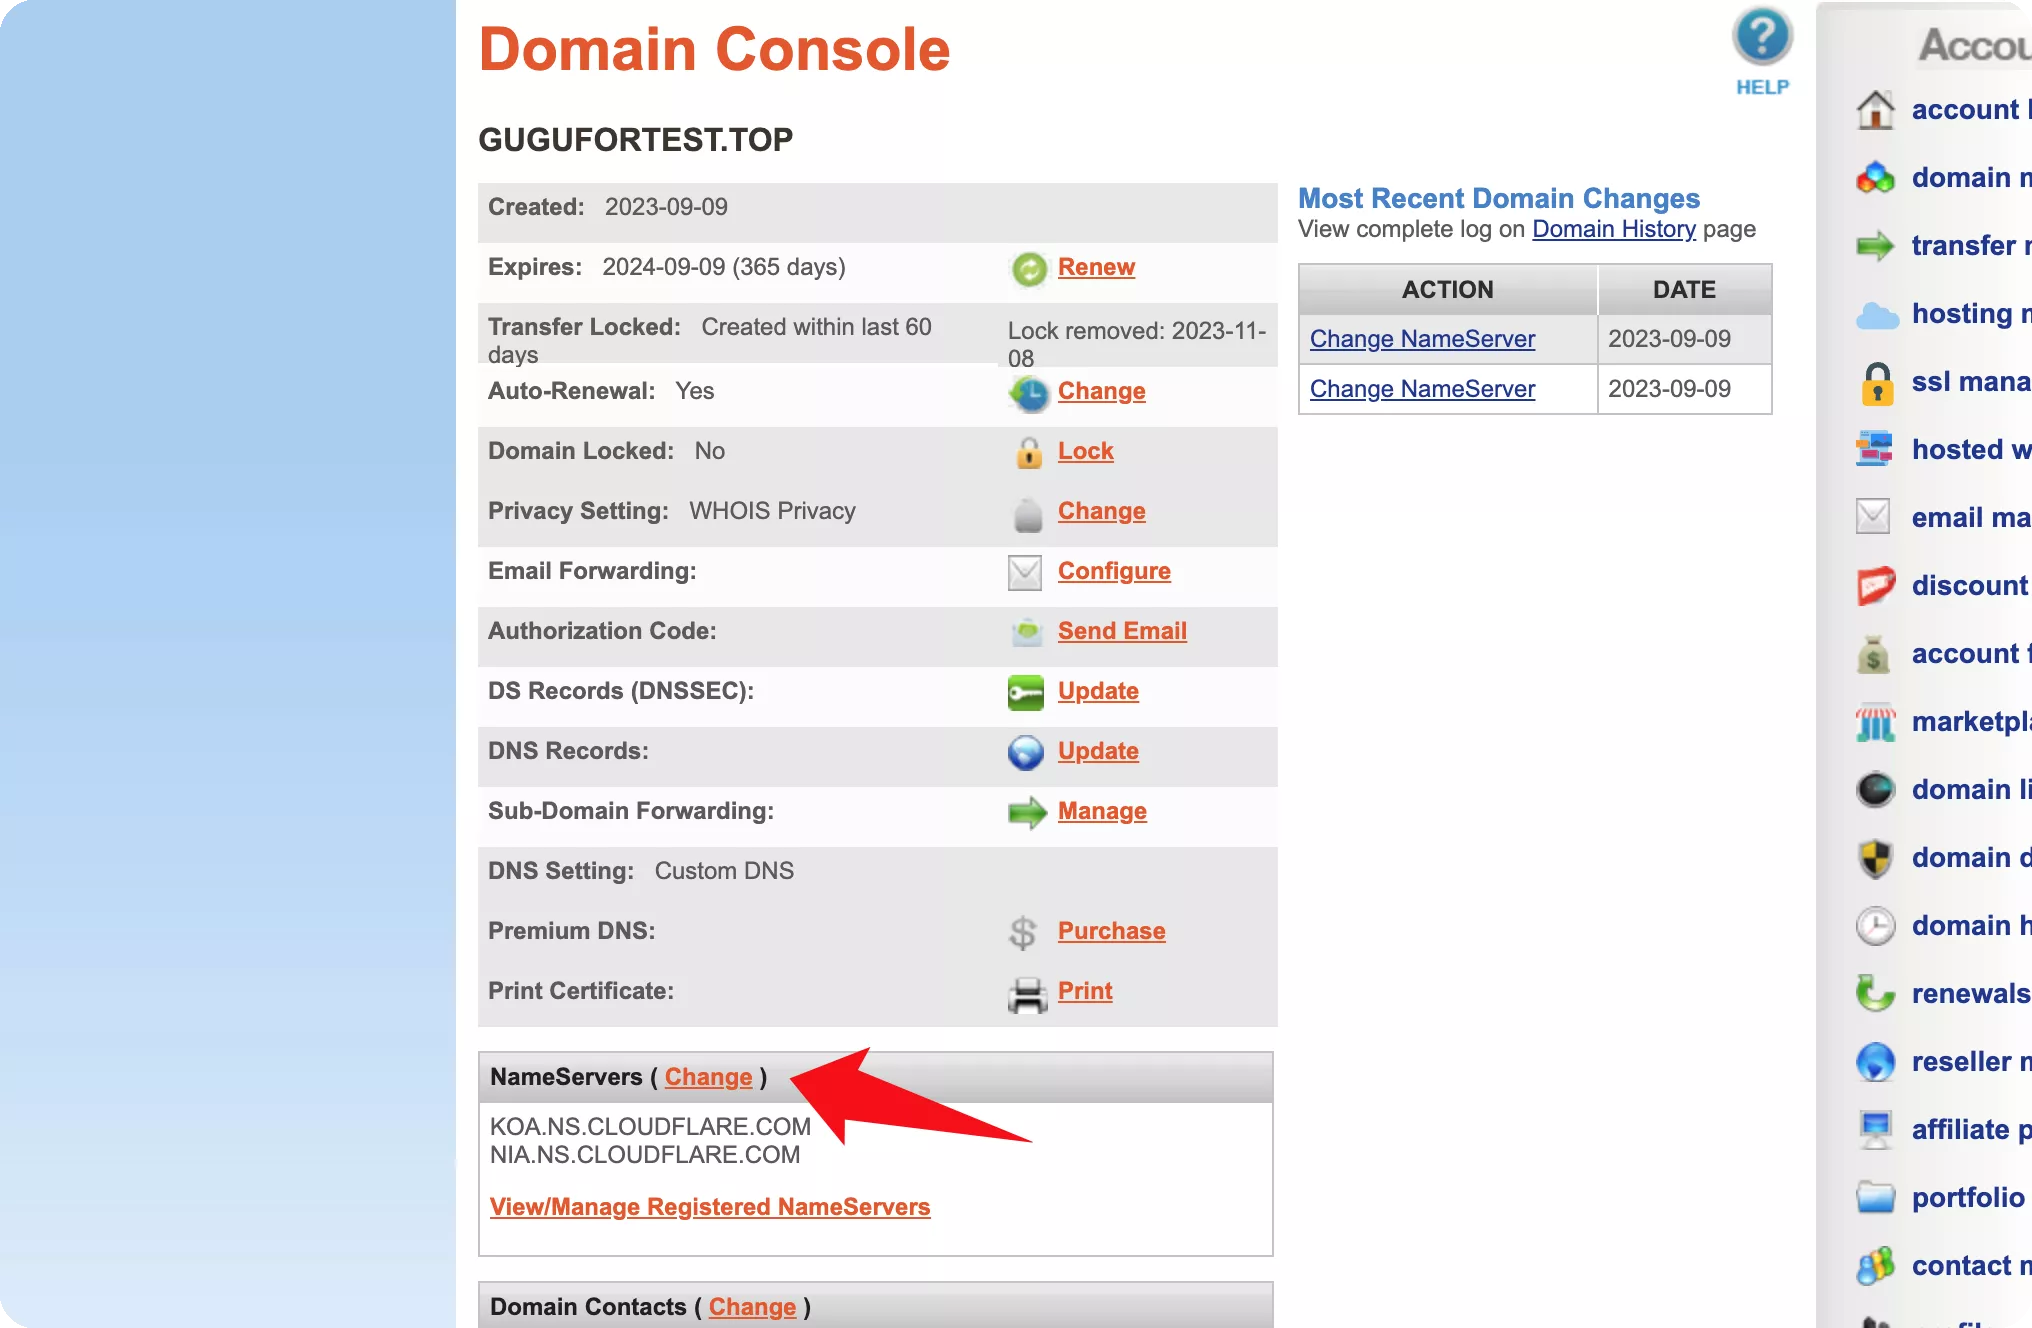
3.3 Change DNS resolution
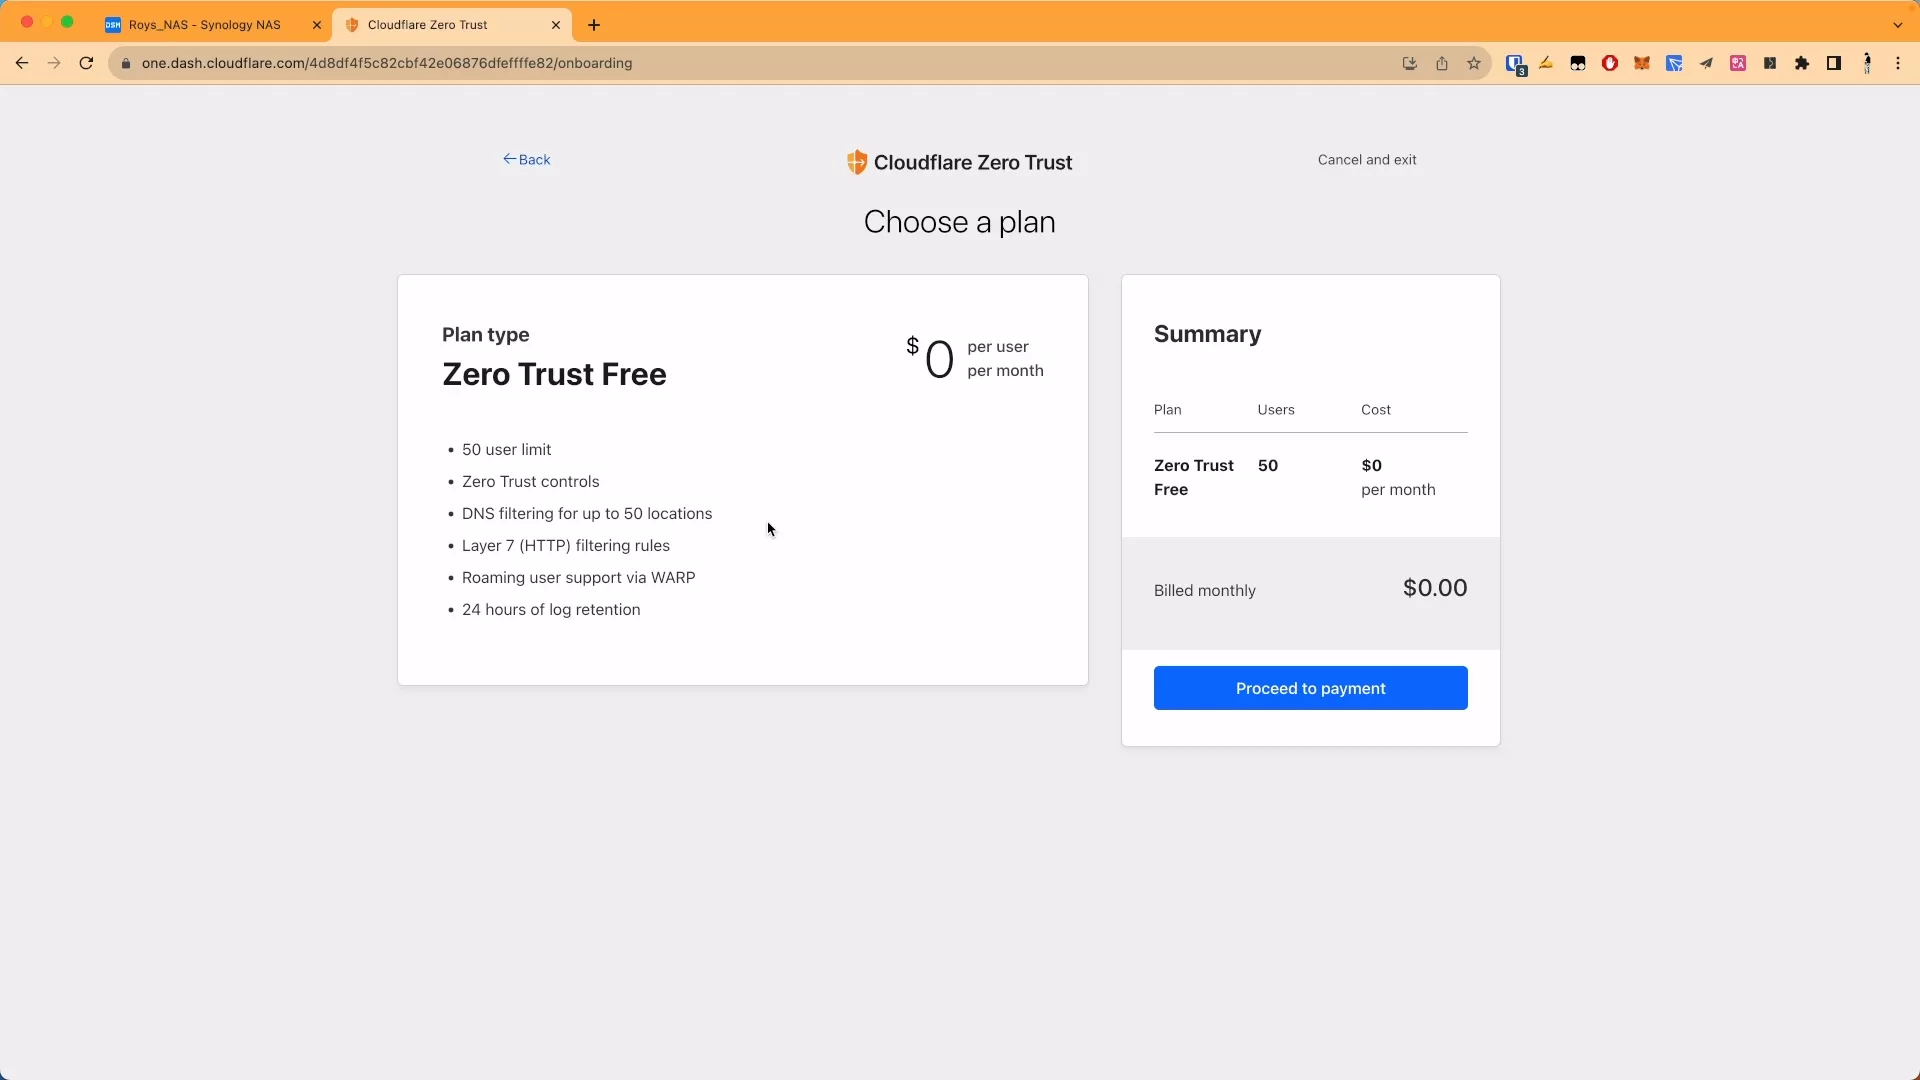
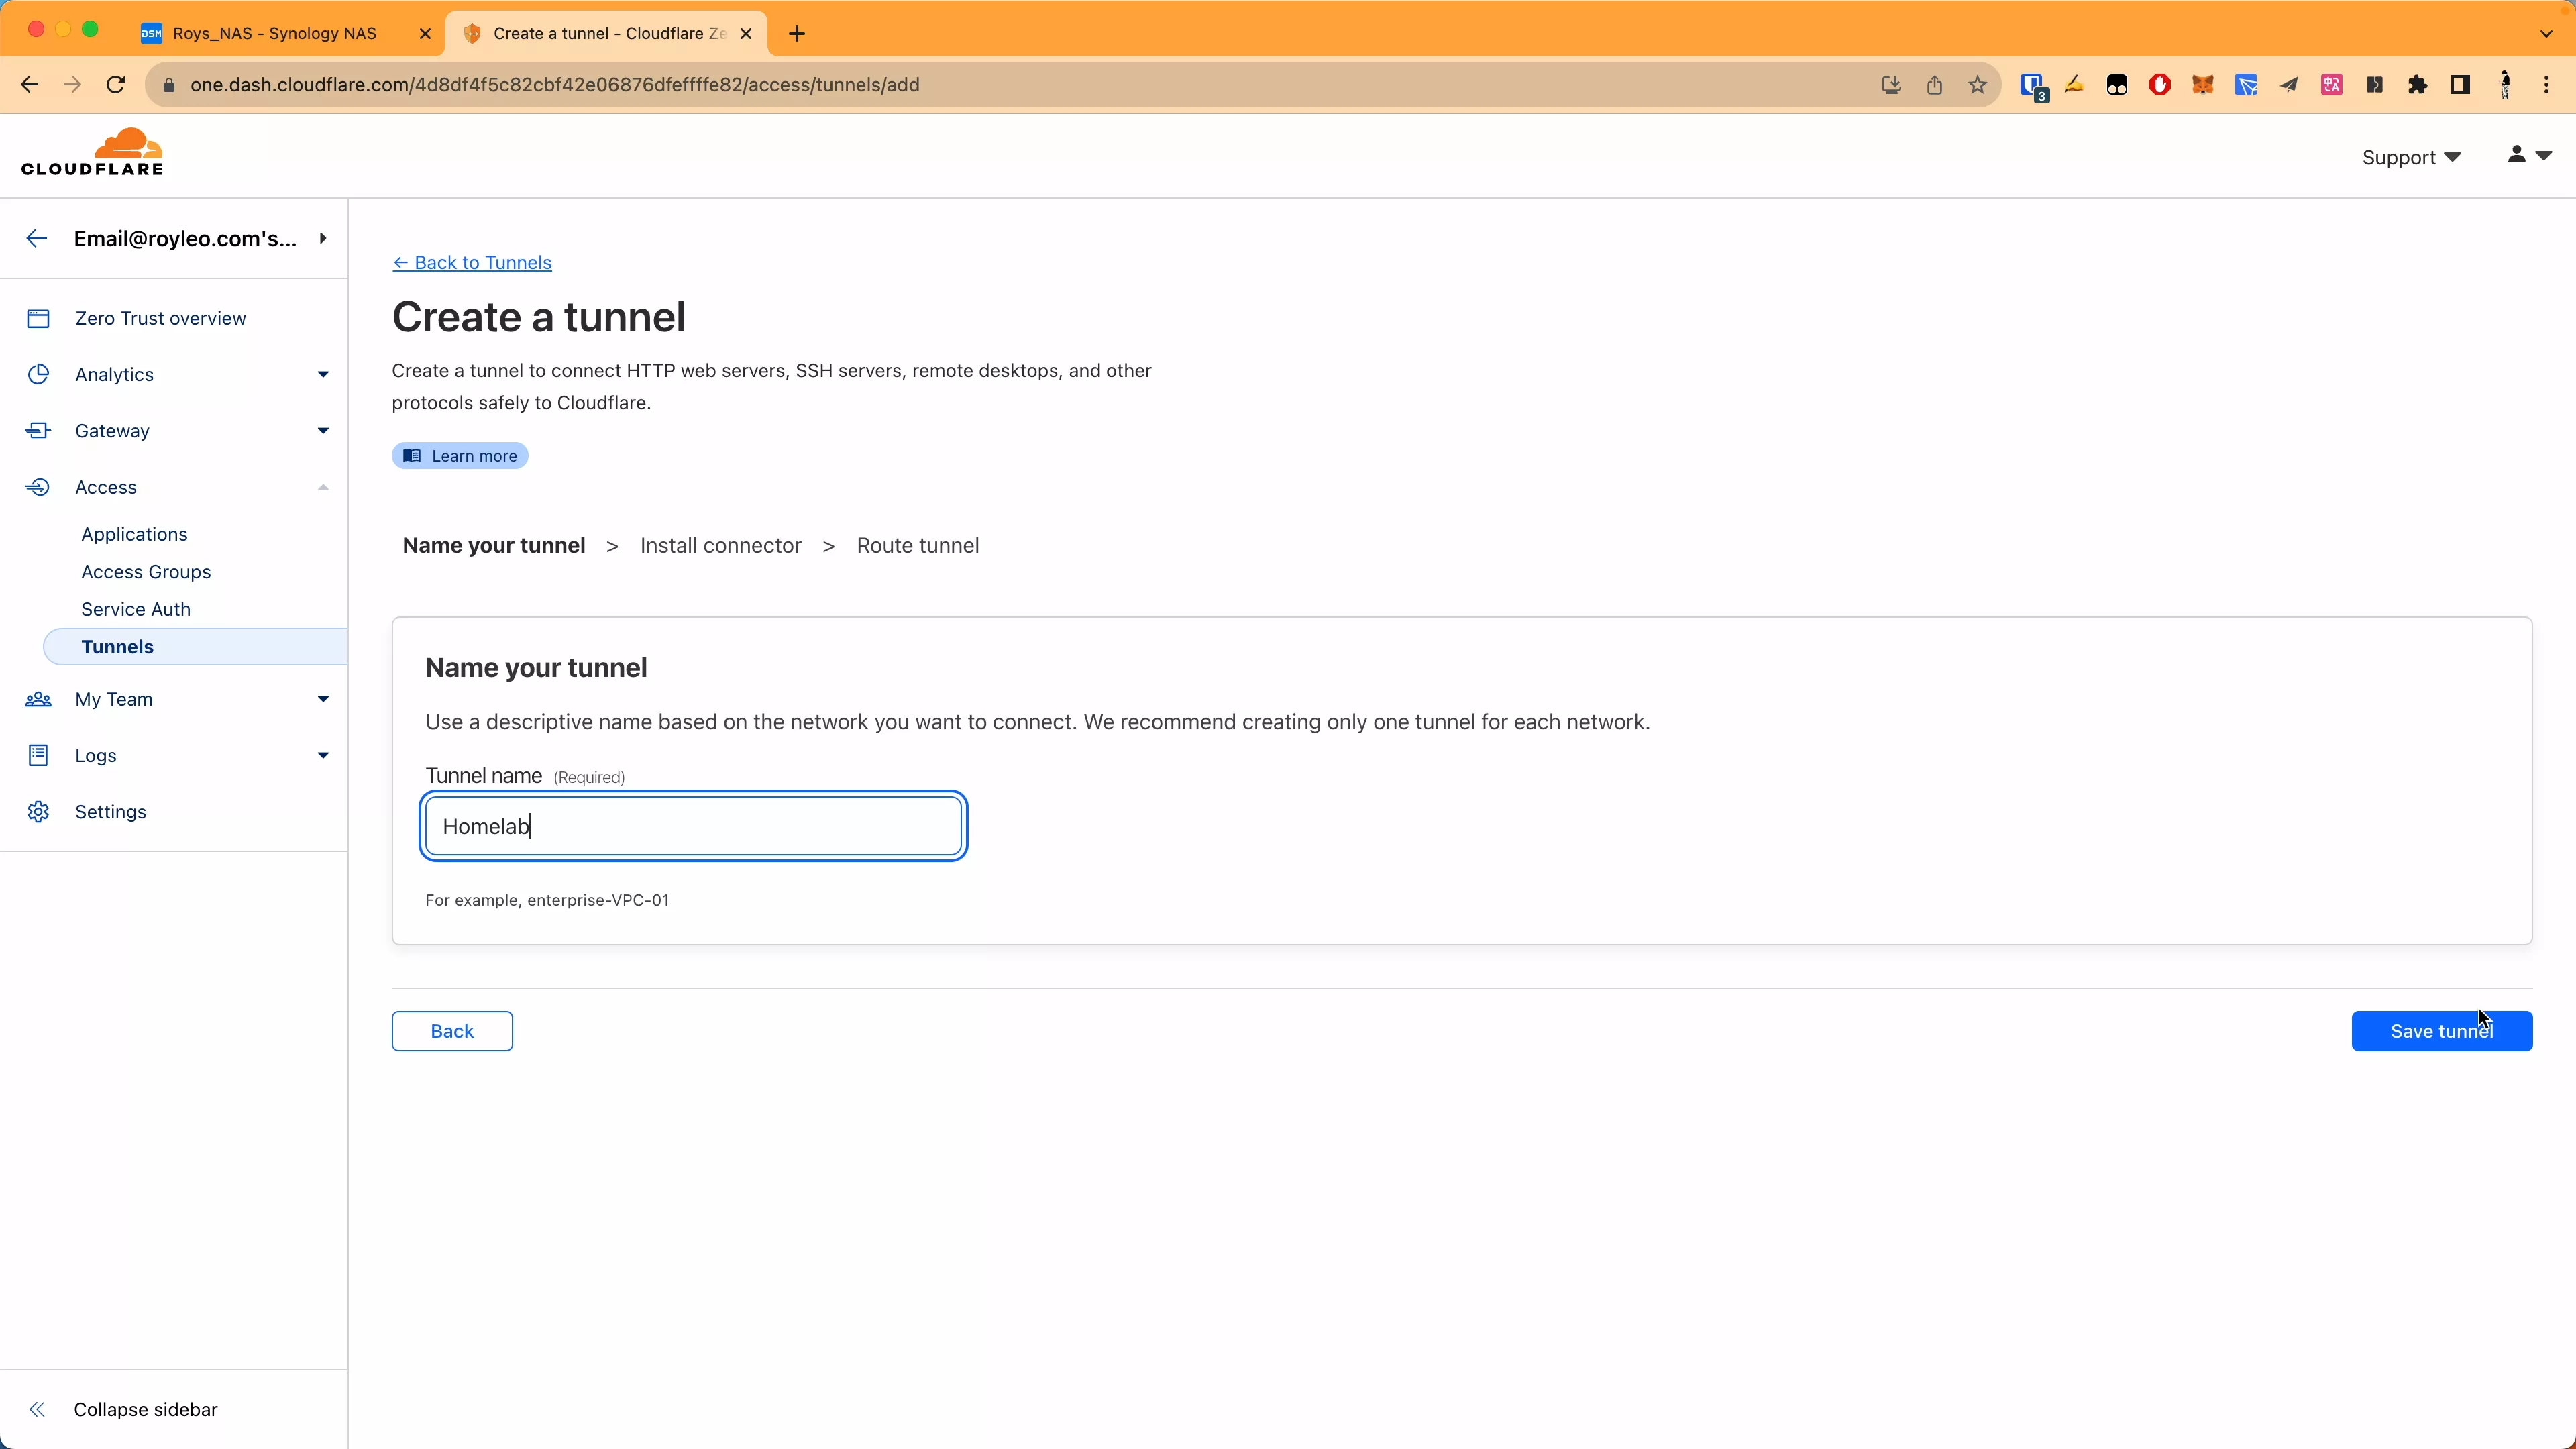
4. Activate CloudFlare Tunnel
If you bind a payment method, the actual CF will not deduct money.
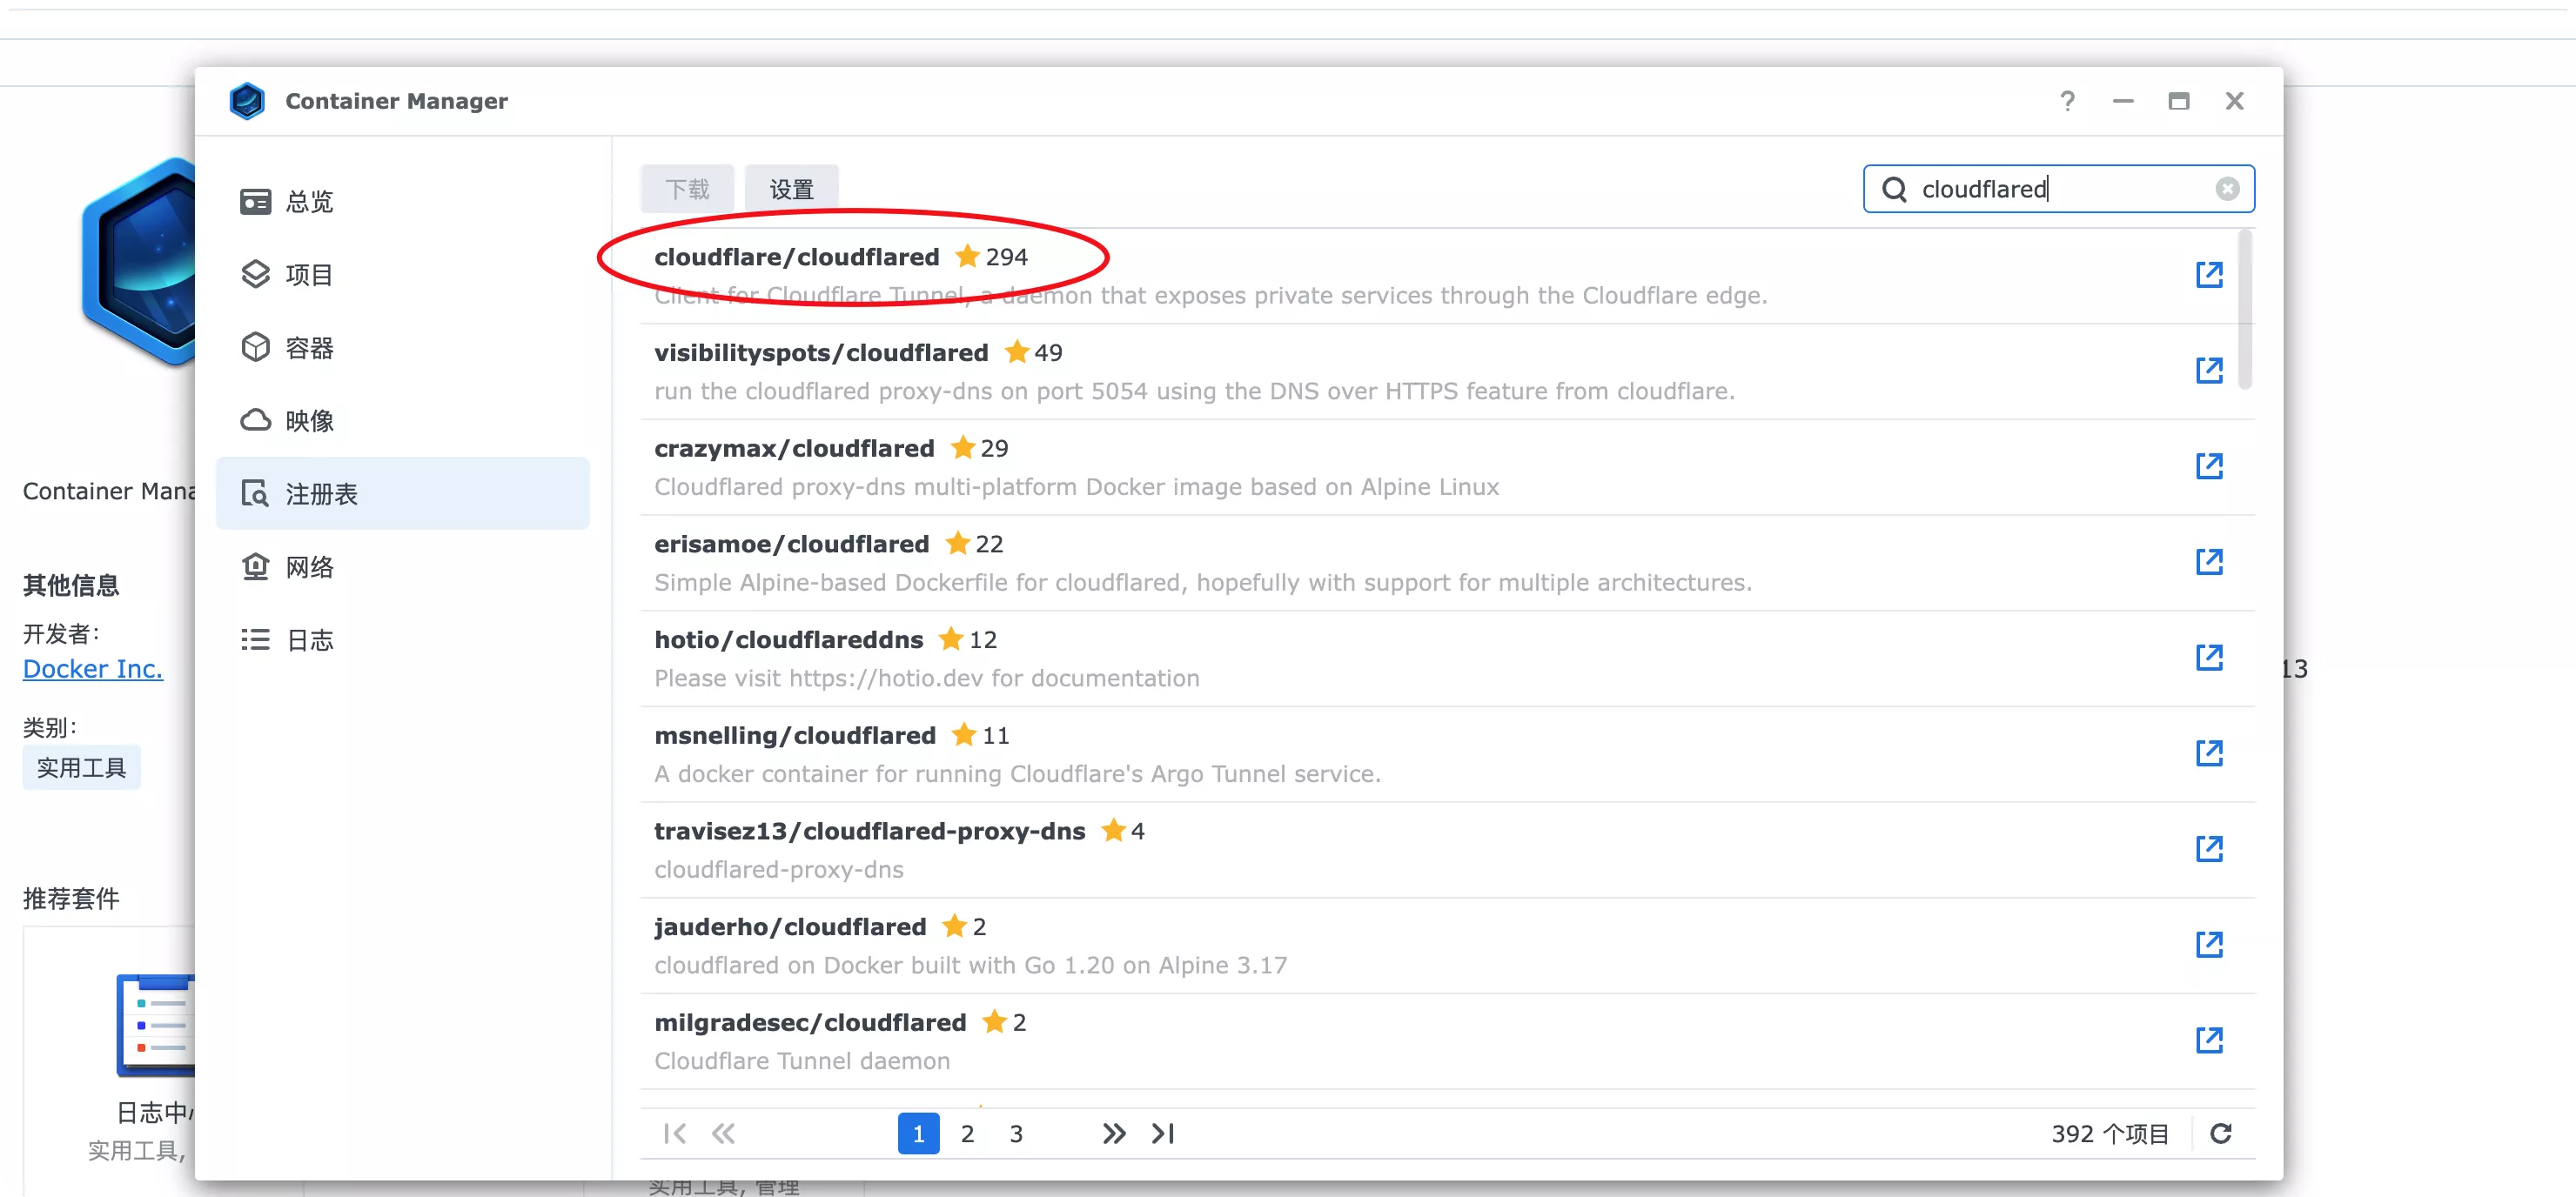
5. Synology configures Cloudflared
5.1 Install Cloudflared using the graphical interface
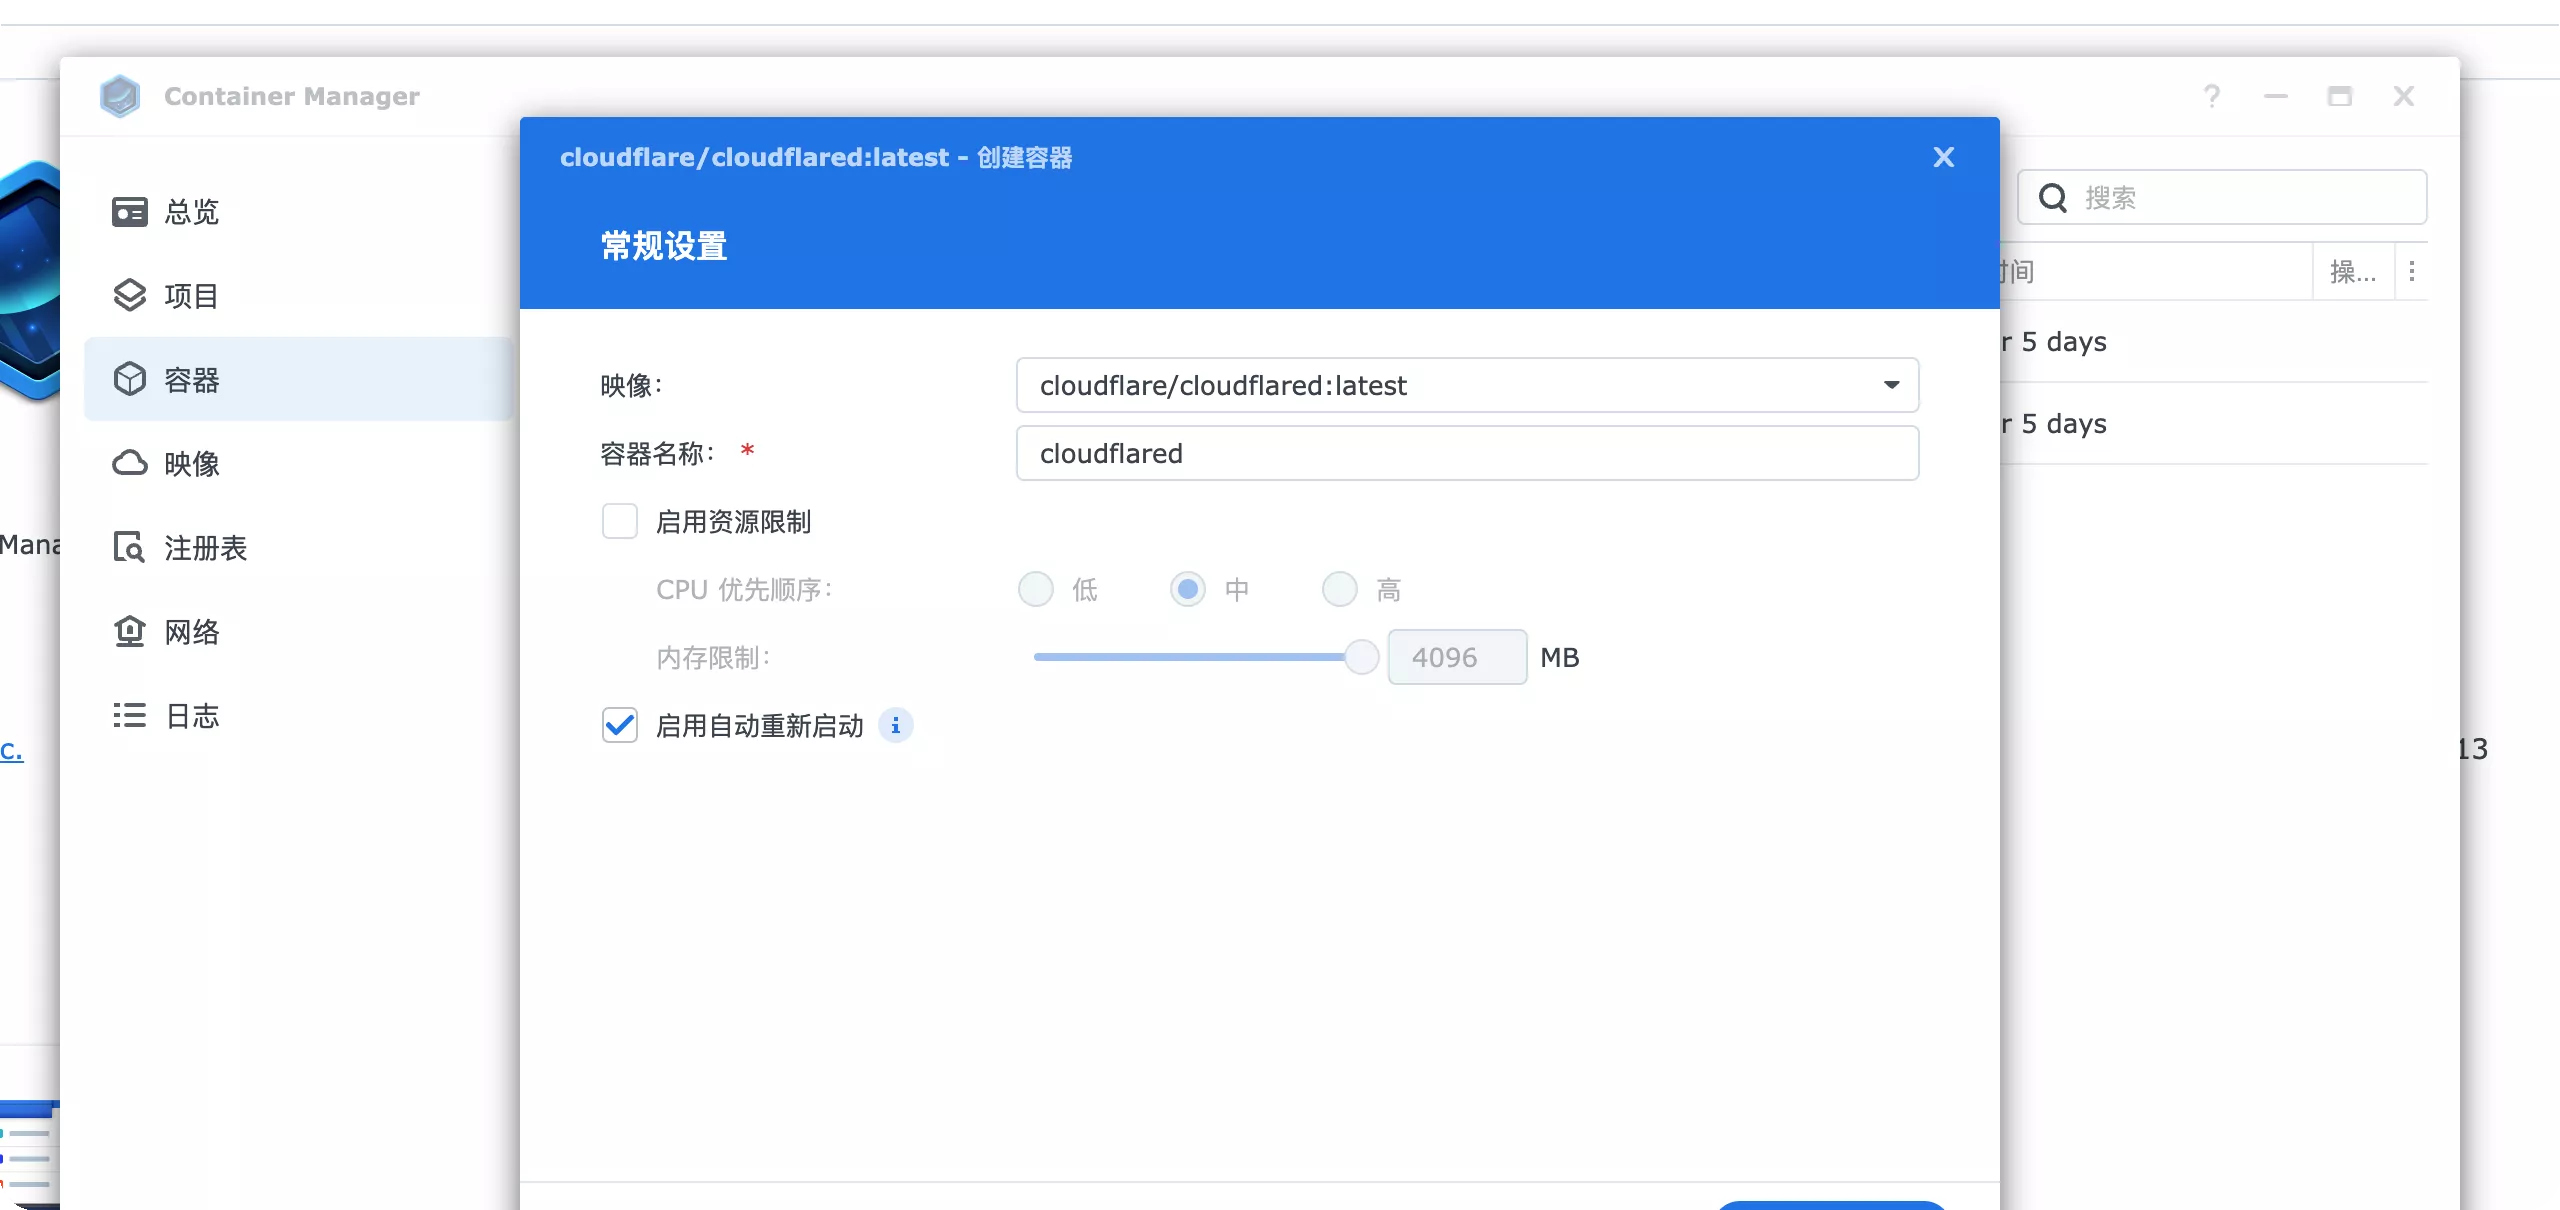
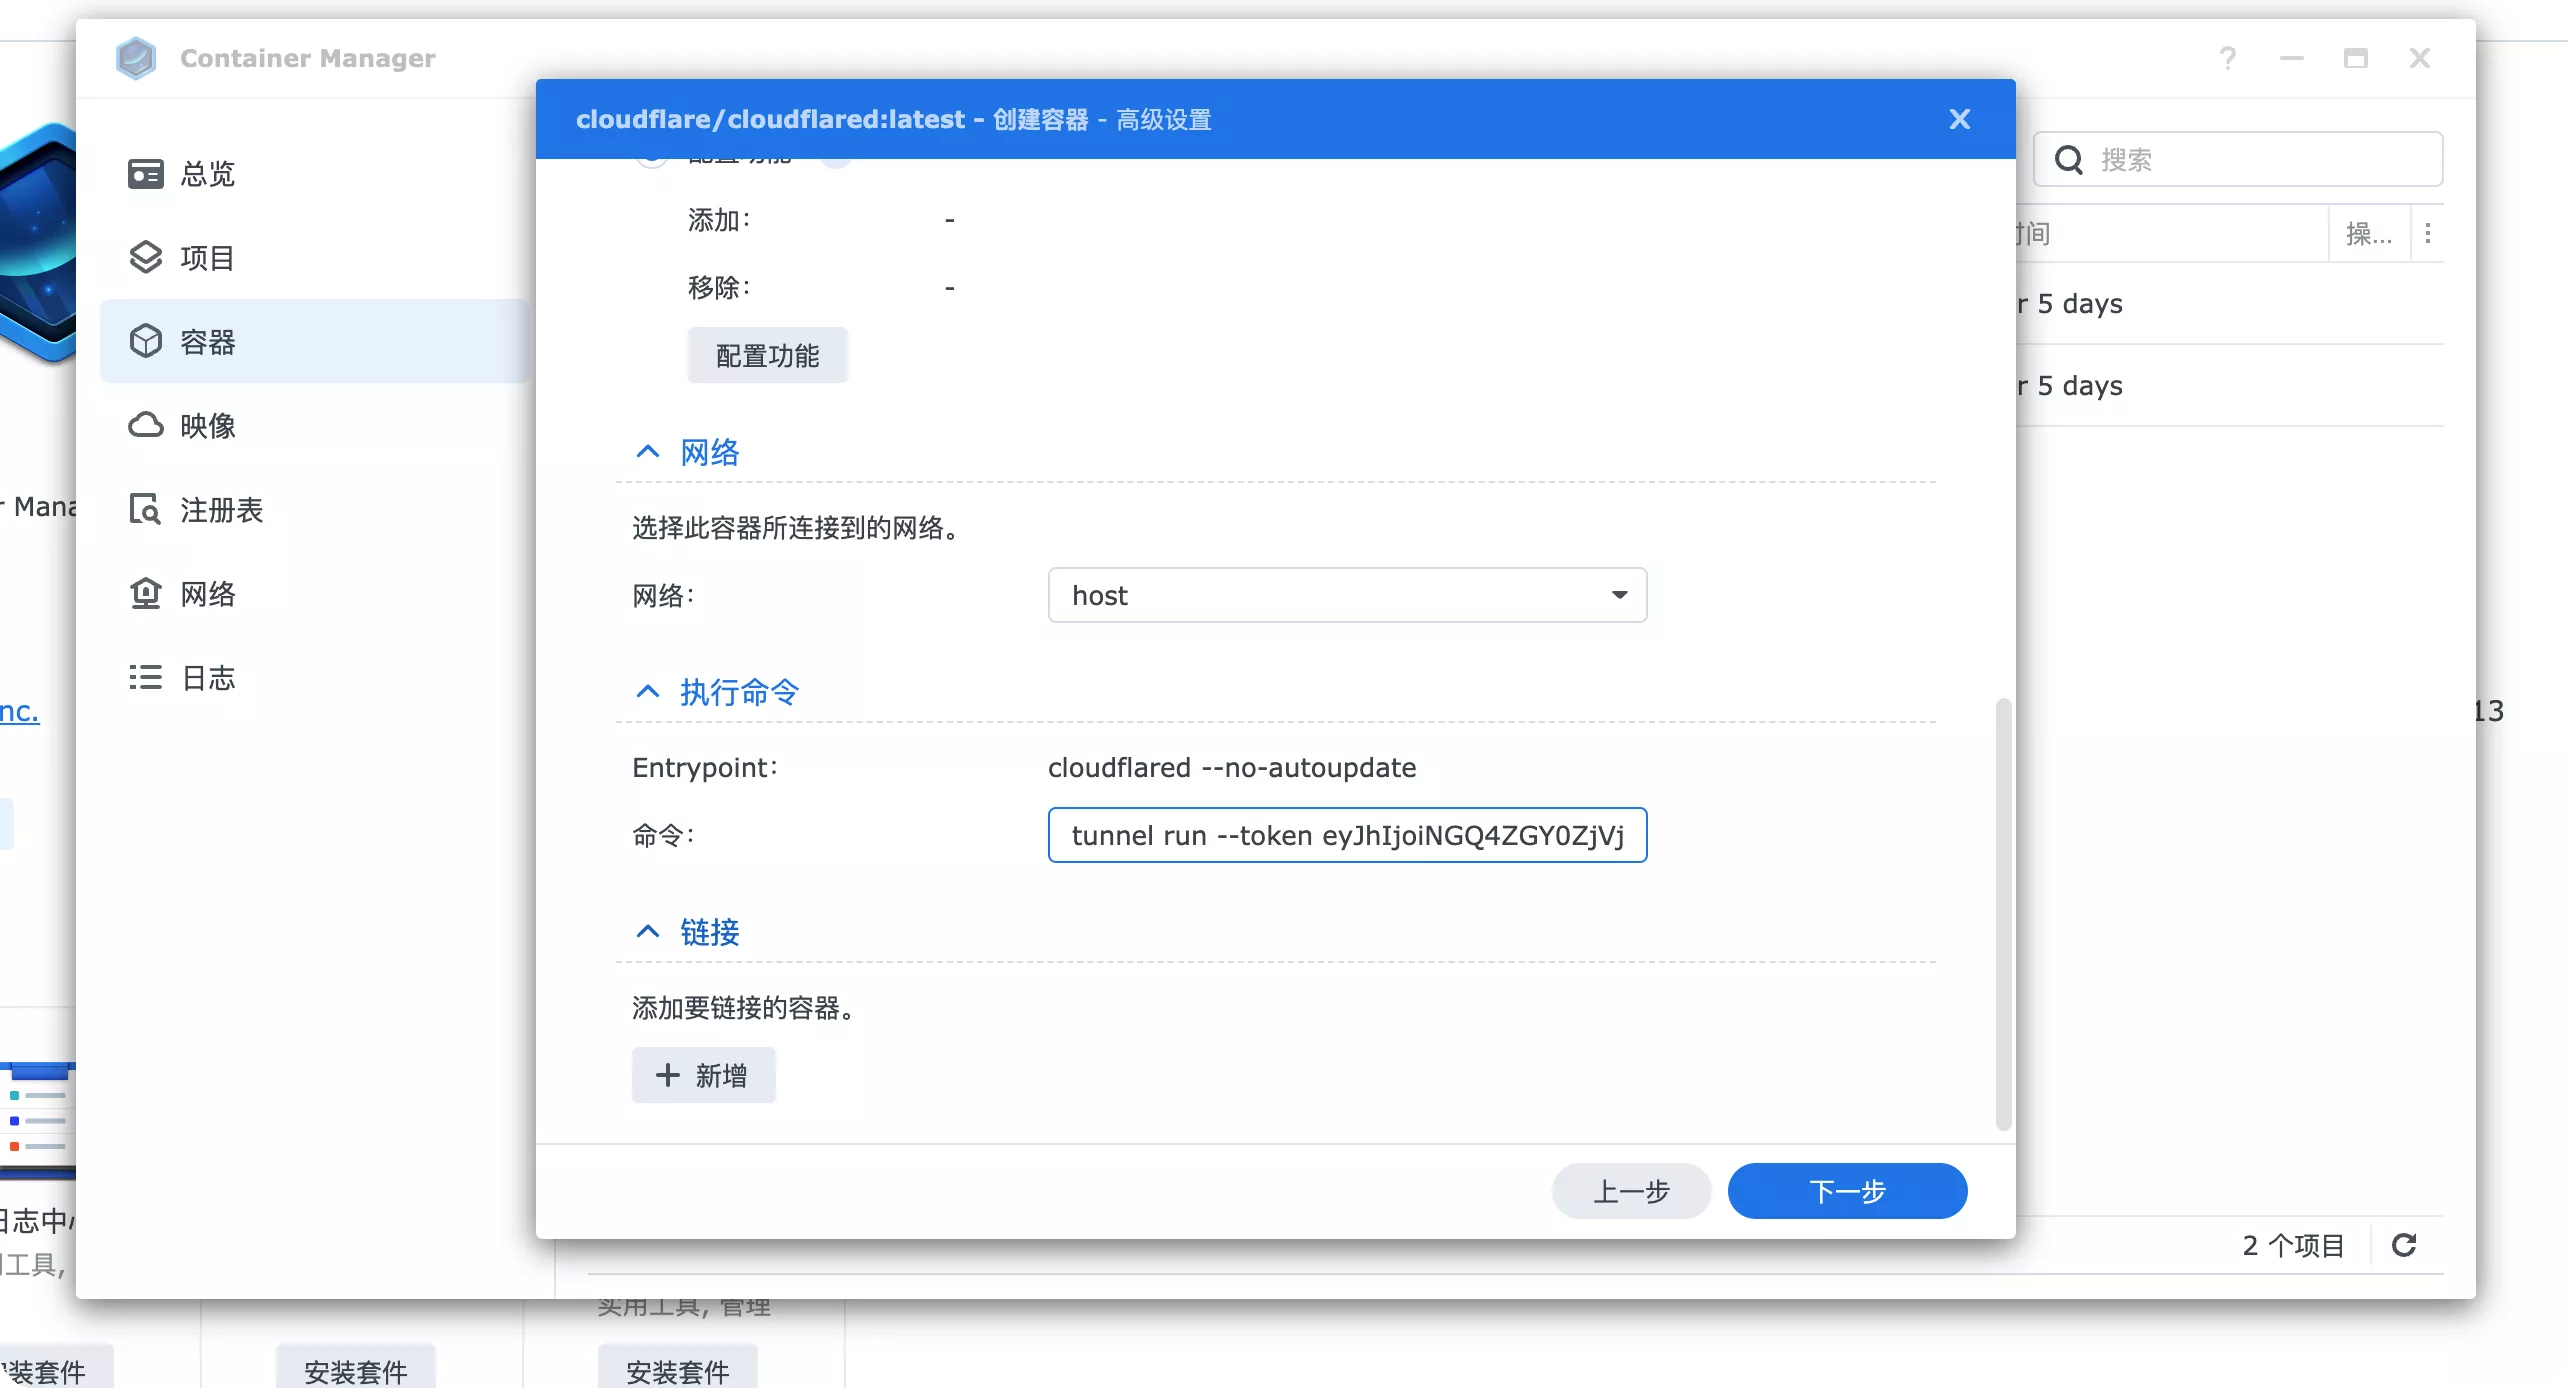
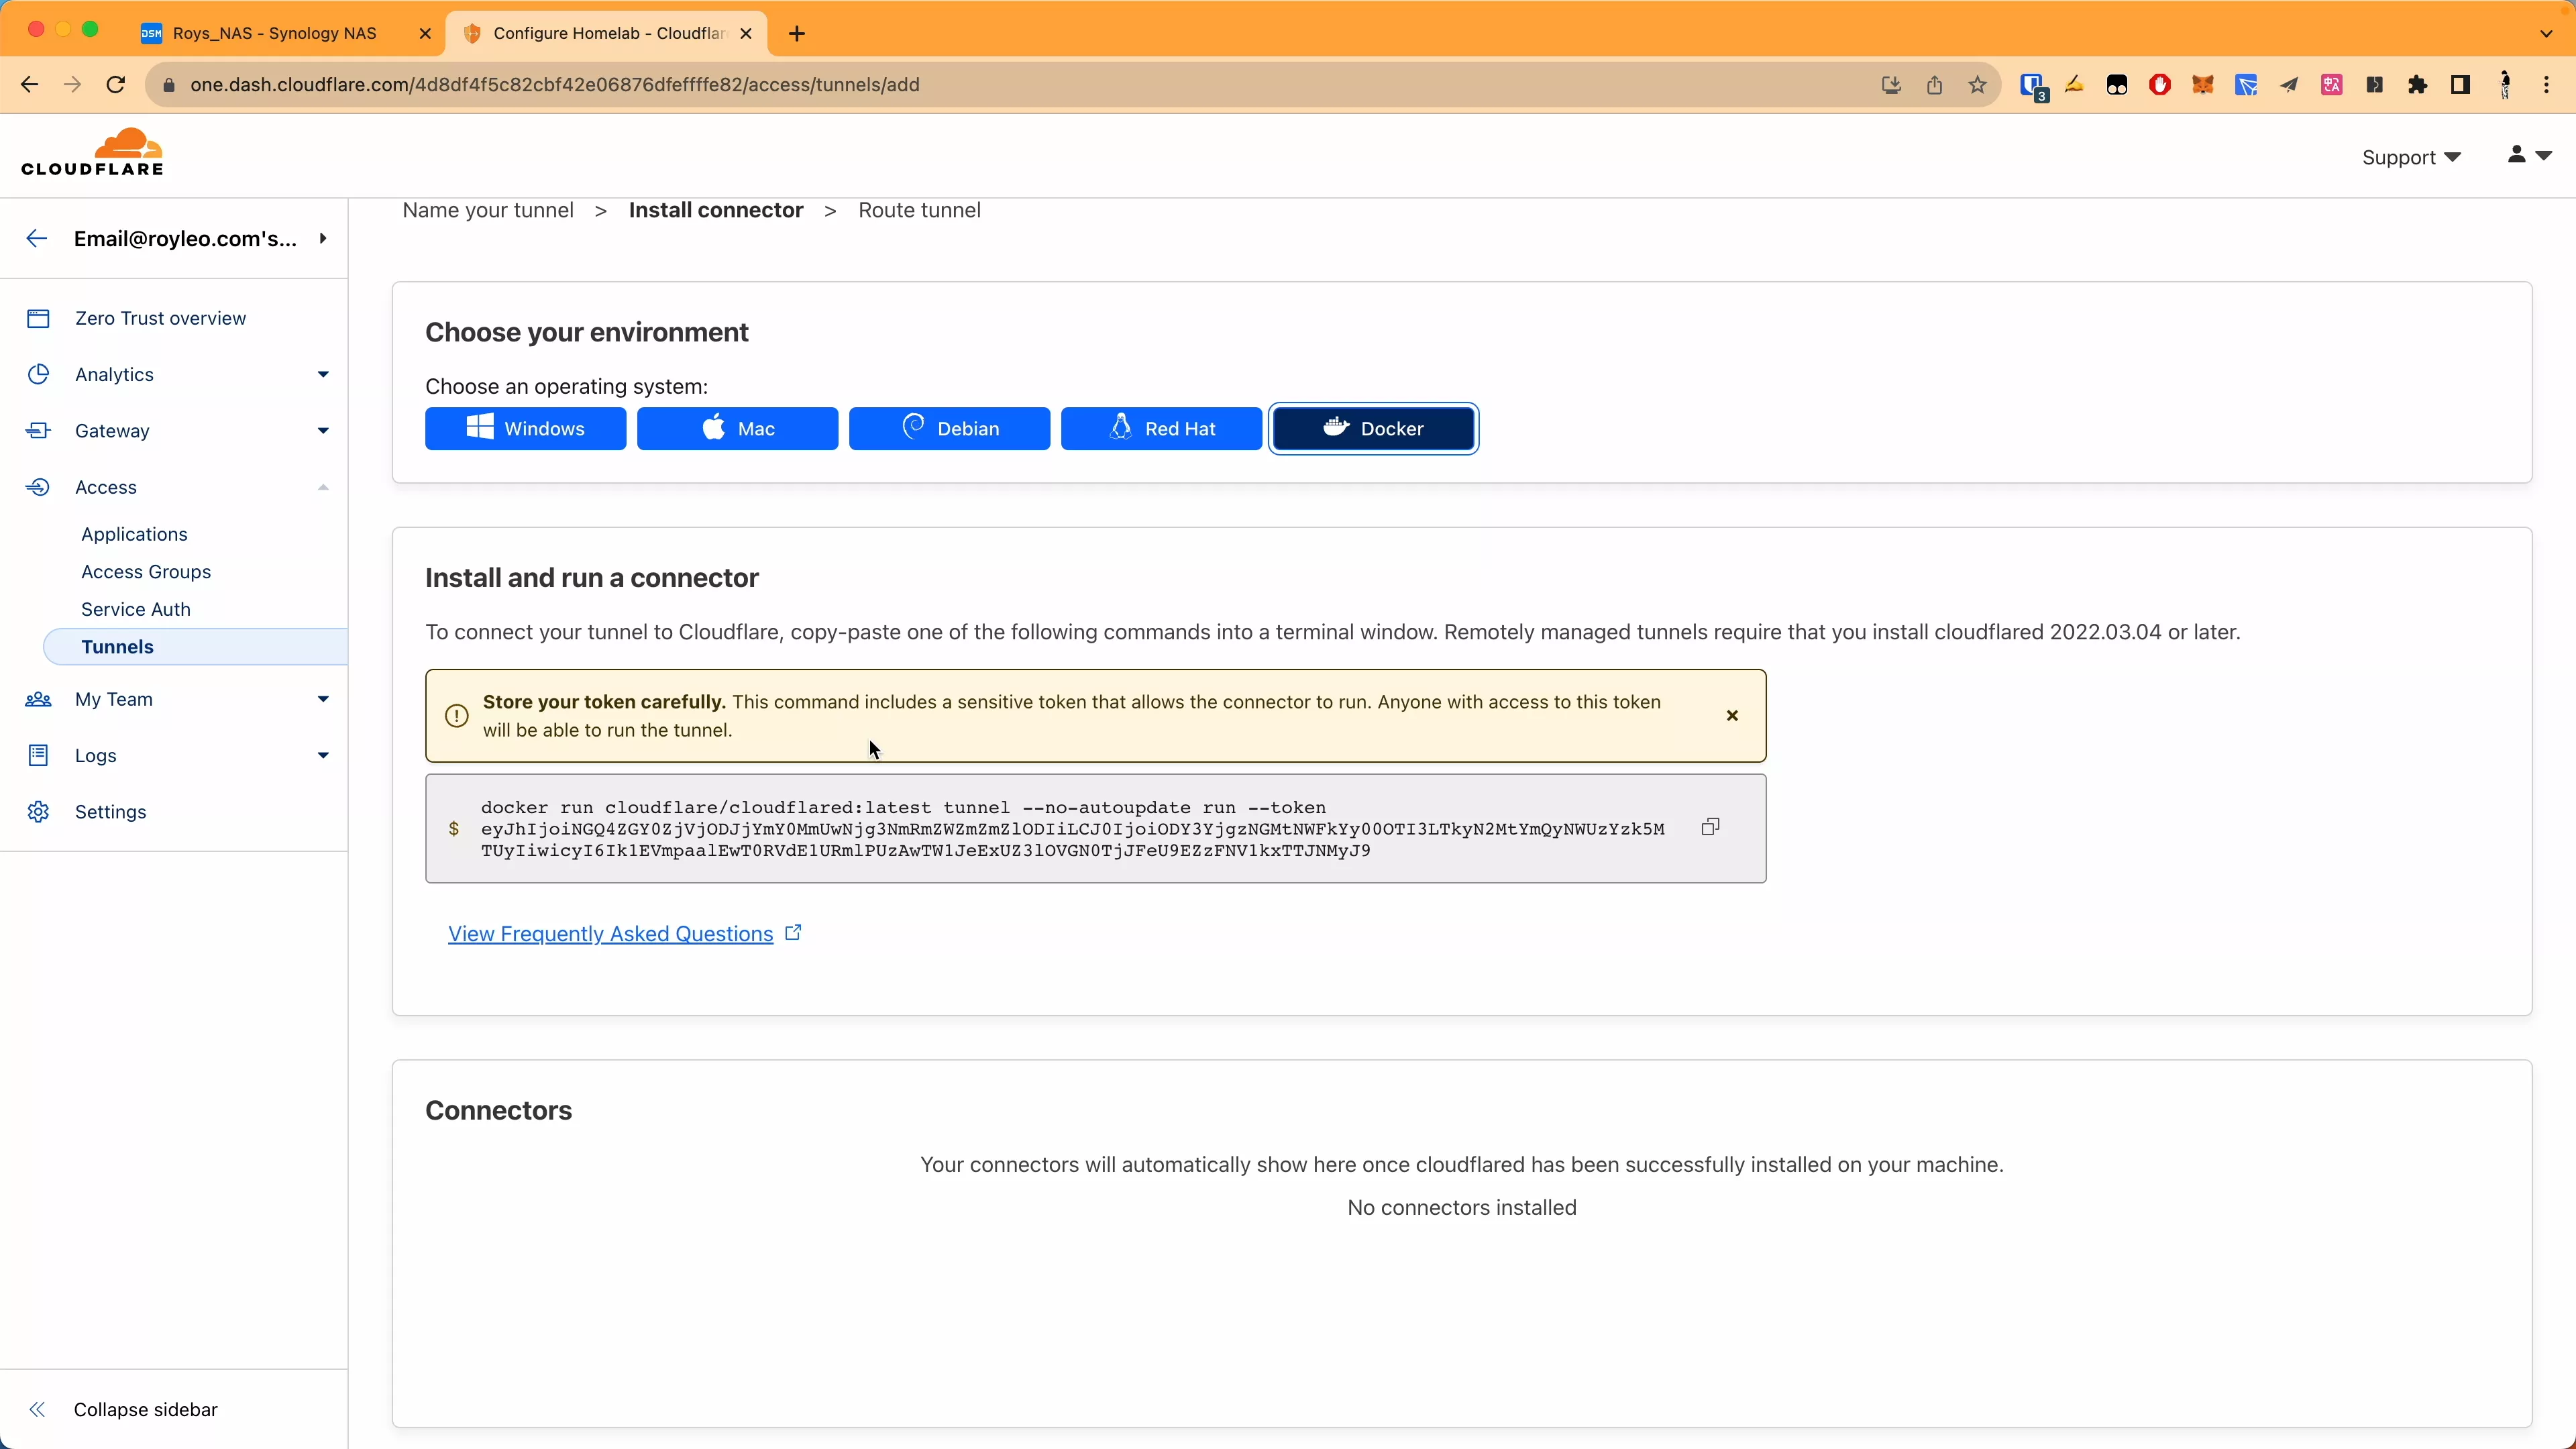
docker run -d --restart=always cloudflare/cloudflared:latest tunnel --no-autoupdate run --token eyJhIjoiNGQ4ZGY0ZjVjODJjYmY0MmUwNjg3NmRmZWZmZmZlODIieLCJ0IjoiODY3YjgzNGMtNWFkYy00O0TI3LTkyN2MtYmQyNWUz Yzk5MTUyIiwicyI6Ik1EVmpaalEwT0RVdE1URmlPUzAwTW1JeExUZ3wlOVGNr0TjJFeU9EZzFNV1kxTTJNMyJ9 |
Command filling: tunnel run --token eyJhIjoiNGQ4ZGY0ZjVjODJjYmY0MmUwNjg3NmRmZWZmZmZlODIieLCJ0IjoiODY3YjgzNGMtNWFkYy00O0TI3LTkyN2MtYmQyNWUzYzk5MTUyIiwicyI6Ik1EVmpaalEwT0RVdE1URmlPUzAwTW1JeExUZ3wlOVGNr0TjJFeU9EZzFNV1kxTTJNMyJ9 is enough.
5.2 Install Cloudflared using the command line (recommended)
5.2.1 Open SSH
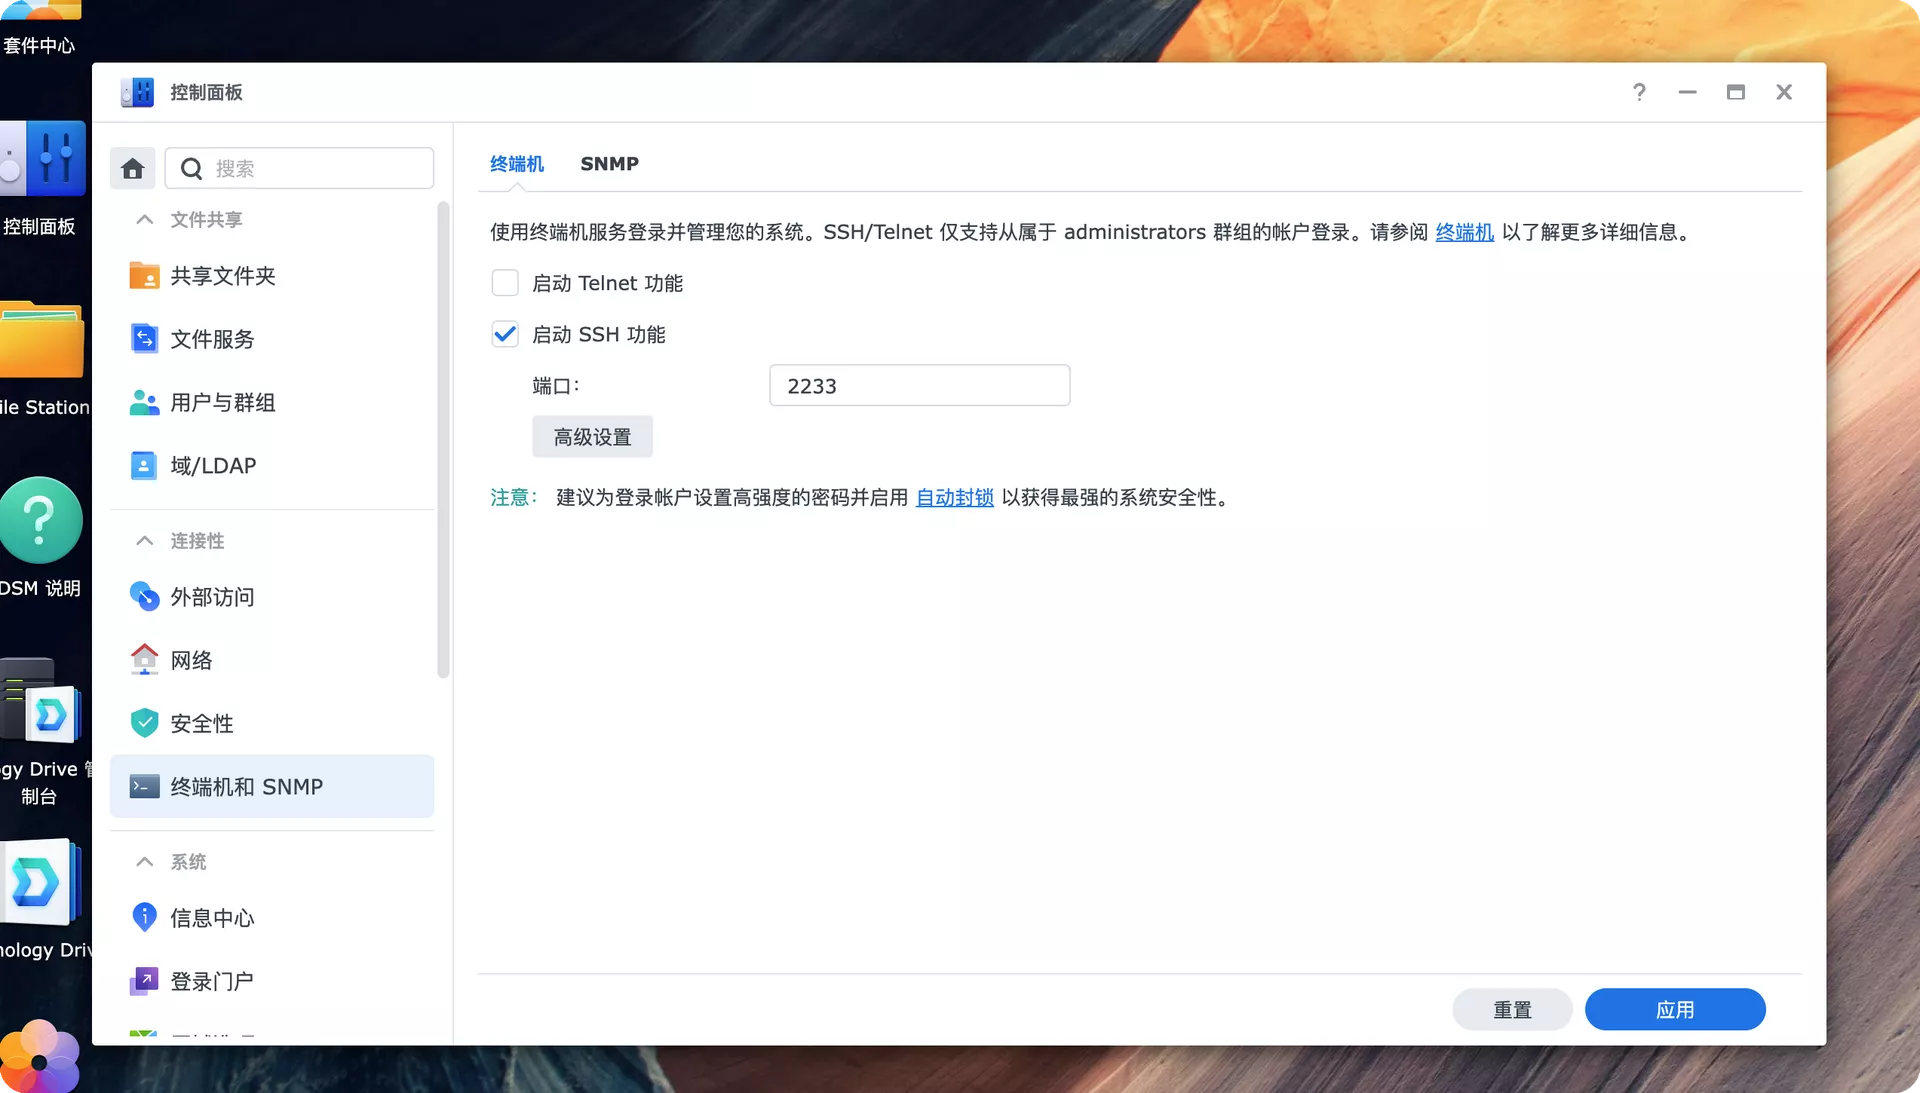
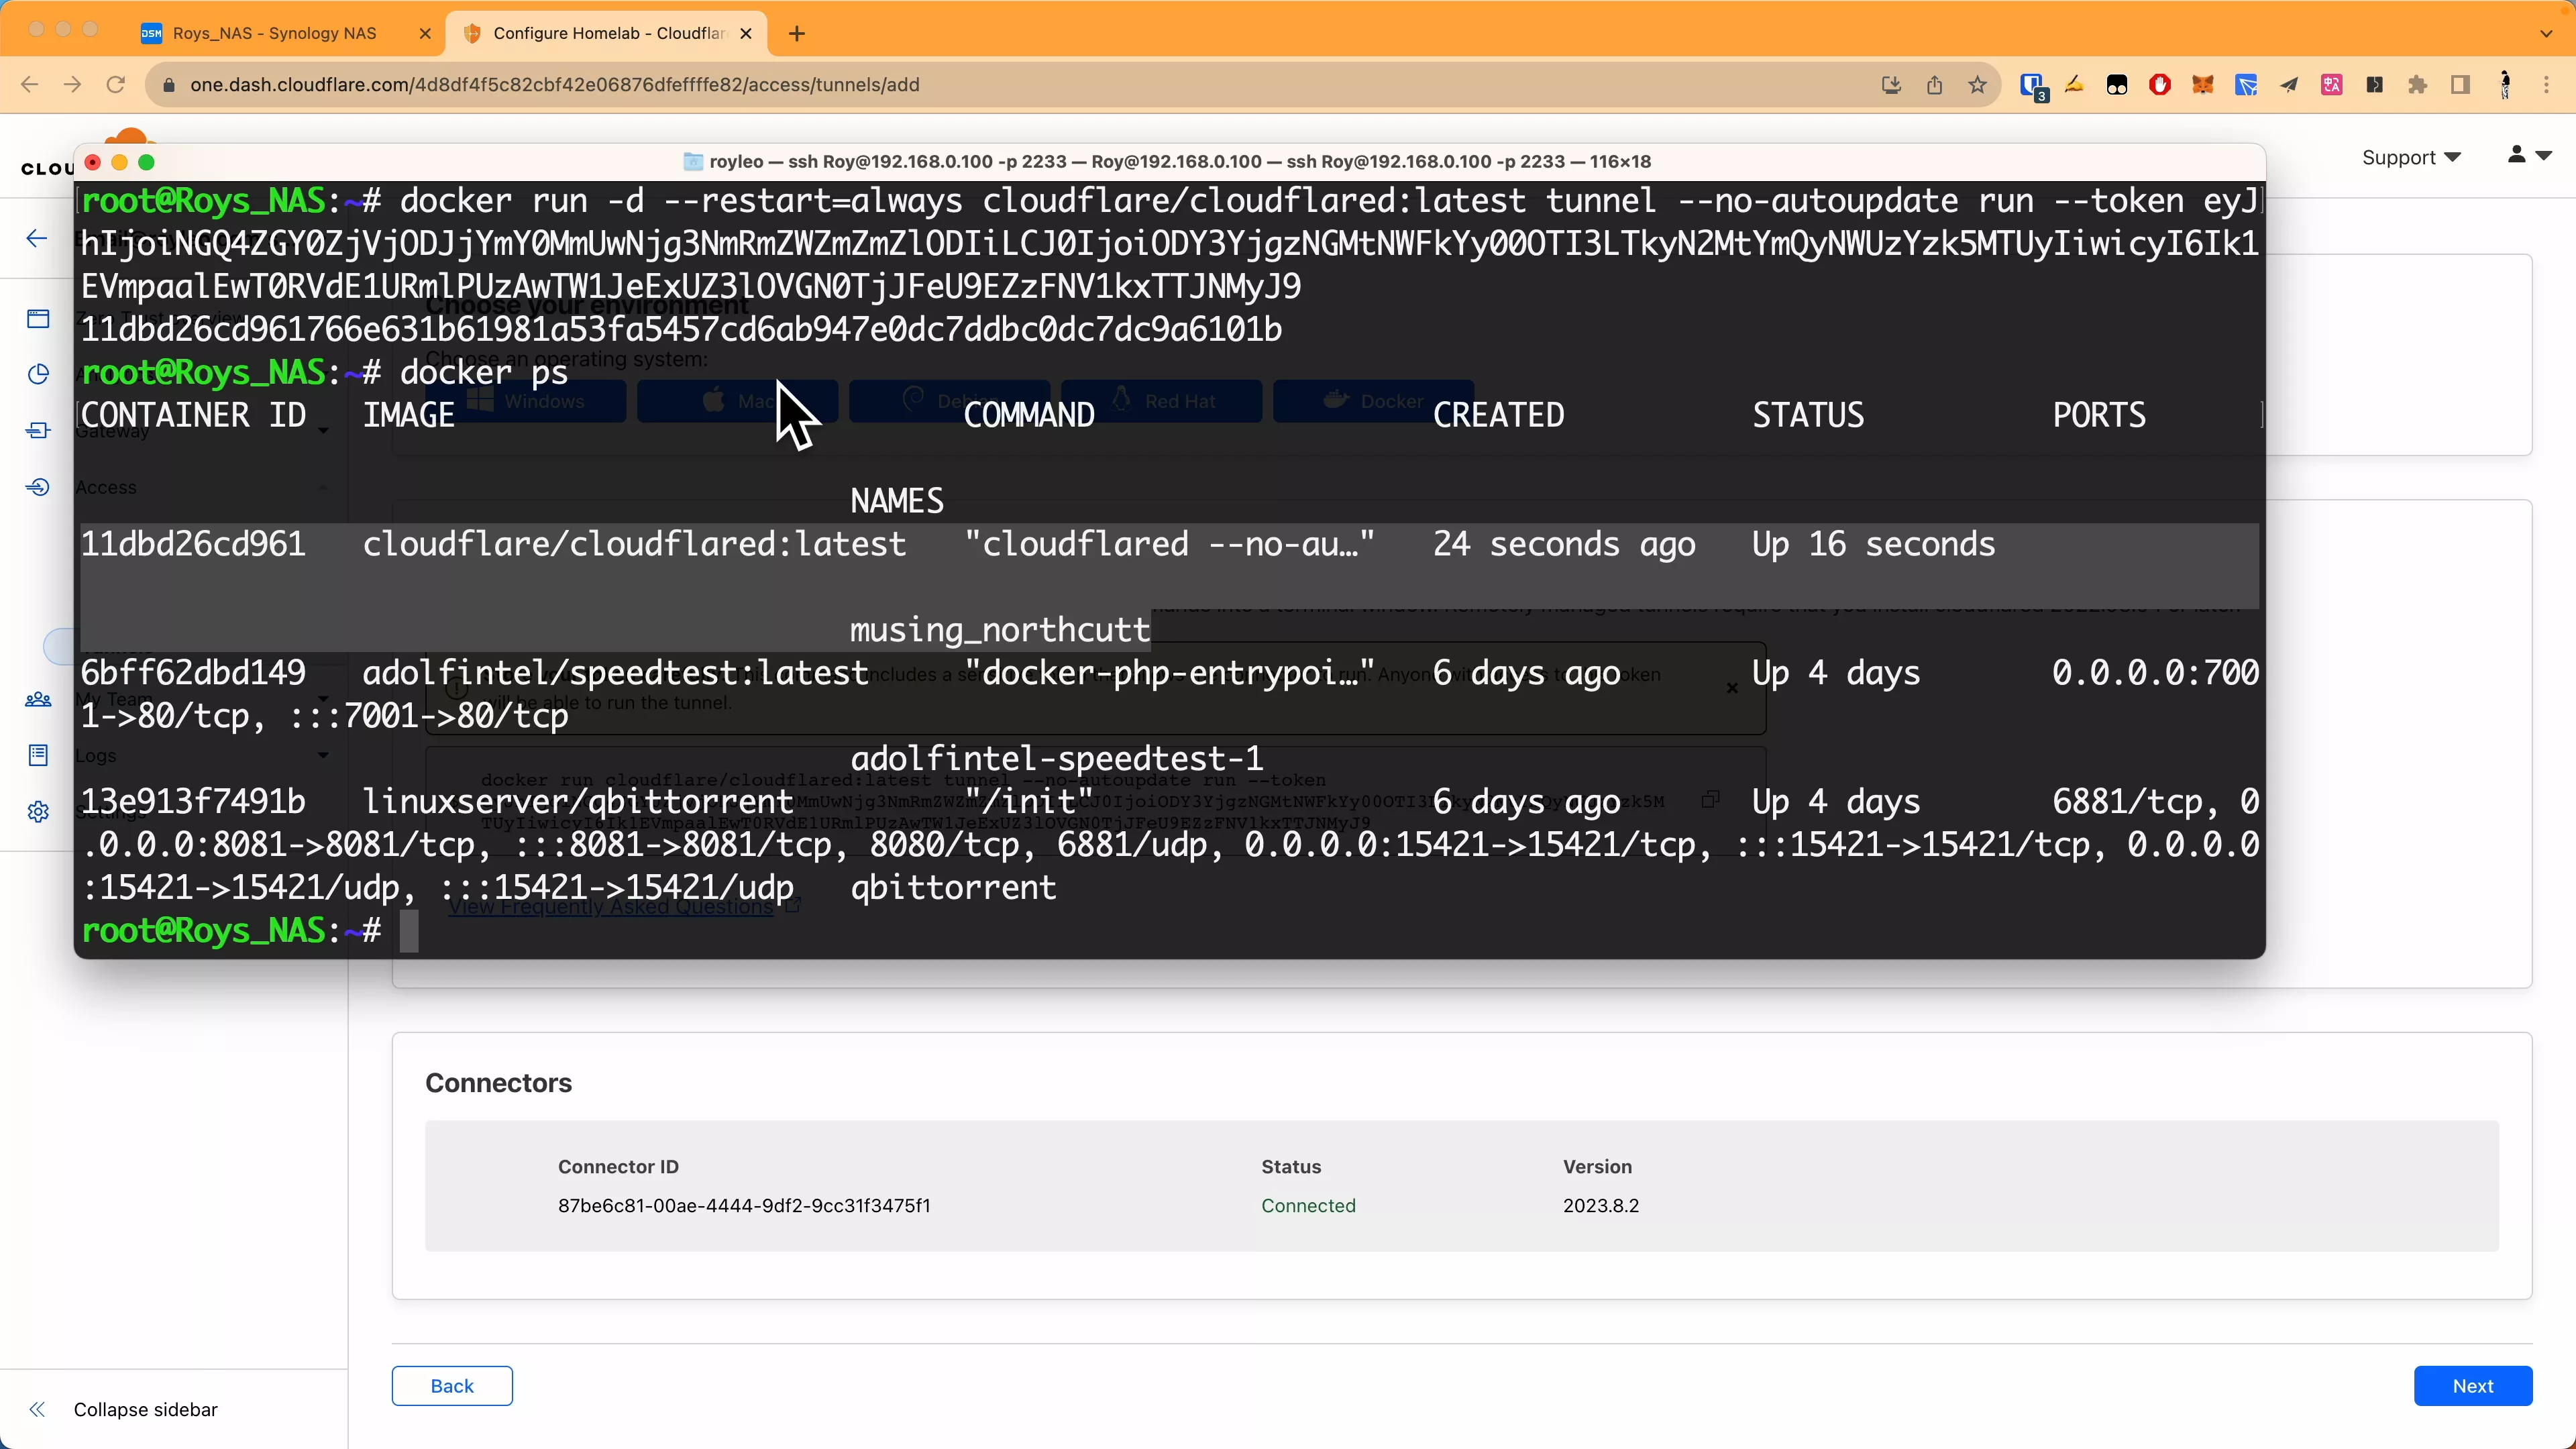
5.2.2 Operation
docker run -d --restart=always cloudflare/cloudflared:latest tunnel --no-autoupdate run --token eyJhIjoiNGQ4ZGY0ZjVjODJjYmY0MmUwNjg3NmRmZWZmZmZlODIieLCJ0IjoiODY3YjgzNGMtNWFkYy00O0TI3LTkyN2MtYmQyNWUz Yzk5MTUyIiwicyI6Ik1EVmpaalEwT0RVdE1URmlPUzAwTW1JeExUZ3wlOVGNr0TjJFeU9EZzFNV1kxTTJNMyJ9 |
The complete explanation of this command is as follows:
-
docker run: This is the command used to start a new container. -
-d: This option tells Docker to run the container in the background and return the container ID. -
--restart=always: As mentioned above, this will set the container’s restart policy to always restart. -
cloudflare/cloudflared:latest: This is the Docker image you want to run. Specifically, you are running the latest version of Cloudflare’scloudflaredimage. -
tunnel --no-autoupdate run --token eyJhI...J9: These are the parameters passed to thecloudflaredimage to configure and run your tunnel.
This command will start a new cloudflared container that will always run in the background and automatically restart after being stopped.
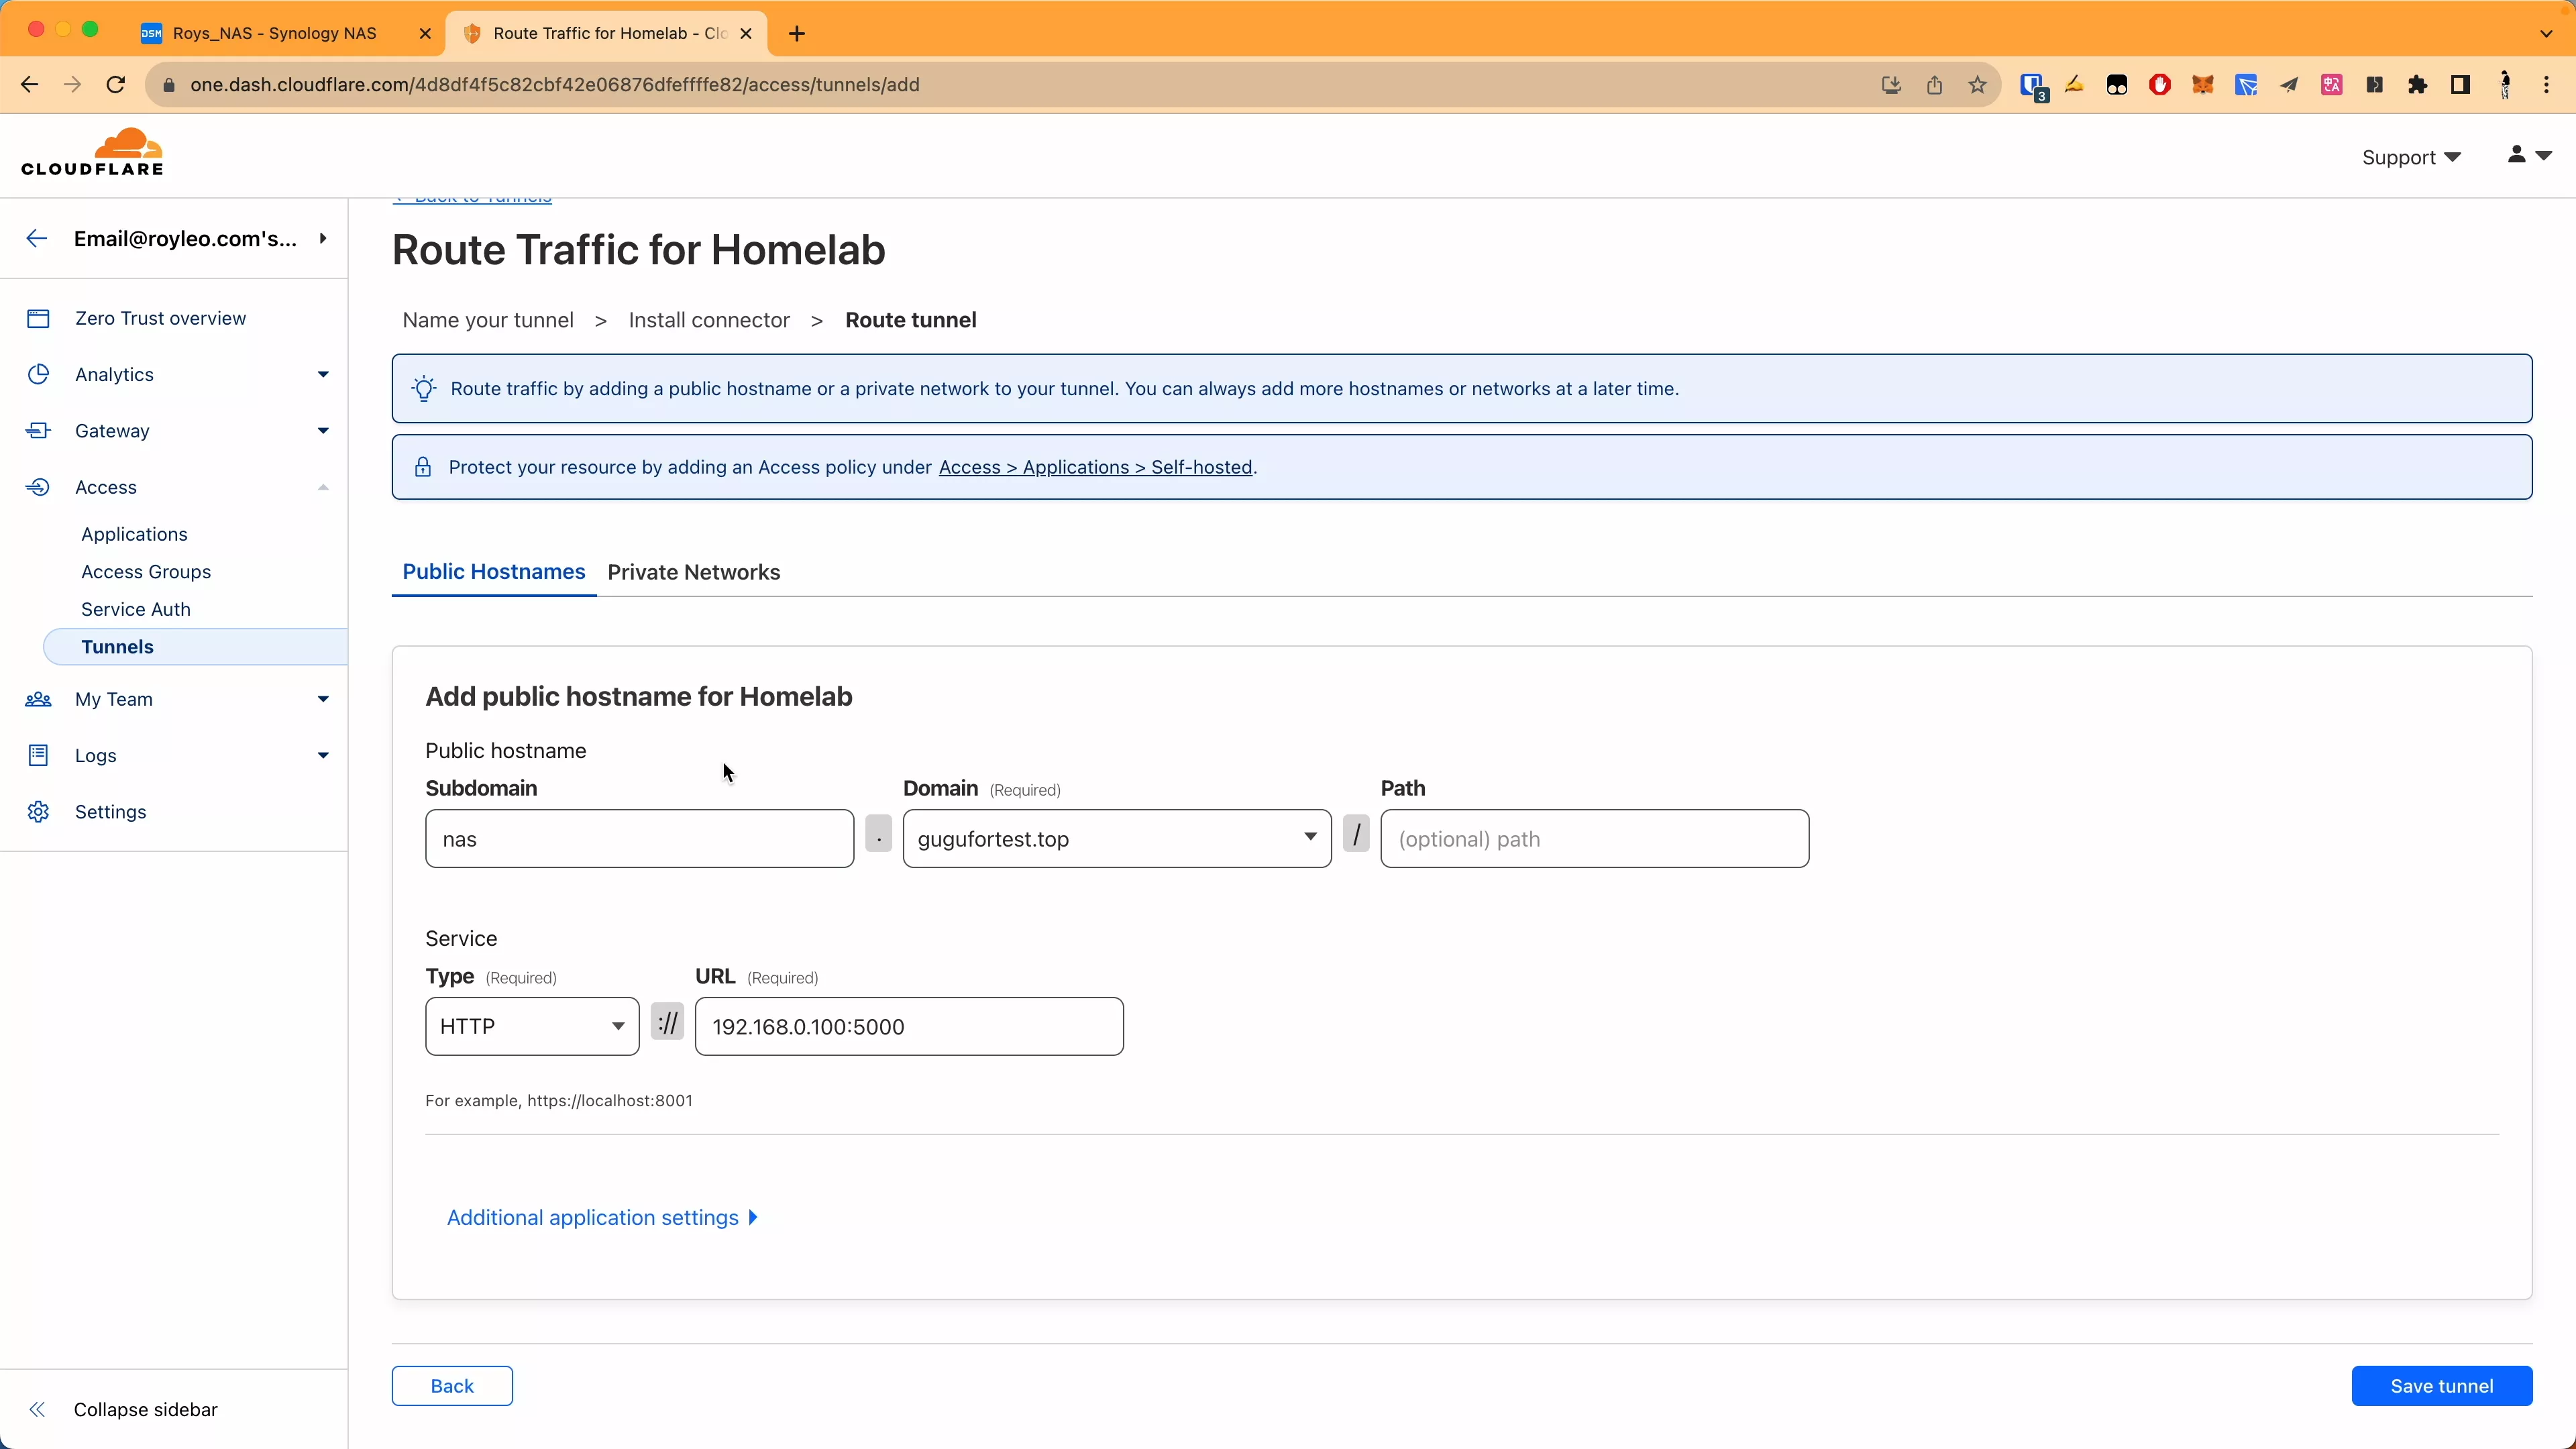
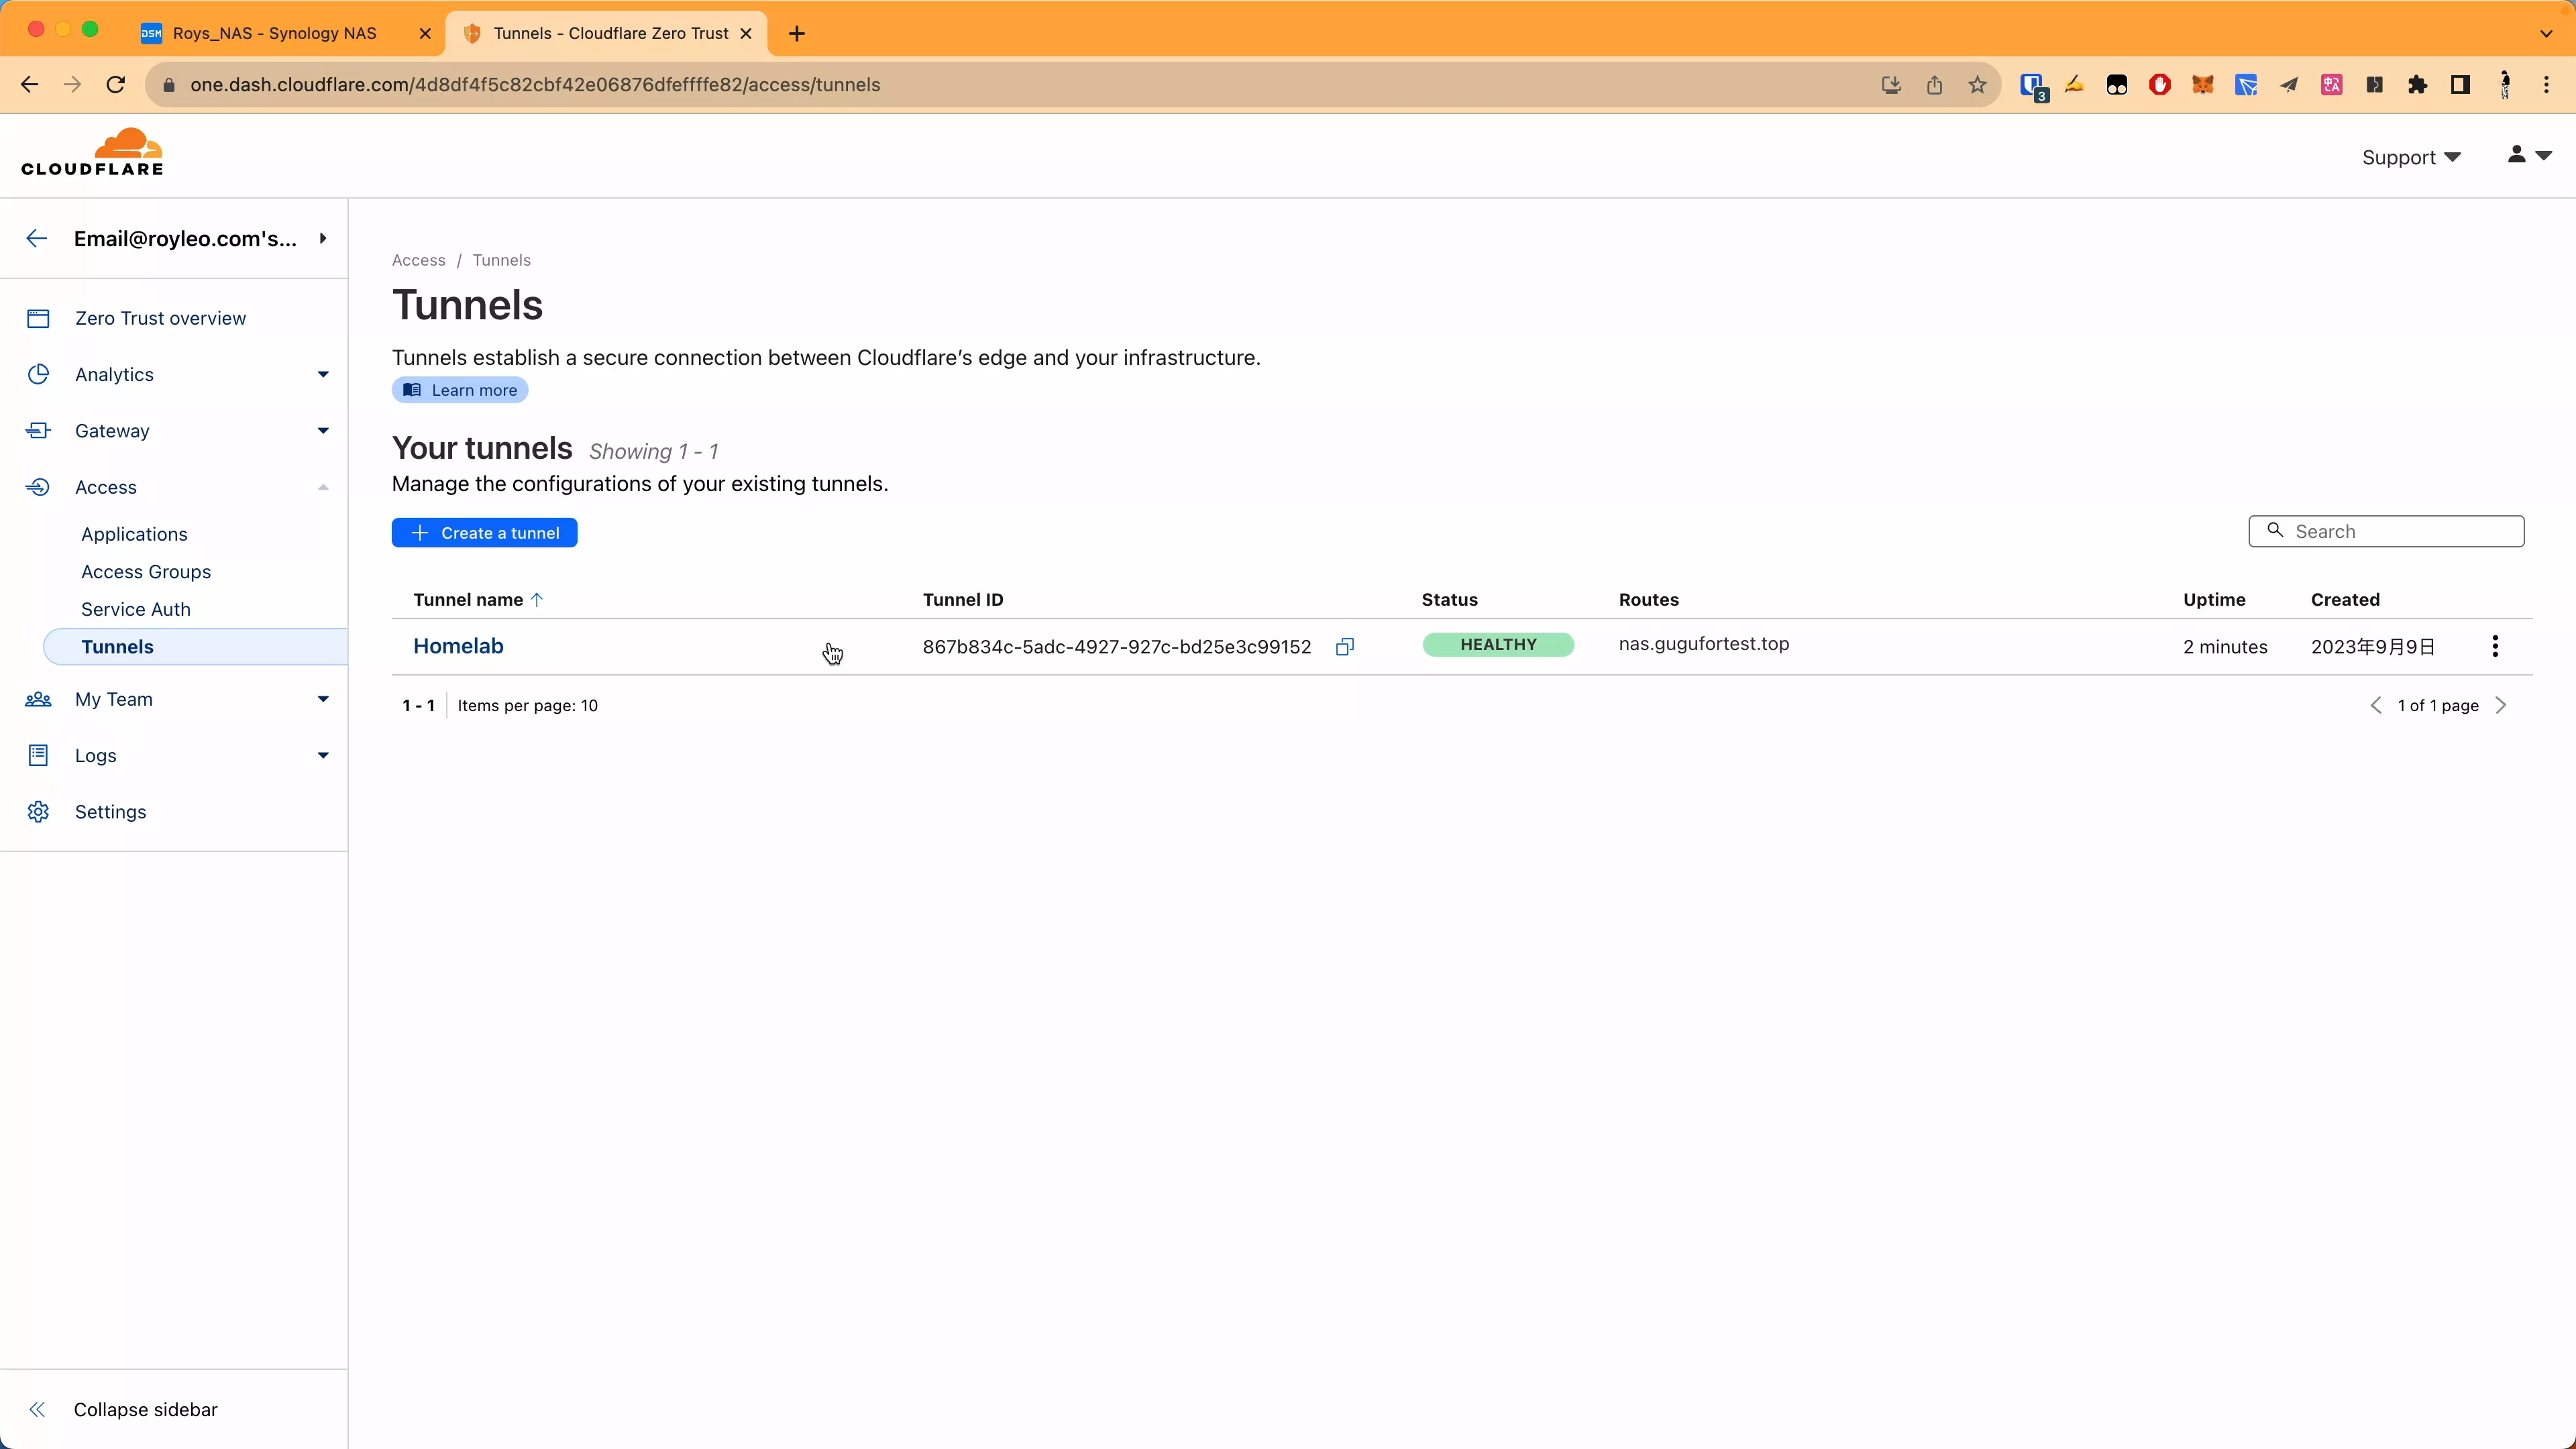
6. CF background configuration
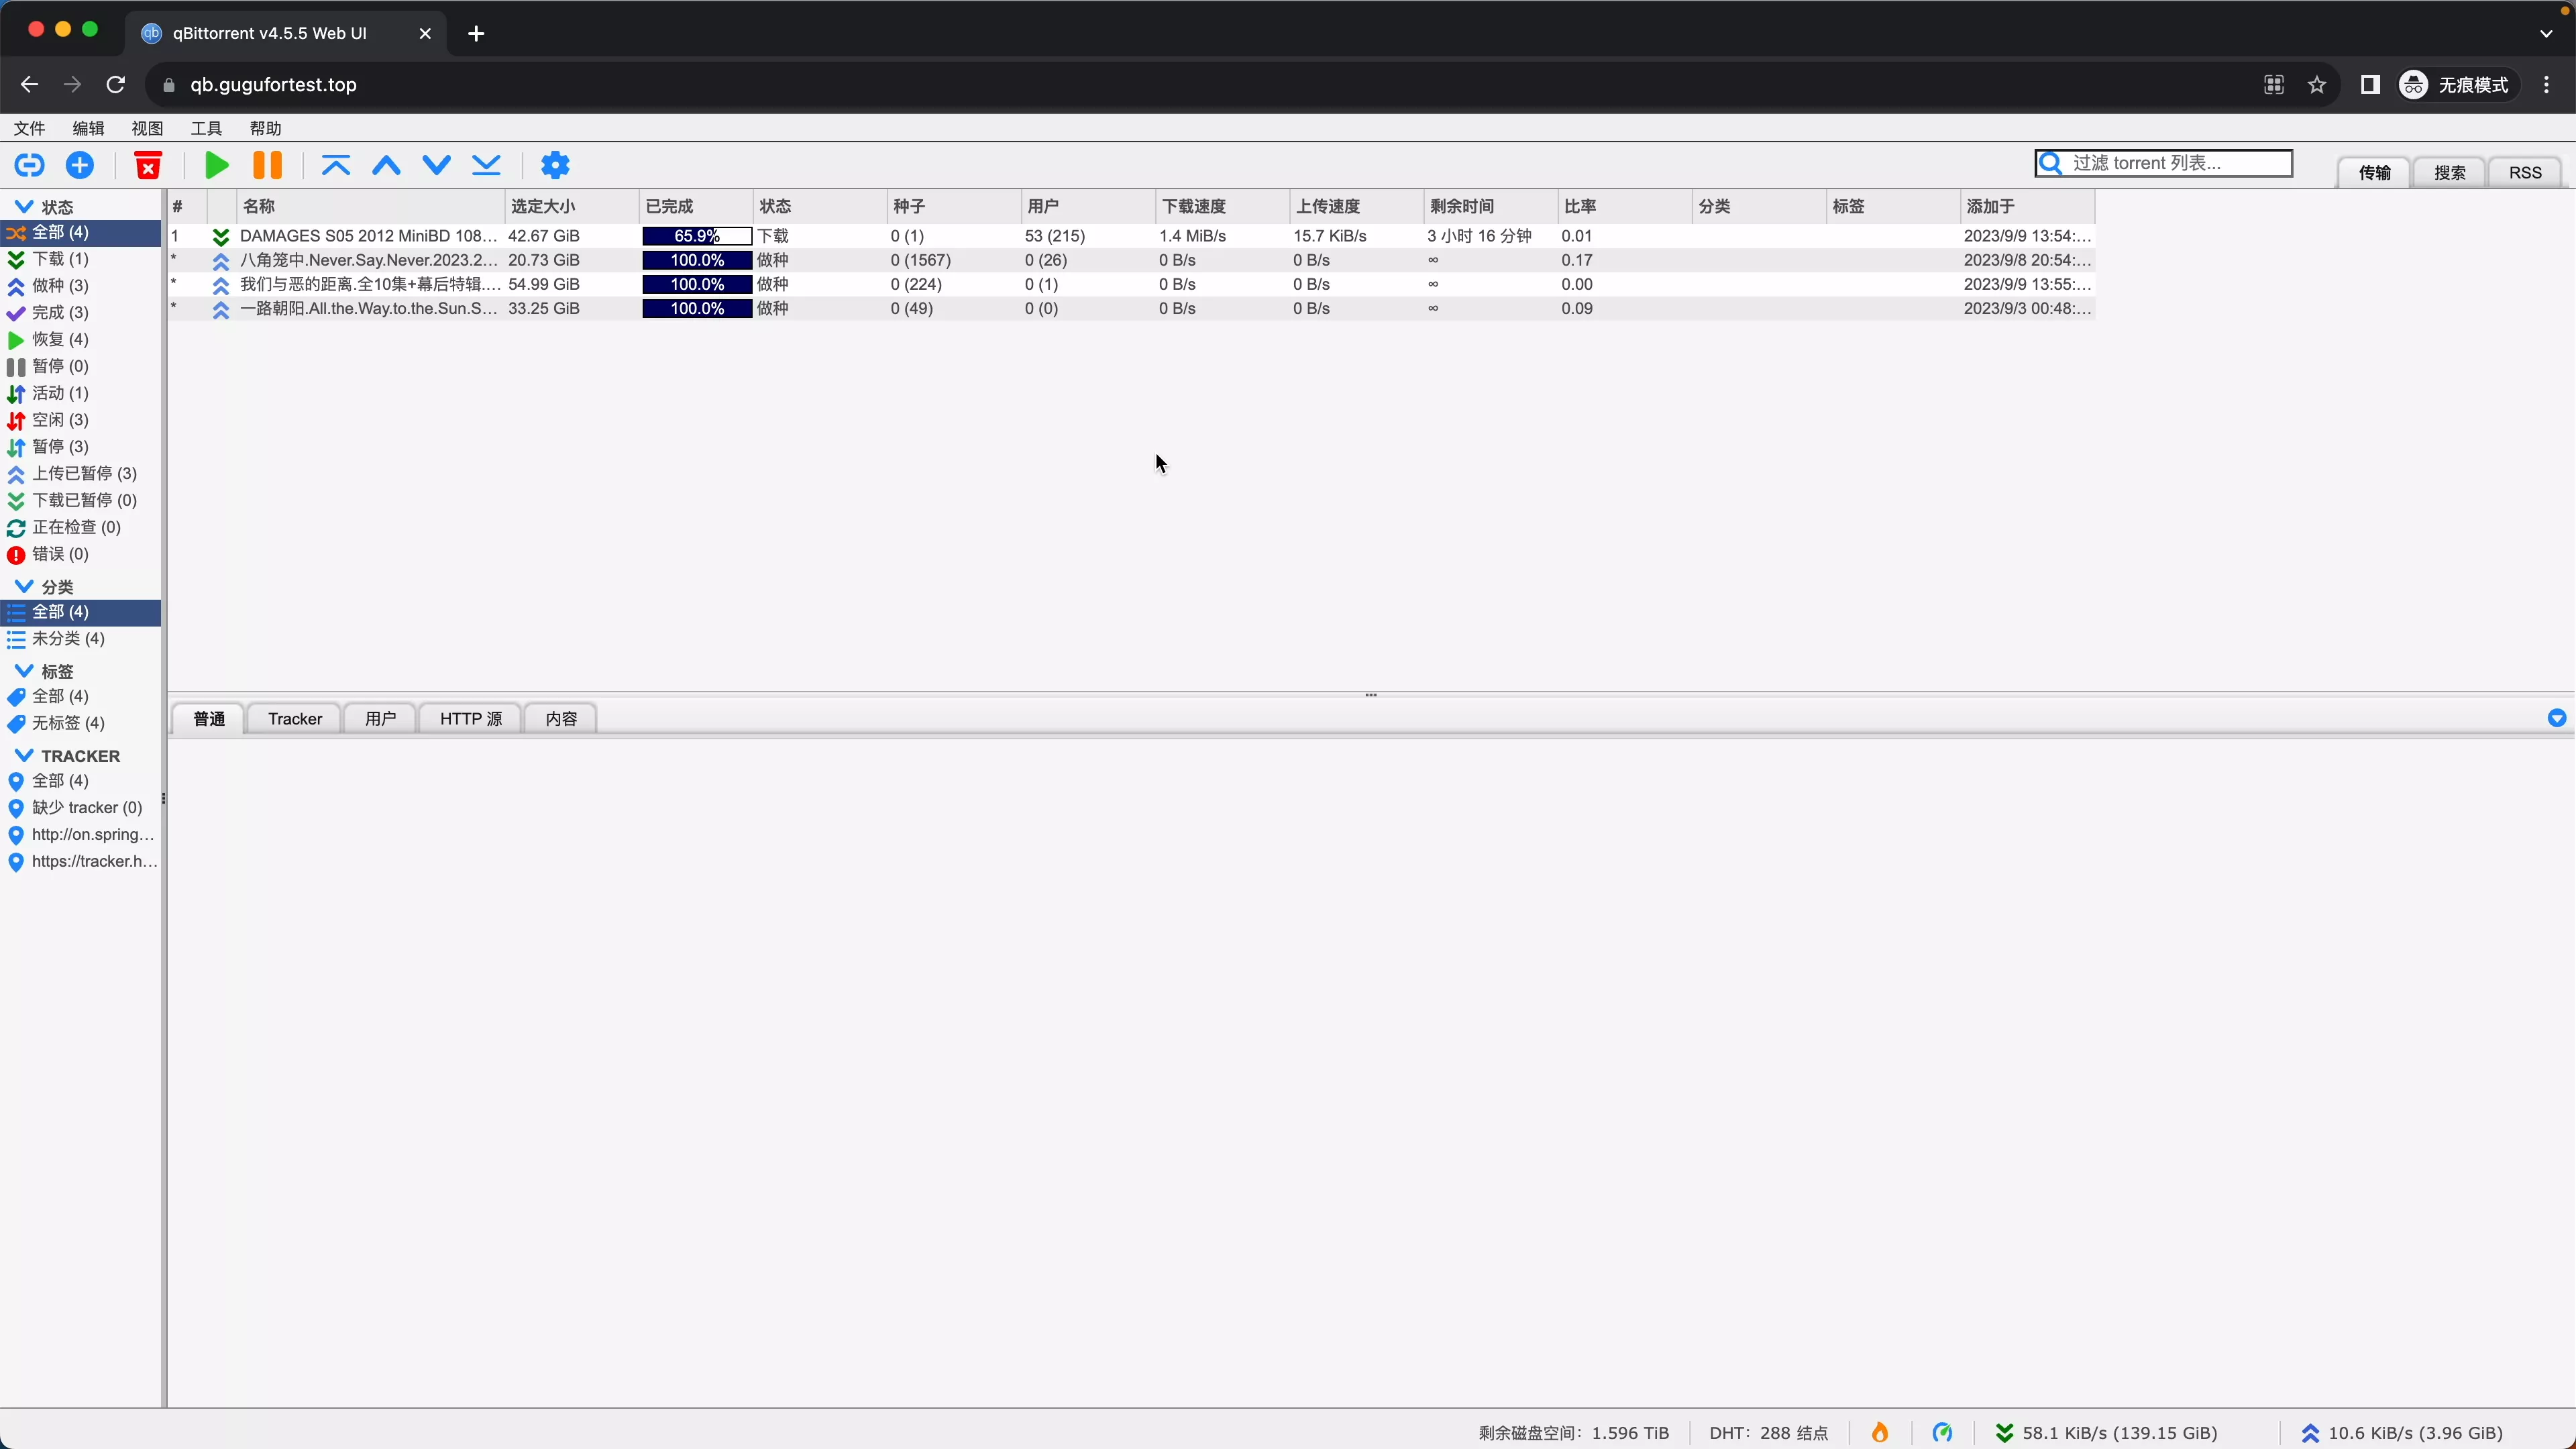
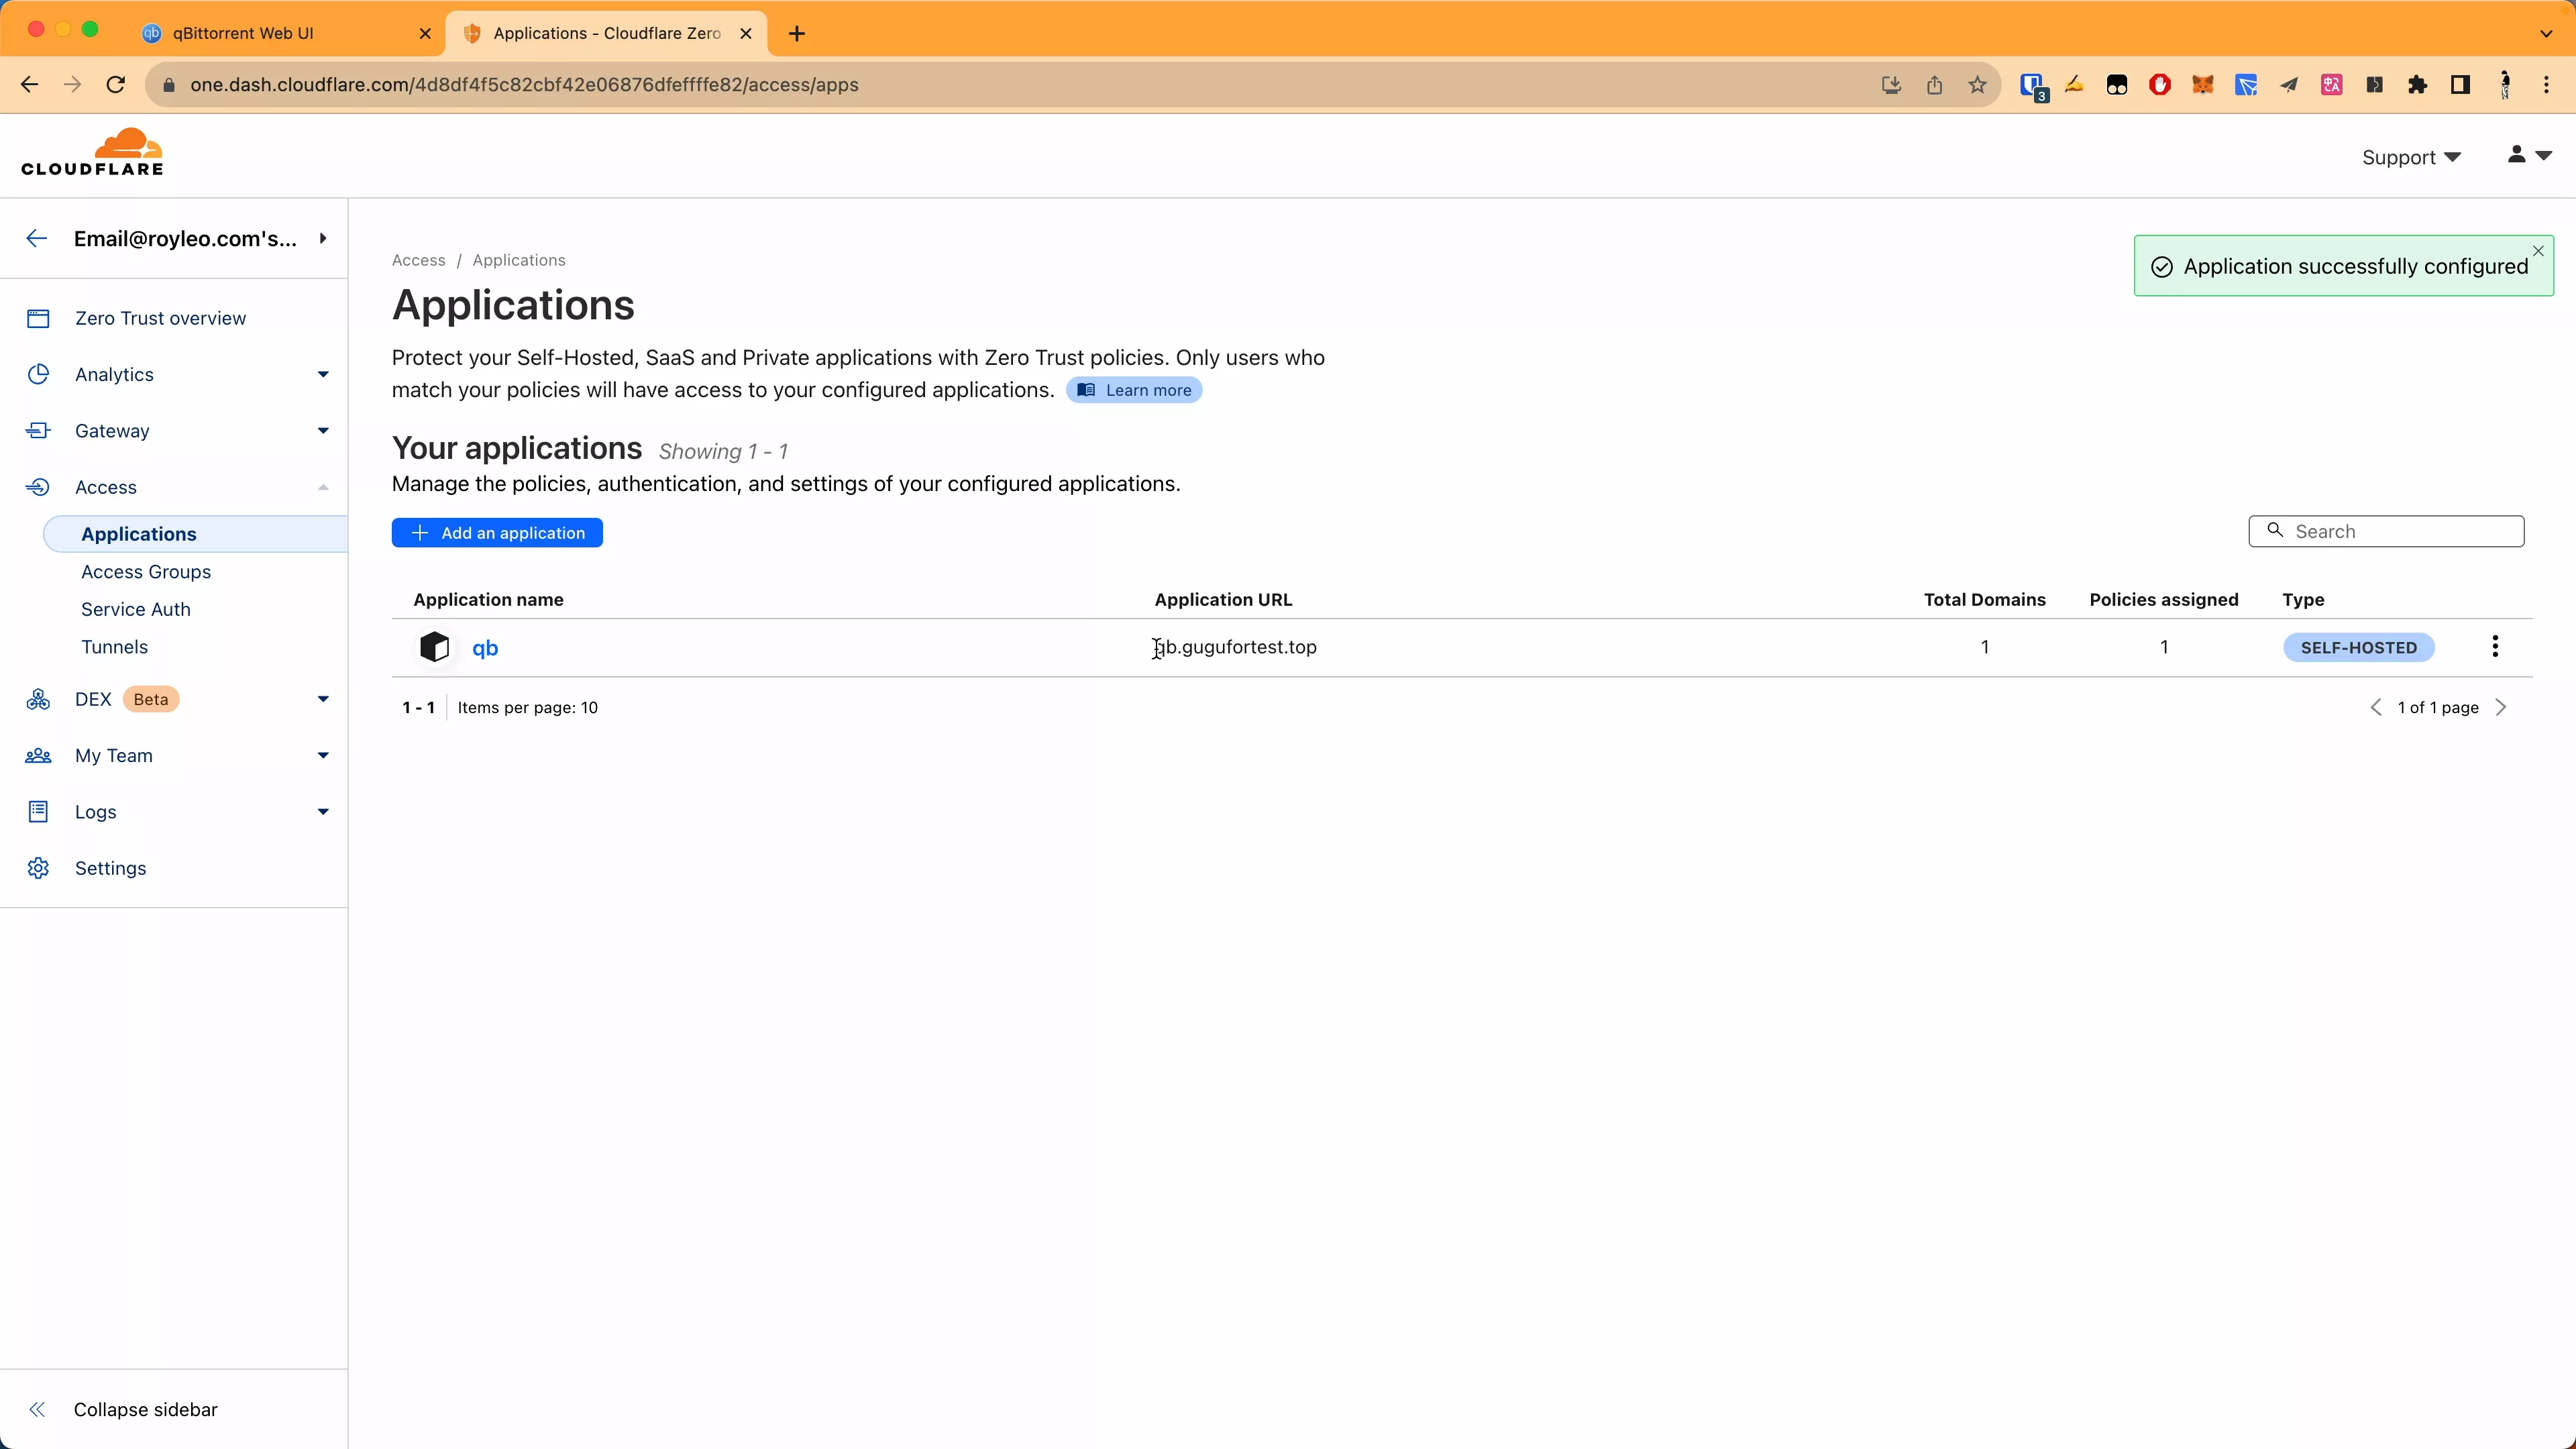
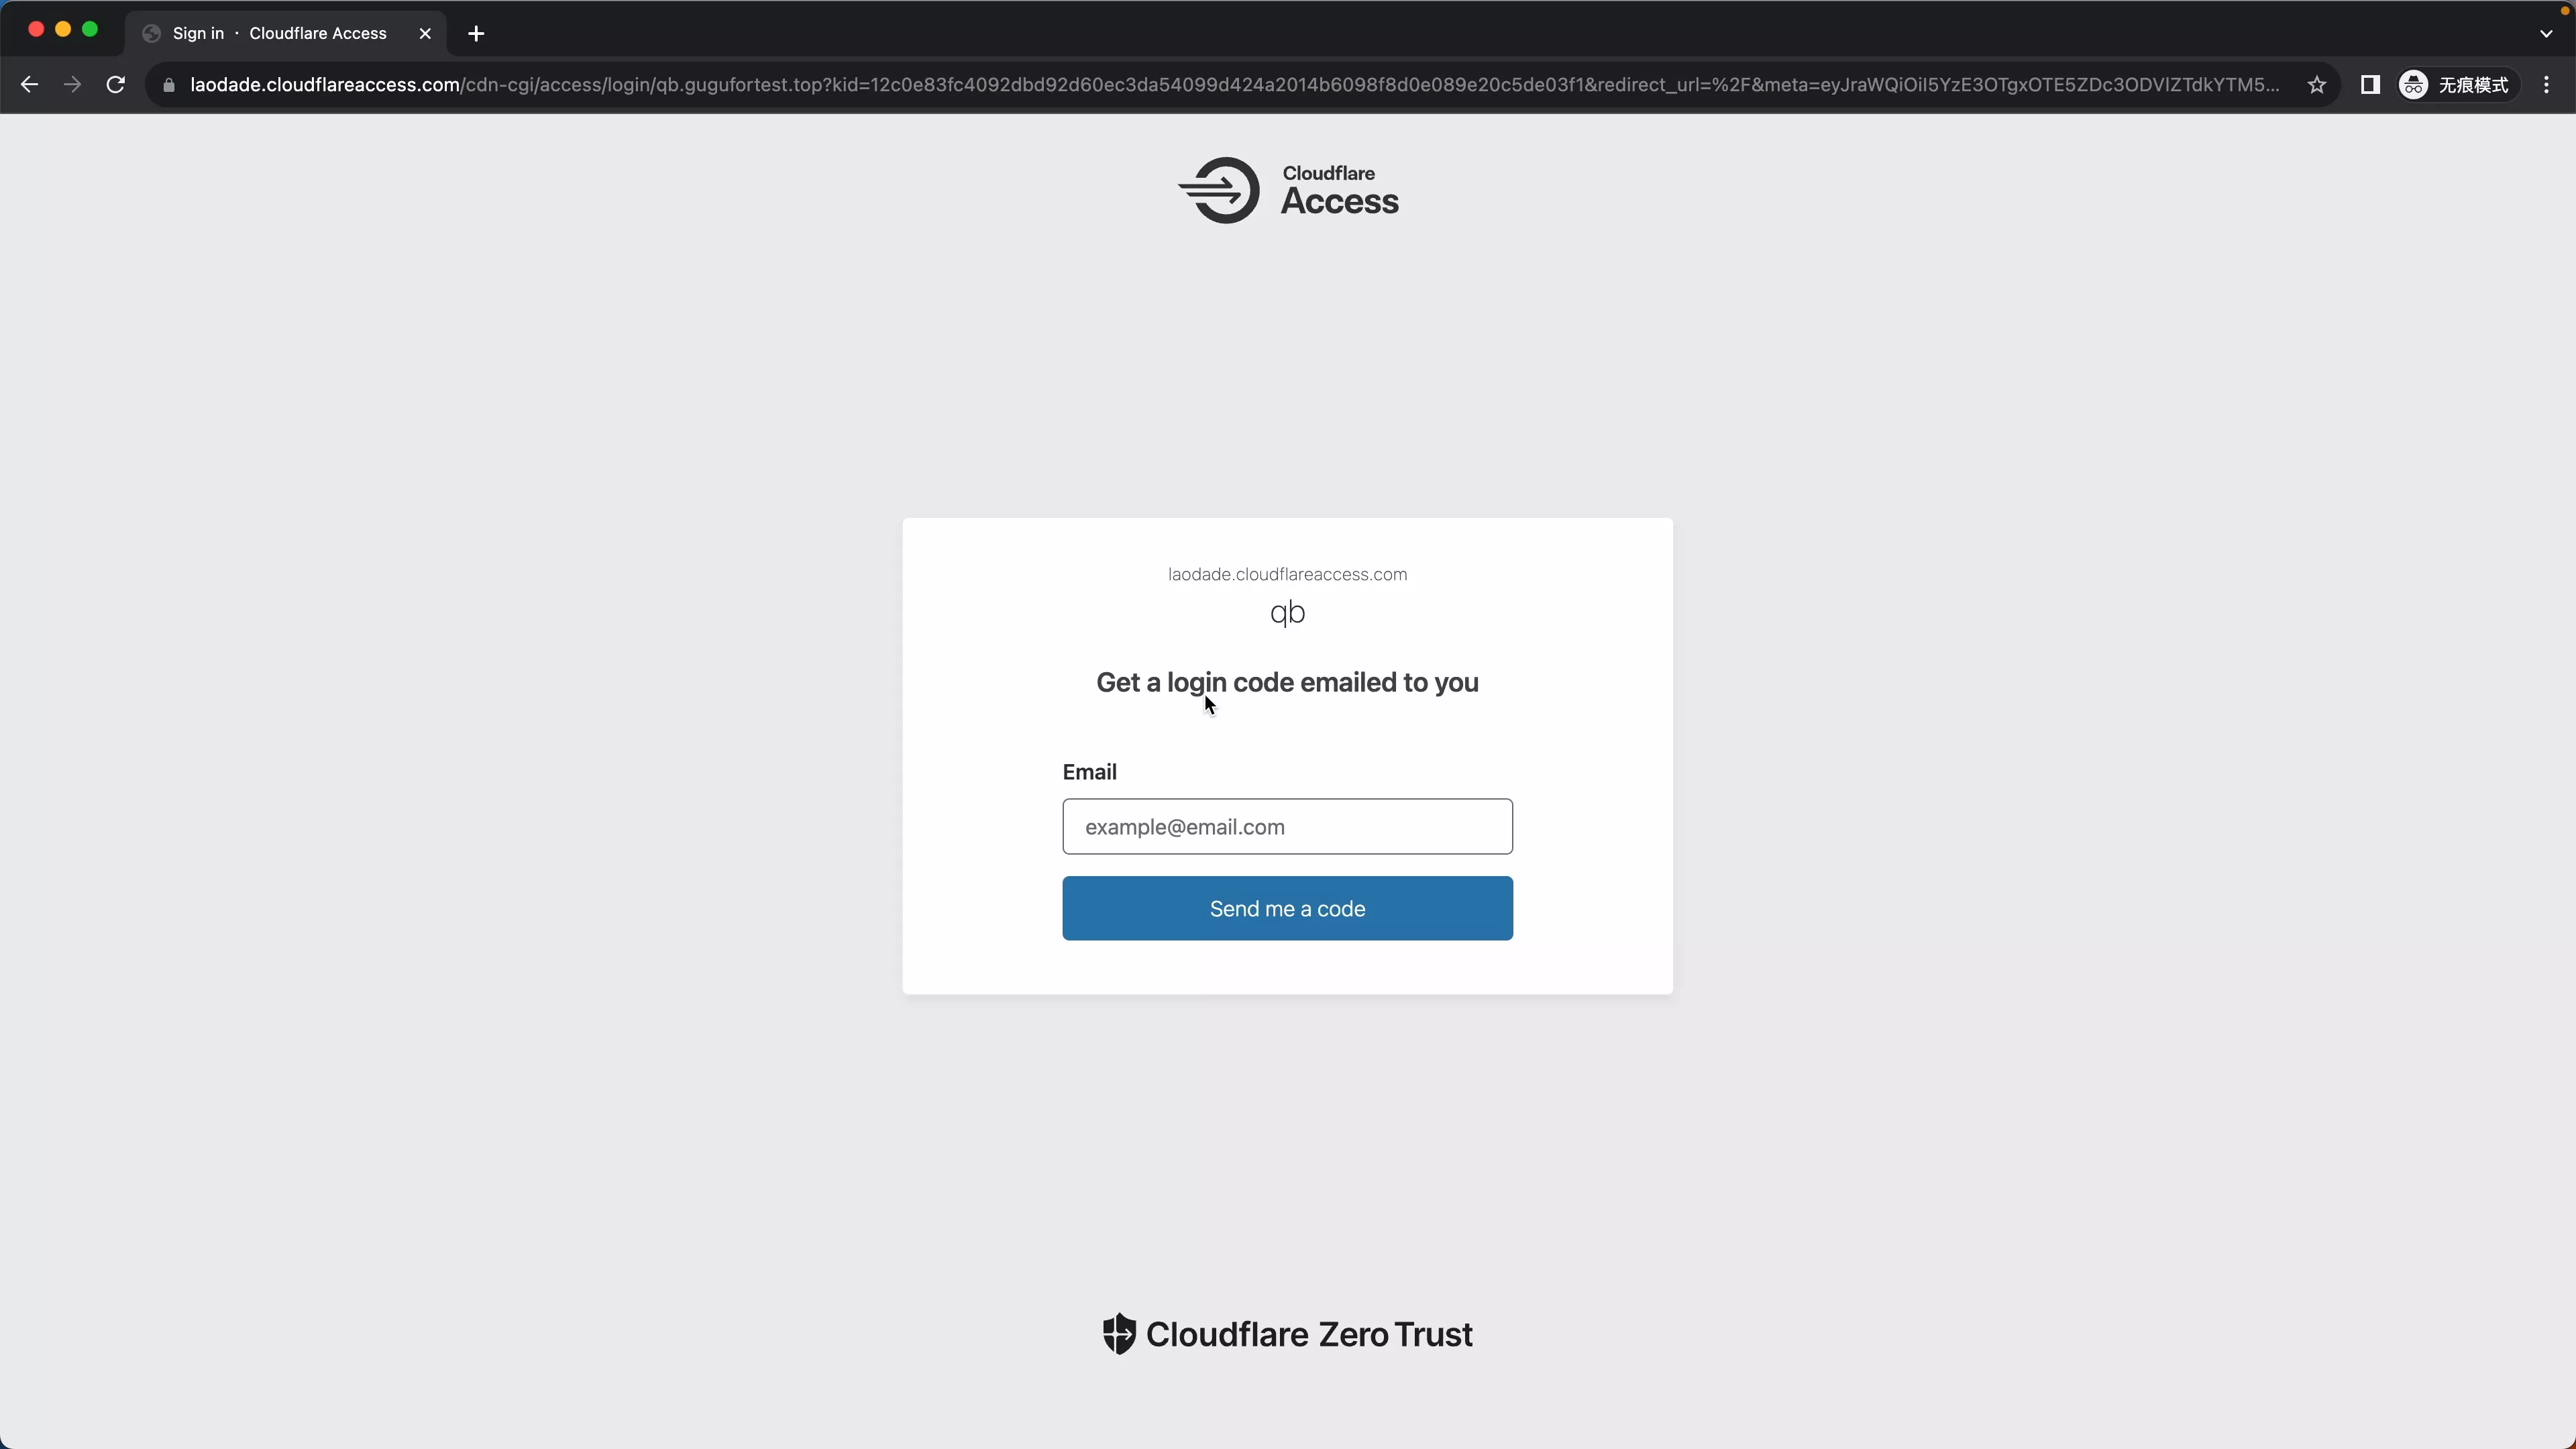
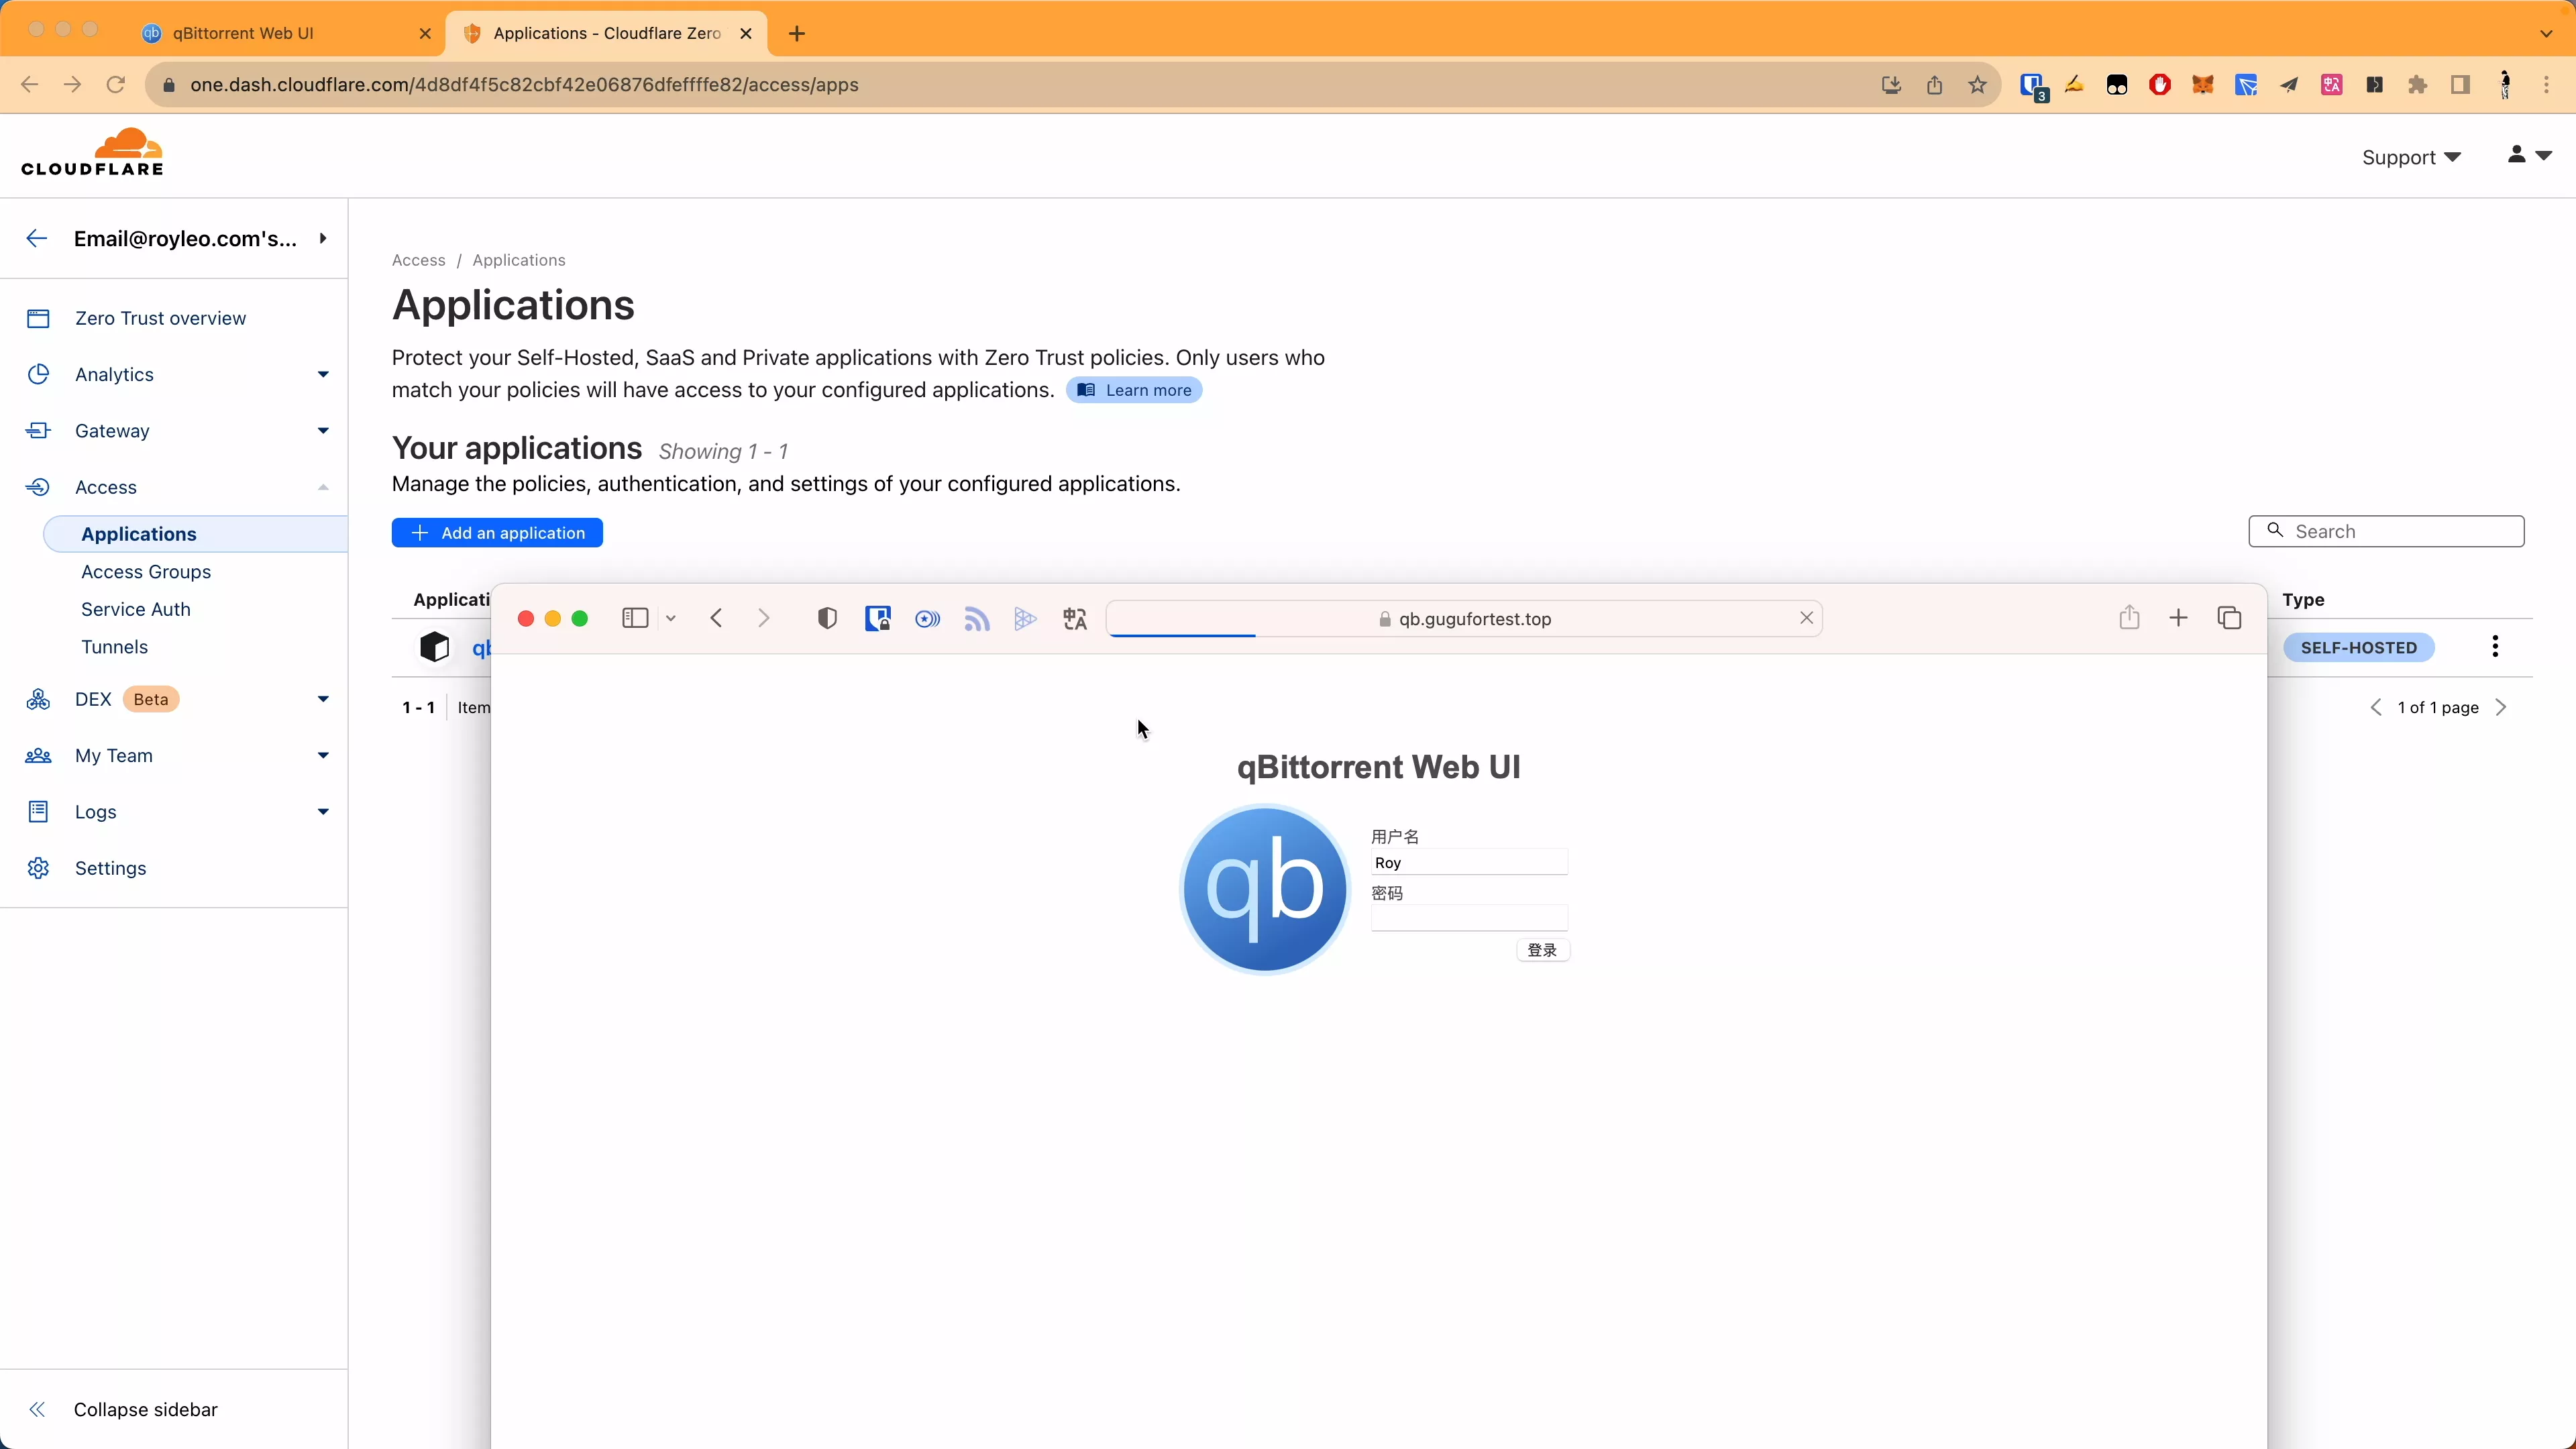
7. Add additional authentication
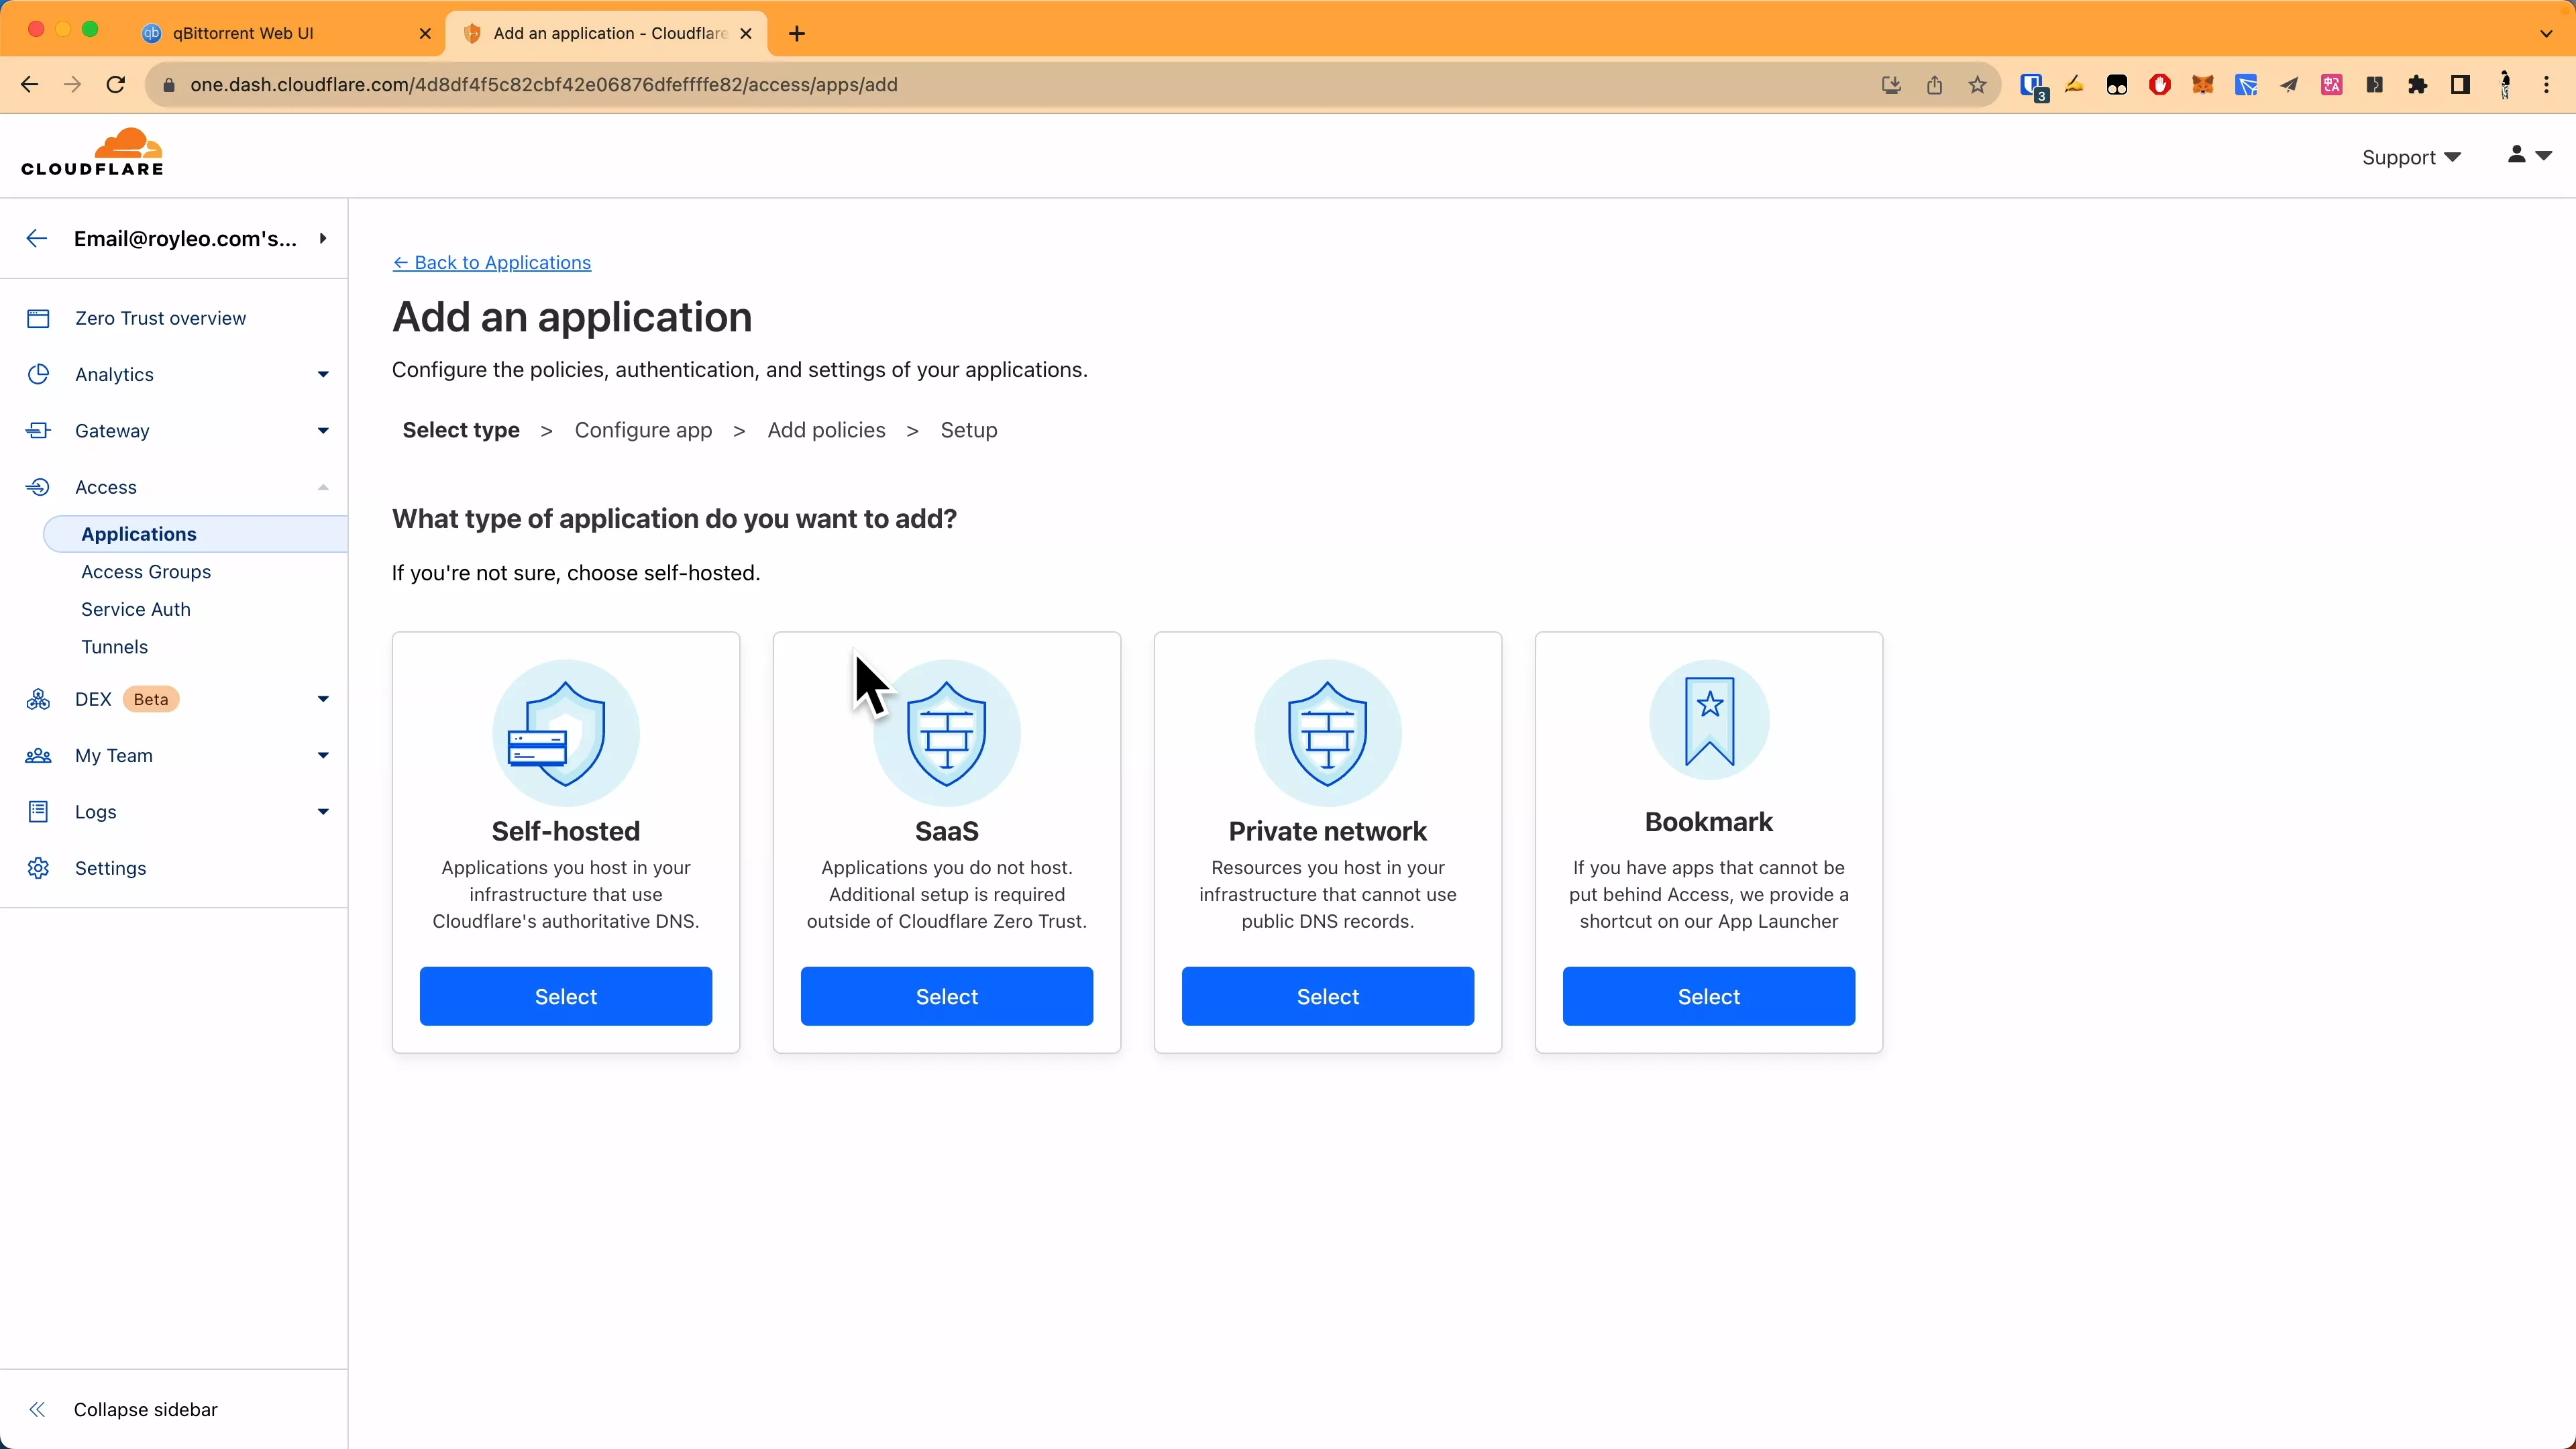
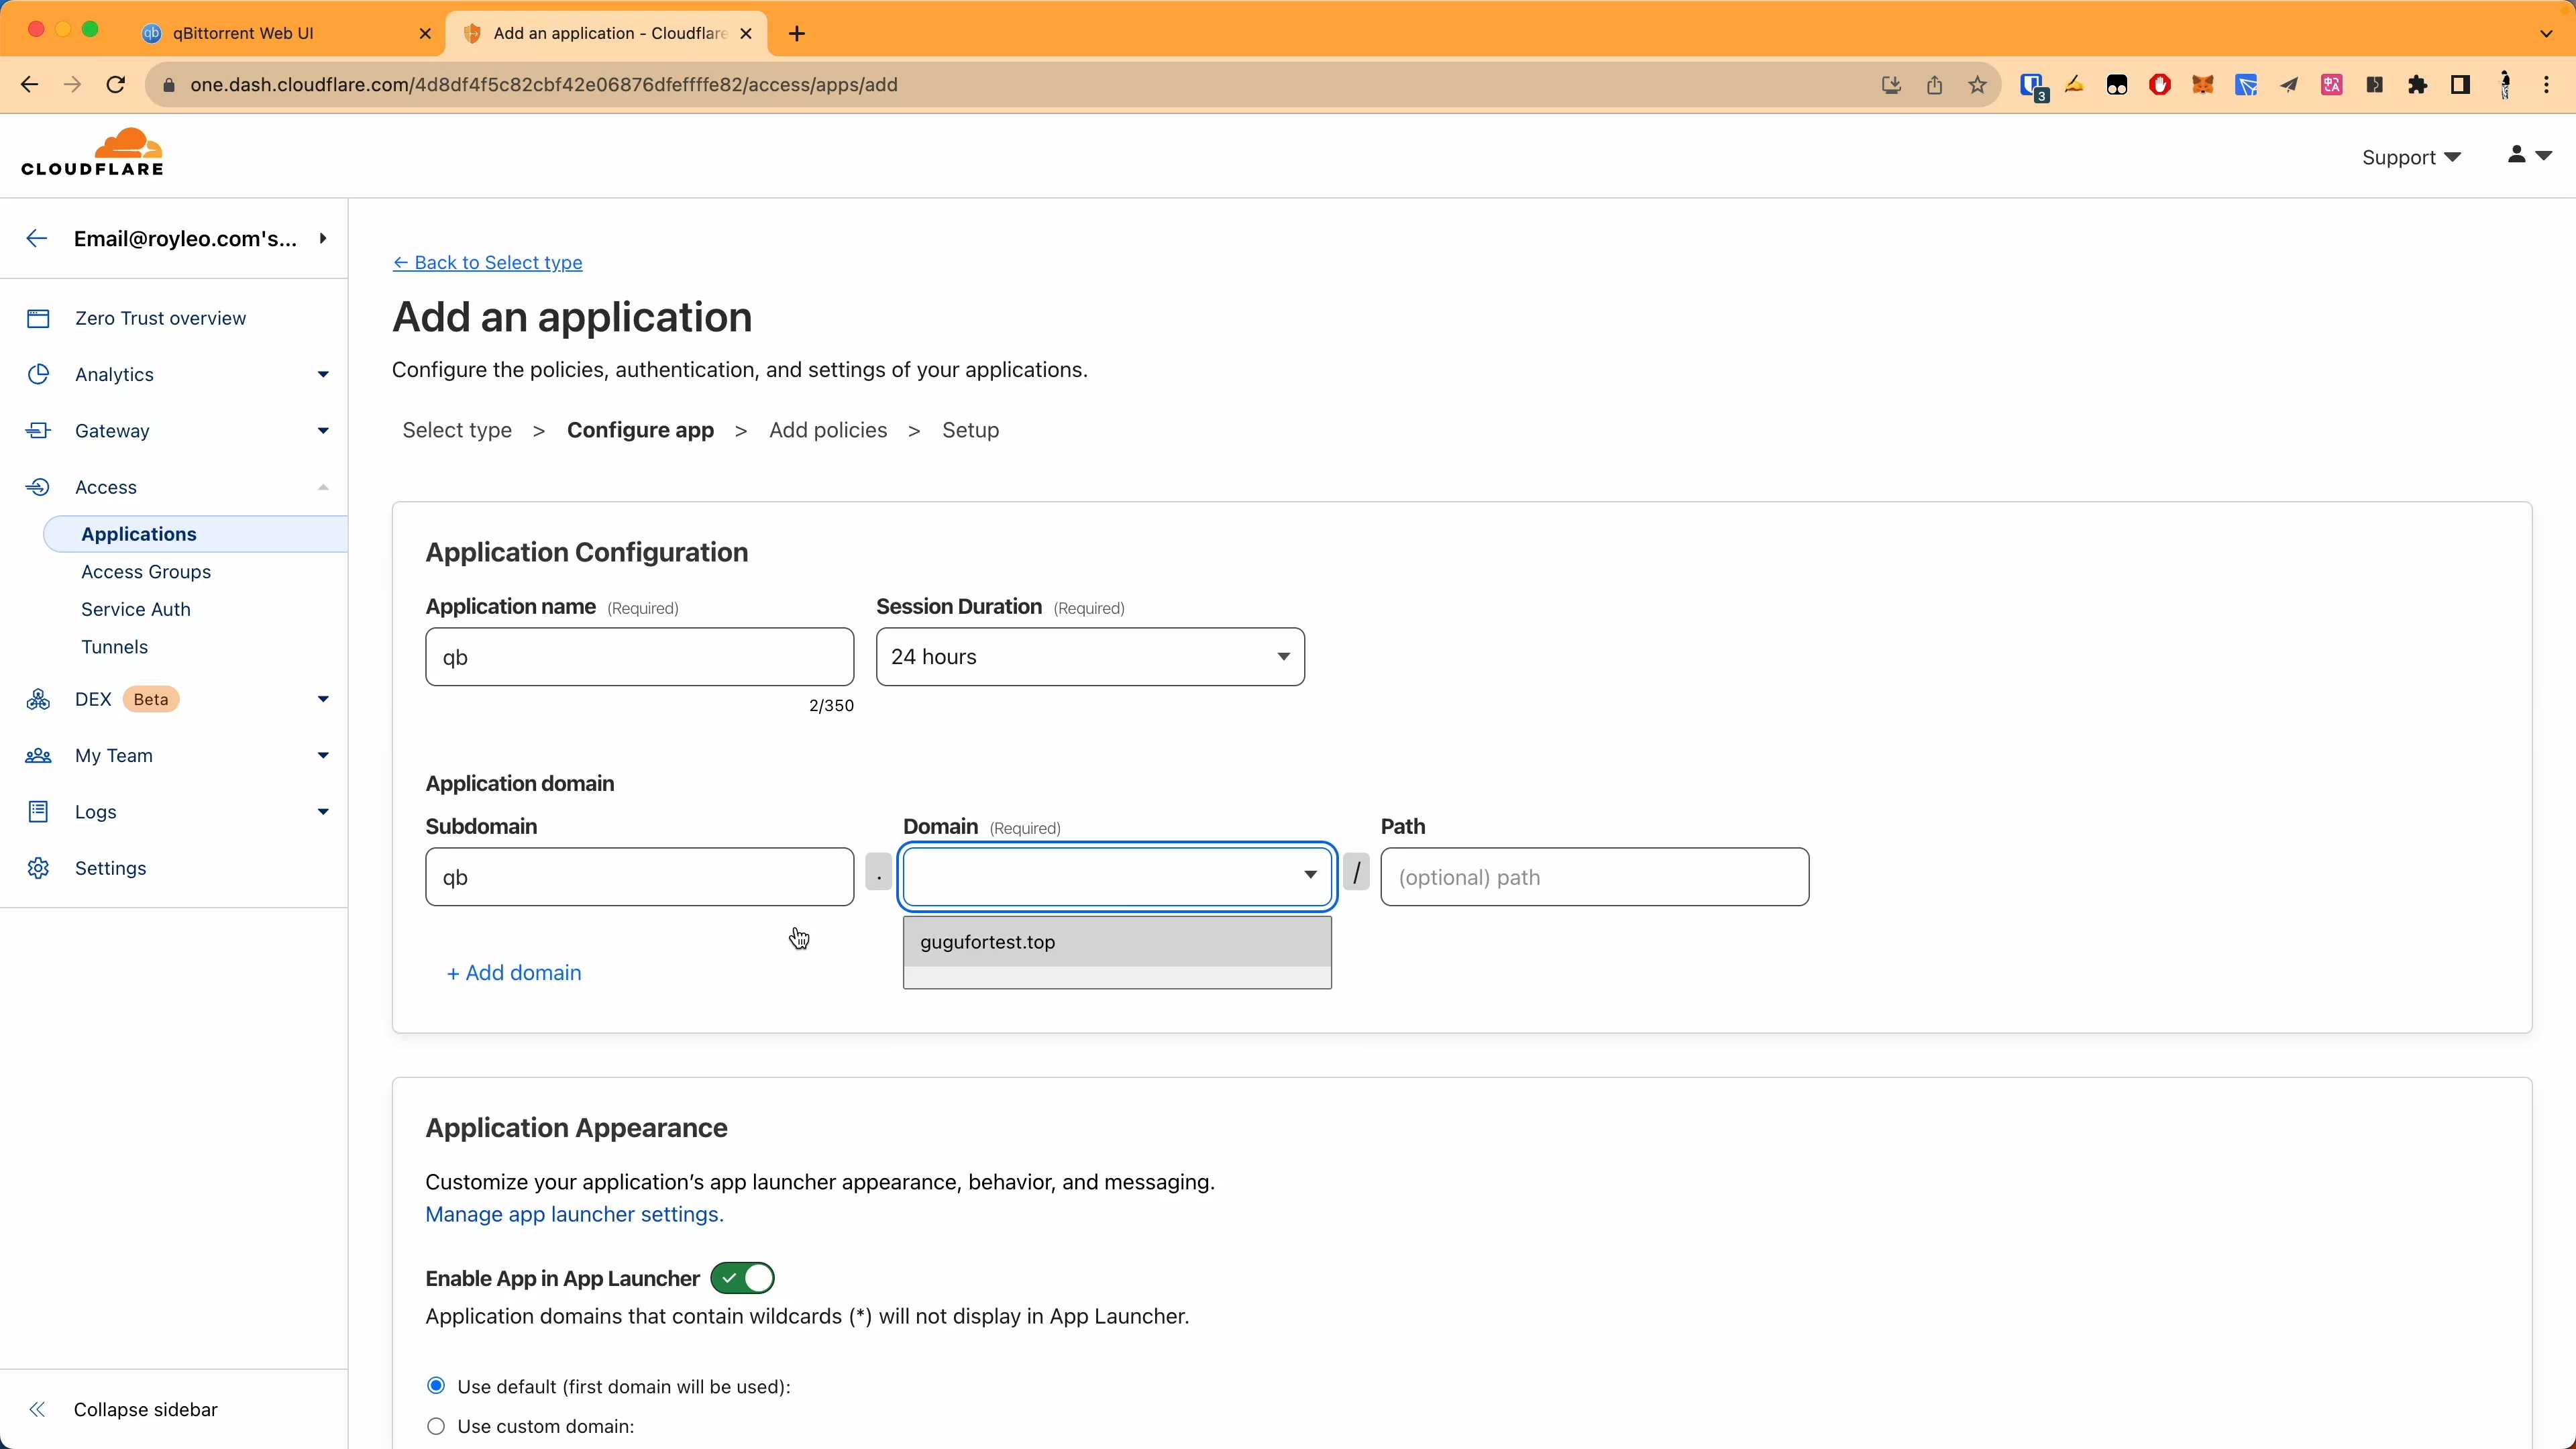
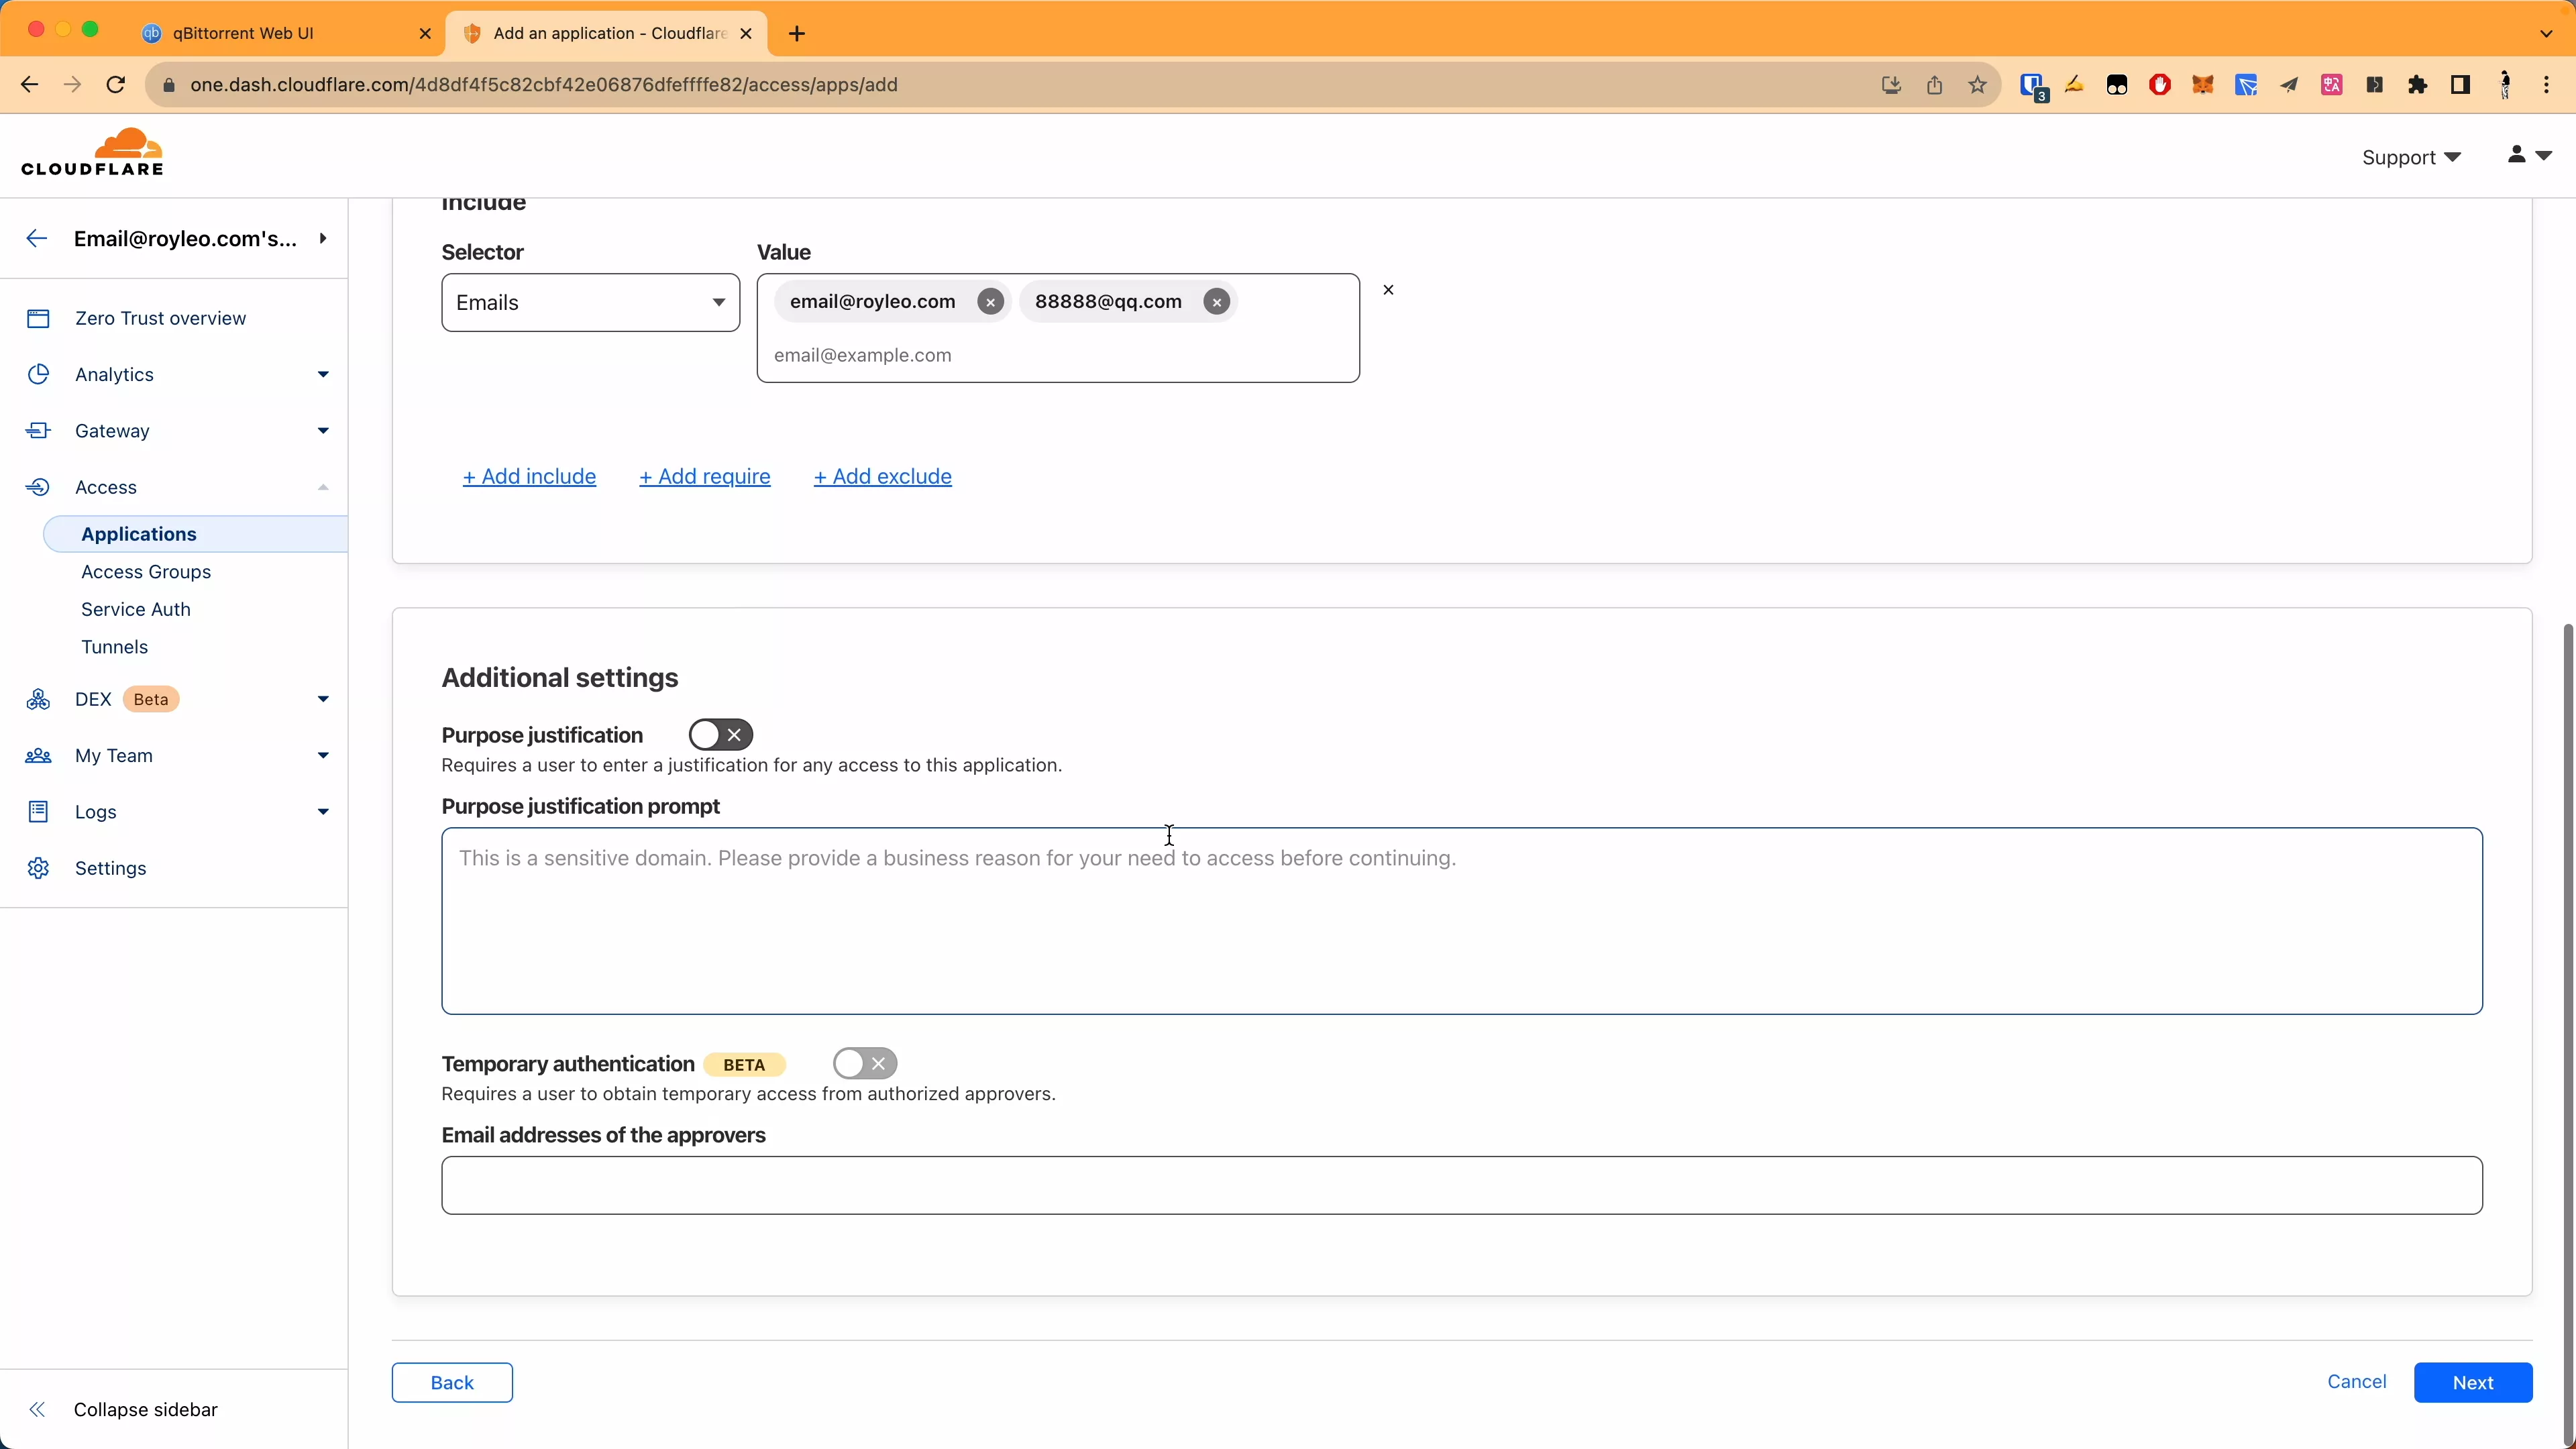
This article is reproduced from: https://blog.laoda.de/archives/cloudflare-tunnel/
For personal collection only, the copyright belongs to the original author
This article is reproduced from: https://shoucang.zyzhang.com/%E6%97%A0%E6%83%A7ddos%EF%BC%8C%E6%97%A0%E9%9C%80%E5%BC%80% E6%94%BE%E9%A2%9D%E5%A4%96%E7%AB%AF%E5%8F%A3%EF%BC%8C%E6%97%A0%E9%9C%80%E6% 9C%8D%E5%8A%A1%E5%99%A8%EF%BC%8C%E9%9A%8F%E6%97%B6%E9%9A%8F/
This site is only for collection, and the copyright belongs to the original author.