Original link: https://immmmm.com/twikoo-by-docker/
Recommended reading for the data export section: “Transfer Twikoo Tencent Cloud Function Deployment to Private Deployment” . This article records the sequence of private deployment steps, and the relevant diagrams can also refer to the above.
1. New website
Successfully changed to: first open SSL and then reverse generation. Because SSL cannot be turned on after adding the reverse generation, the subsequent certificate renewal is also the same, first close the reverse generation and then renew. For details, refer to the above.
Second, pull the mirror
(Pagoda’s software store “Docker Manager” is installed to facilitate subsequent visual management.)

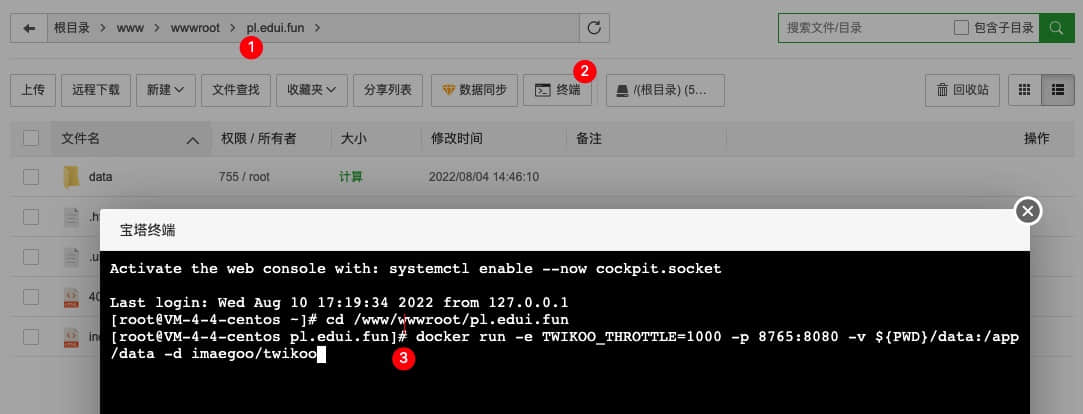
Enter the website directory, click the terminal and drop the next command, so as to pull up the mirror in this directory . The advantage is that the relevant comment data will be in the data folder under this path. If you pull up multiple dockers, data isolation will be achieved.
docker run -e TWIKOO_THROTTLE=1000 -p 8765:8080 -v ${PWD}/data:/app/data -d imaegoo/twikoo
Among them, TWIKOO_THROTTLE=1000 is to increase the IP request current limit to 1000, and 8765 is to customize the port. It is OK to not change these two points.
Access the bound subdomain name, see the following information, the deployment is successful:
{"code":100,"message":"Twikoo 云函数运行正常,请参考https://twikoo.js.org/quick-start.html#%E5%89%8D%E7%AB%AF%E9%83%A8%E7%BD%B2 完成前端的配置","version":"1.6.5"}
3. Version update
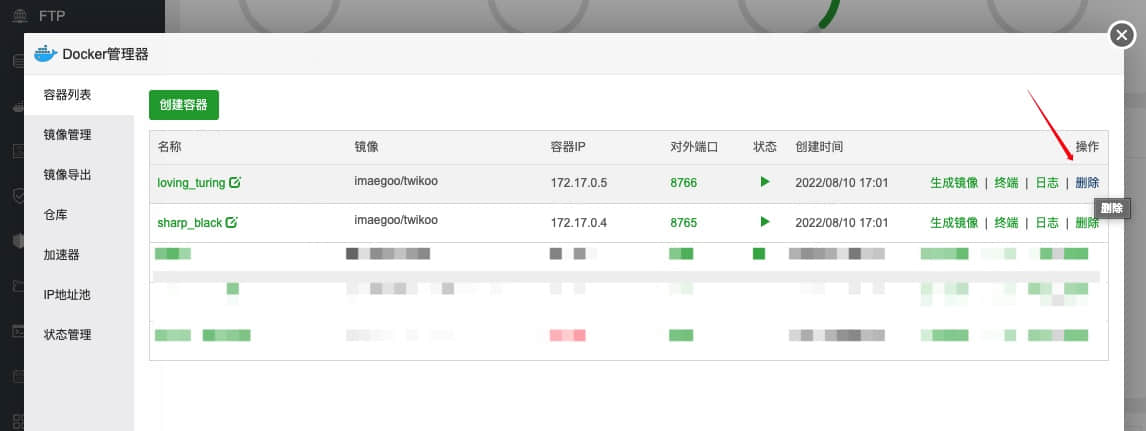
1. Docker manager, delete the container directly

2. The terminal pulls the latest image
docker pull imaegoo/twikoo
3. Enter the website directory and pull up the new version
docker run -e TWIKOO_THROTTLE=1000 -p 8765:8080 -v ${PWD}/data:/app/data -d imaegoo/twikoo
Finally, the cdn link version of the front end can also be updated.
This article is reprinted from: https://immmmm.com/twikoo-by-docker/
This site is for inclusion only, and the copyright belongs to the original author.