Original link: https://leovan.me/cn/2023/04/what-i-talk-about-when-i-talk-about-photo-retouching-colors-part-1/
The text is the first blog in the “When I Talk” series, and the follow-up “When I Talk” series will be from the perspective of programmers to popularize other areas that have not been touched by science.
color space
A color space is an organization of colors by which a fixed analog and digital representation of a color can be obtained by means of a color space and tests against a physical device. A color model is an abstract mathematical model that describes colors through a set of numbers. Since “color space” has a fixed combination of color models and mapping functions, the term is also used informally to refer to color models.
RGB
The red, green and blue (RGB) color model is an additive color mixing model , which adds the three primary colors of red (Red) , green (Green) , and blue (Blue) in different proportions to synthesize various color lights. The principle of the three primary colors is not due to physical reasons, but due to physiological reasons.
The RGB color model can be mapped onto a cube, as shown in the following figure:
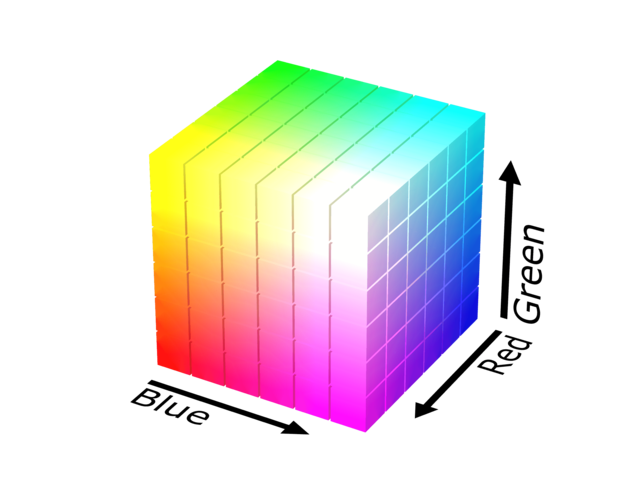
Red, green and blue three-primary color light display technology is widely used in television and computer monitors, using red, green and blue three primary colors as sub-pixels to form true color pixels, through the blurring of eyes and brains, “human seeing” does not exist in Perceived color on a monitor.
CMYK
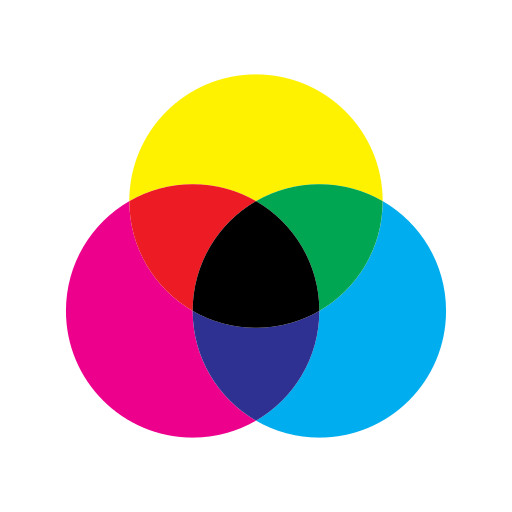
Printing four-color separation mode (CMYK) is a subtractive color mixing model used in color printing. Using the principle of color mixing of three primary colors of color materials, plus black ink, a total of four colors are mixed and superimposed to form the so-called “full-color printing”. The four standard colors are:
- Cyan : Cyan or “water blue”
- Magenta : magenta or “purple”
- Yellow : yellow
- Key plate : Because black is often used in practice, it can also be simply regarded as blacK
A schematic diagram of CMY color stacking is shown below:
Using floating-point numbers from $0$ to $1$ to represent $R, G, B$ and $C, M, Y, K$, the conversion formula from four-color to three-primary light is as follows:
$$ \begin{aligned} R &= \left(1 - C\right) \left(1 - K\right) \\ G &= \left(1 - M\right) \left(1 - K\right) \\ B &= \left(1 - Y\right) \left(1 - K\right) \end{aligned} $$
The conversion formula from three-primary light to four-color separation is as follows:
$$ \begin{aligned} C &= 1 - \dfrac{R}{\max \left(R, G, B\right)} \\ M &= 1 - \dfrac{G}{\max \left(R, G, B\right)} \\ Y &= 1 - \dfrac{B}{\max \left(R, G, B\right)} \\ K &= 1 - \max \left(R, G, B\right) \\ \end{aligned} $$
HSL and HSV
Both HSL and HSV are representations of points in the RGB color model in a cylindrical coordinate system. These two representations attempt to be more intuitive than the Cartesian-based geometric structure RGB. HSL is Hue, Saturation, Lightness (Hue, Saturation, Lightness), HSV is Hue, Saturation, Value (Hue, Saturation, Value), also known as HSB, where B is Brightness. Another color space definition is shown in the following figure:
HSL and HSV color spaces
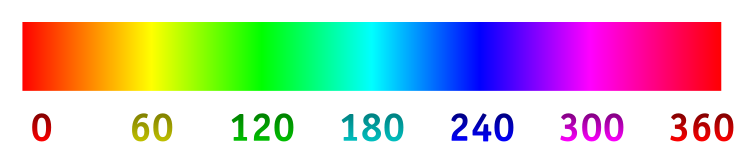
hue
Hue refers to the outer phase of color, which is the different colors perceived by human eyes under the illumination of different wavelengths of light. In the HSL and HSV color spaces, hue is 0 degrees (360 degrees) for red , 60 degrees for yellow , 120 degrees for green , 180 degrees for cyan , 240 degrees for blue , and 300 degrees for magenta . As shown below:
saturation
Saturation refers to the purity of color, which is determined by the intensity of light and its distribution in the spectrum of different wavelengths. The image below shows an example of red from minimum saturation to maximum saturation:

brightness and lightness
The lightness value is how bright something is compared to an equally bright white object. If we take an image, extract the image Hue, Saturation, and Luminance values, and compare them to the Luminance values of a different color space, we can quickly make a visual difference. As shown in the figure below, the V value in HSV color space and the L value in HSL color space are significantly different from the perceived lightness value:
Original Image
L in HSL
V in HSV
difference
Both HSV and HSL have the same definition for hue (H), but not for saturation (S) and lightness and lightness (L and B).
In HSL, saturation exists independently of lightness, which means that very light colors as well as very dark colors can be very saturated in HSL. In HSV, colors closer to white have lower saturation.
- The S in HSV controls the amount of white mixed into the pure color, the larger the value, the less white mixed in, and the purer the color.
- V in HSV controls the amount of black mixed into the pure color. The larger the value, the less black mixed in and the higher the brightness.
- The S in HSL has nothing to do with black and white, and the saturation does not control how much white and black are mixed into the color.
- The L in HSL controls how much white and black are mixed into the pure color.
Take the color pickers of Photoshop and Afiinity Photo as examples:
Photoshop Color Picker (HSV)
Afiinity Photo Color Picker (HSL)
The two softwares adopt HSV and HSL color space respectively, the horizontal axis is saturation (S), and the vertical axis is lightness (V) and lightness (L). It is not difficult to see that in the Photoshop color picker, the less black is mixed up, the higher the lightness; the less white is mixed in to the right, the higher the purity. In the Afiinity Photo color picker, the lower part is pure black with the minimum brightness. From bottom to top, the mixed black gradually decreases until there is no black mixed in at 50% position, and continues to go up, the mixed white gradually increases until 100% The % position becomes completely pure white with the highest brightness.
histogram
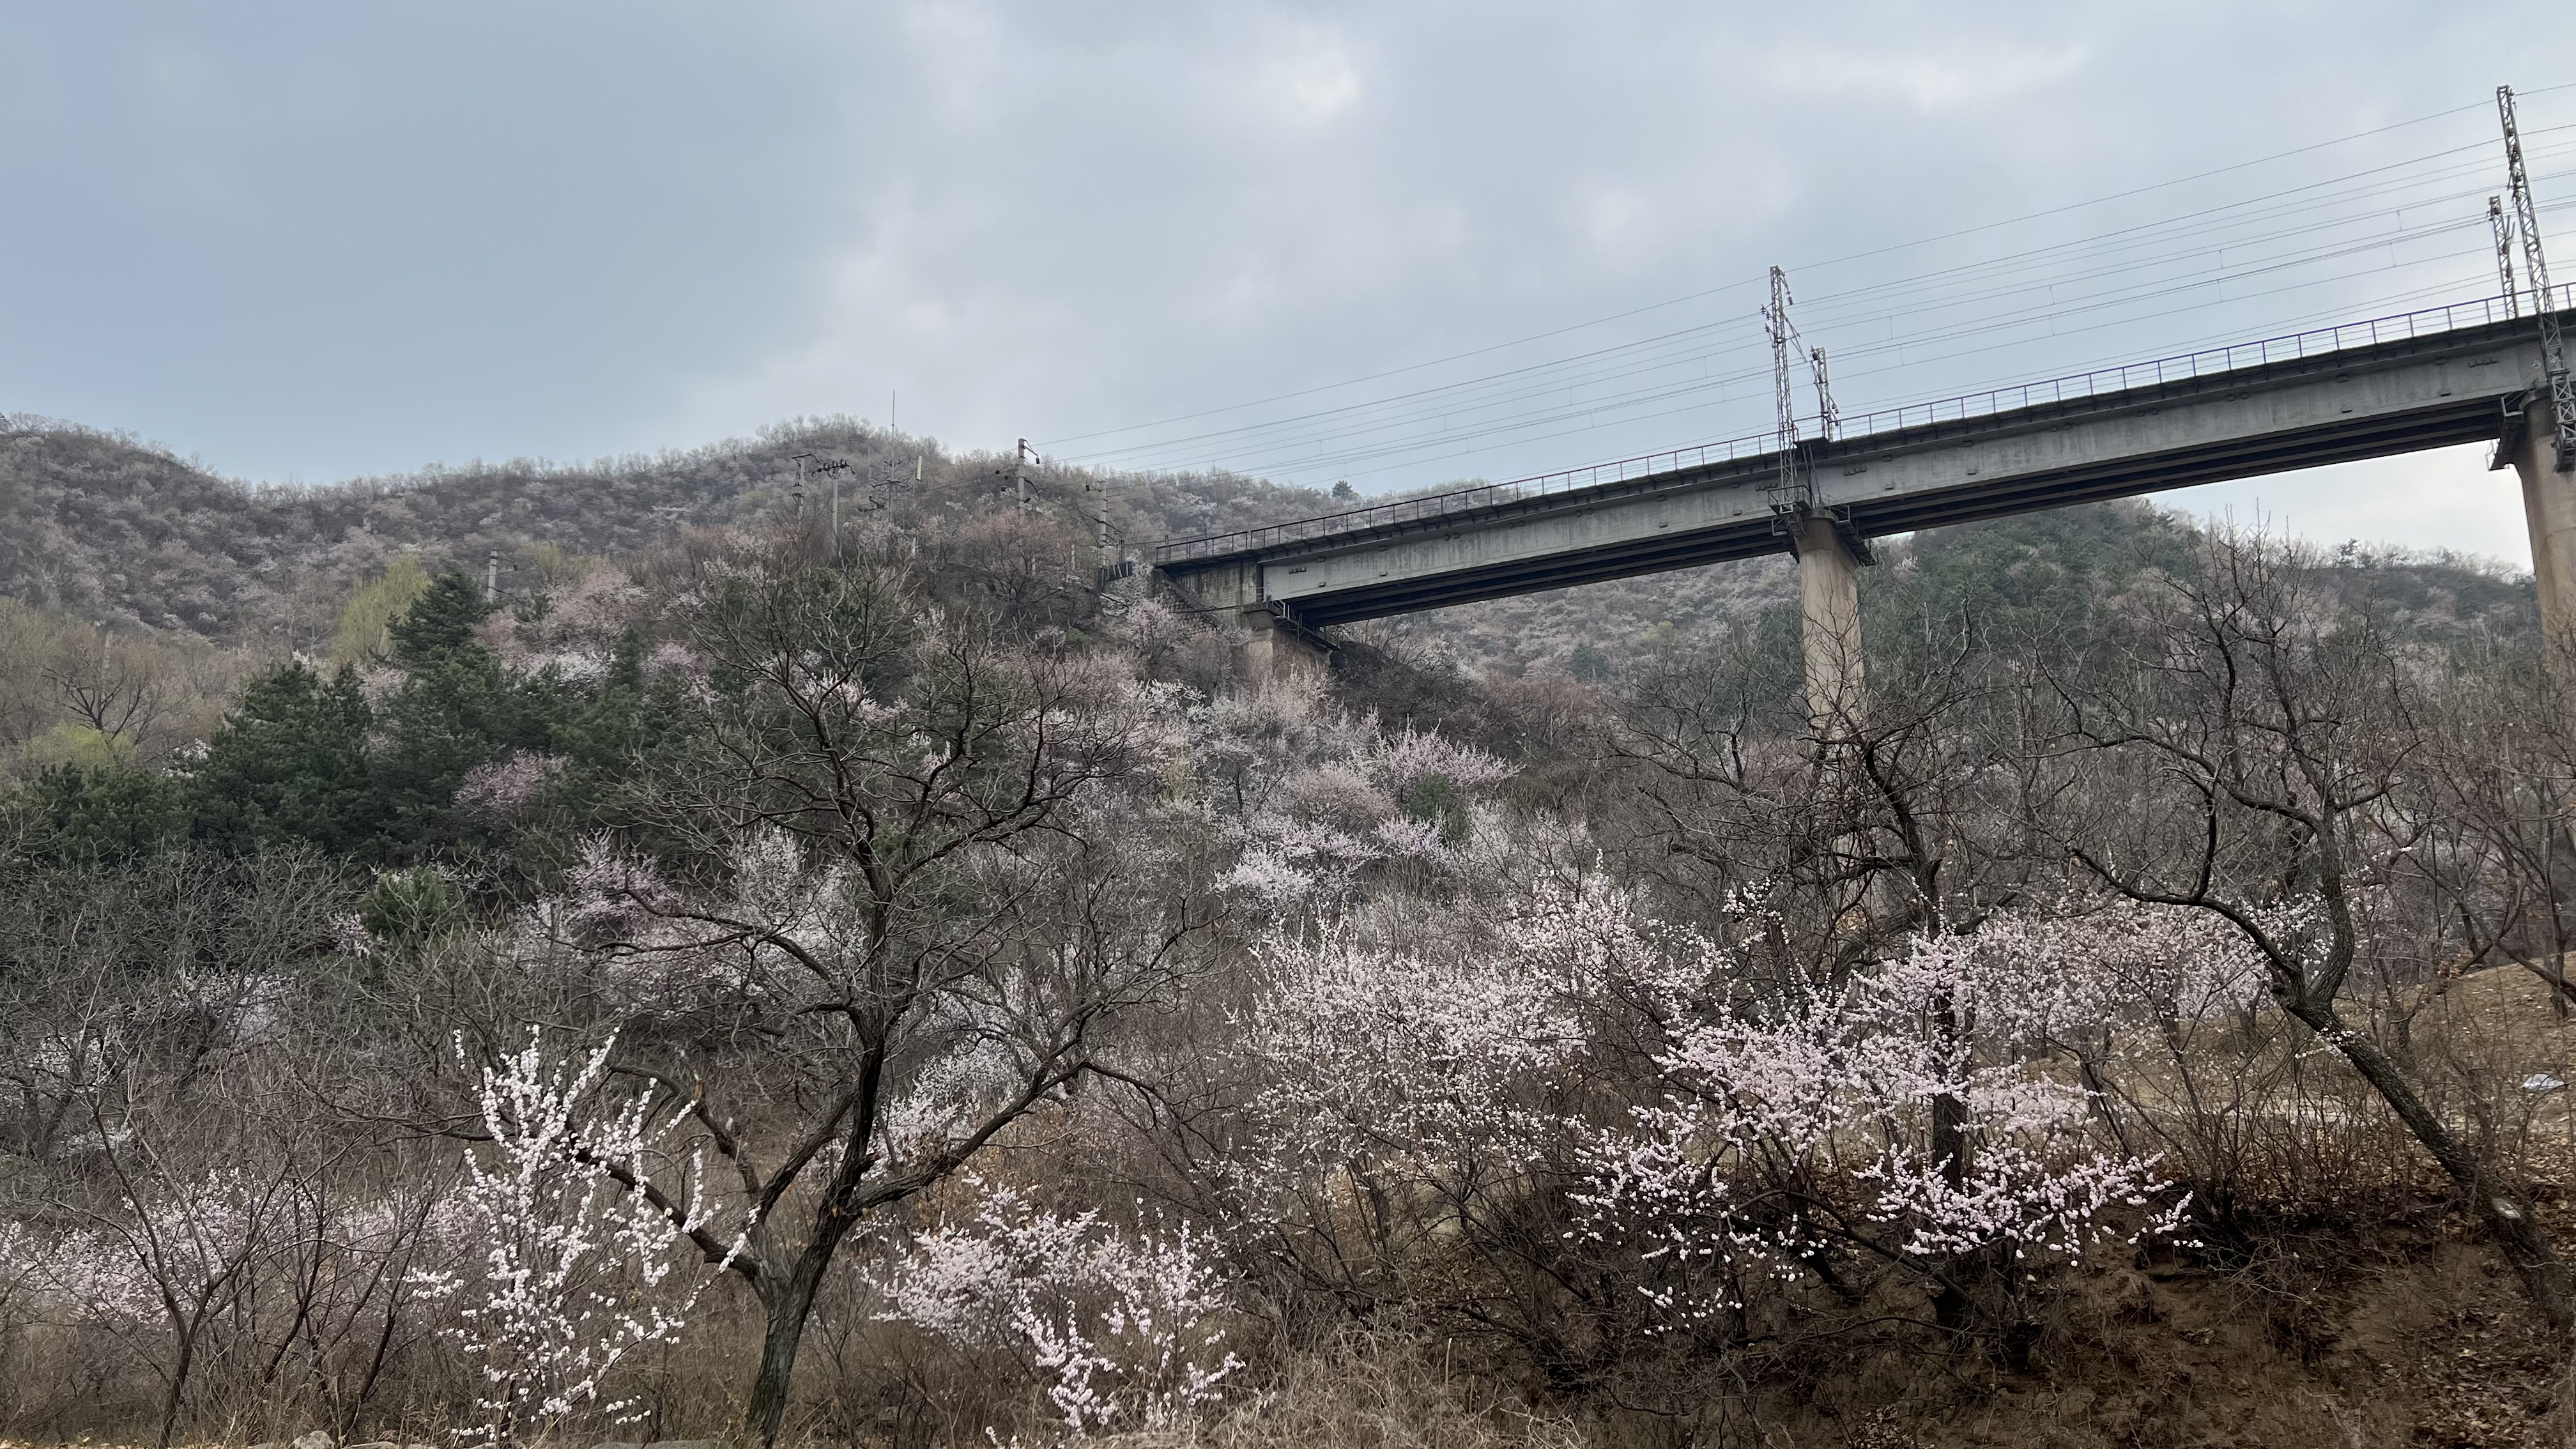
The image histogram is a histogram that reflects the brightness of the image color , where the $x$ axis represents the brightness value, and the $y$ axis represents the number of pixels of the brightness value in the image. Taking the $8$ bit image as an example, the value range of brightness is $\left[0, 2^8-1\right]$, that is, $\left[0, 255\right]$. Take the following picture as an example (original picture: link ):
Original Image
The histogram looks like this in Lightroom:
Original Image Lightroom Histogram
The histogram drawn using Python is as follows:
histogram code
import cv2 import numpy as np import matplotlib.pyplot as plt gray_img = cv2.imread('demo.jpg', cv2.IMREAD_GRAYSCALE) img = cv2.imread('demo.jpg') img_channels = cv2.split(img) height, width = gray_img.shape gray_img_hist = cv2.calcHist([gray_img], [0], None, [256], [0, 256]) img_channels_hist = [cv2.calcHist([img_channel], [0], None, [256], [0, 256]) for img_channel in img_channels] fig, ax = plt.subplots(1, 1) ax.plot(gray_img_hist, color='0.6', label='灰') for (img_channel_hist, color, label) in zip( img_channels_hist, ['#6695ff', '#70df5f', '#f74048'], ['蓝', '绿', '红']): ax.plot(img_channel_hist, color=color, label=label) segments = [0, 28, 85, 170, 227, 255] segments_text = ['黑色', '阴影', '曝光', '高光', '白色'] for (left_border, right_border, segment_text) in \ zip(segments[:-1], segments[1:], segments_text): if left_border != 0: ax.axvline(x=left_border, ymin=0, color='black') ax.annotate( segment_text, xy=((left_border + right_border) / 2, np.max(img_channels_hist) / 3), ha='center') ax.legend(loc='upper center') plt.xlim([0, 256]) ax.set_xticks([0, 32, 64, 96, 128, 160, 192, 224, 256]) ax.axes.get_yaxis().set_visible(False) plt.tight_layout() fig.set_size_inches(8, 4) plt.savefig('demo-image-histgram.png', dpi=100)
Original image histogram
With $28, 85, 170, 227$ as the dividing line, the histogram can be divided into five areas: black , shadow , exposure , highlight , and white . Among them, the exposure area retains the most details of the picture with moderate brightness, the shadows and highlights correspond to the darker and brighter areas of the photo, and the black and white parts have almost no details. When the entire histogram is too far to the left, it means underexposure , and when it is too far to the right, it means overexposure .
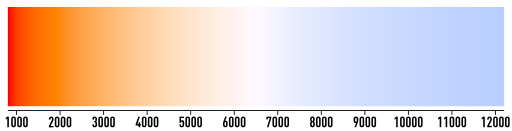
color temperature
Color temperature (Temperature) refers to the Kelvin temperature of the black body radiator that emits similar light from the light source in the photo. The lower the Kelvin temperature, the warmer the light, and the higher the Kelvin temperature, the colder the light, as shown in the following figure:
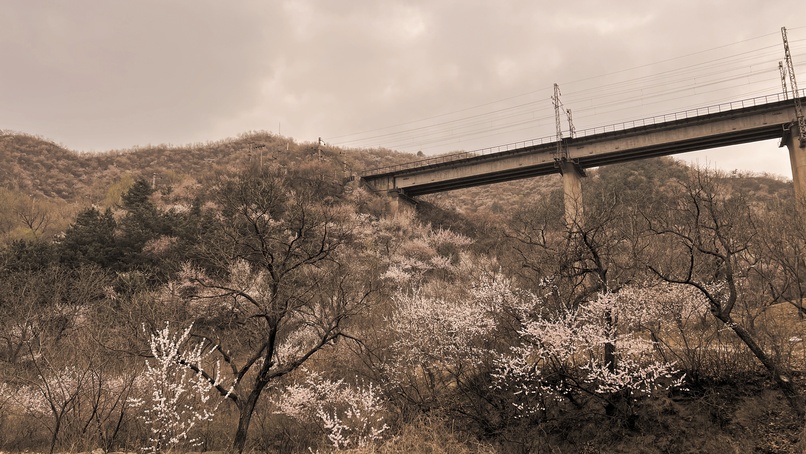
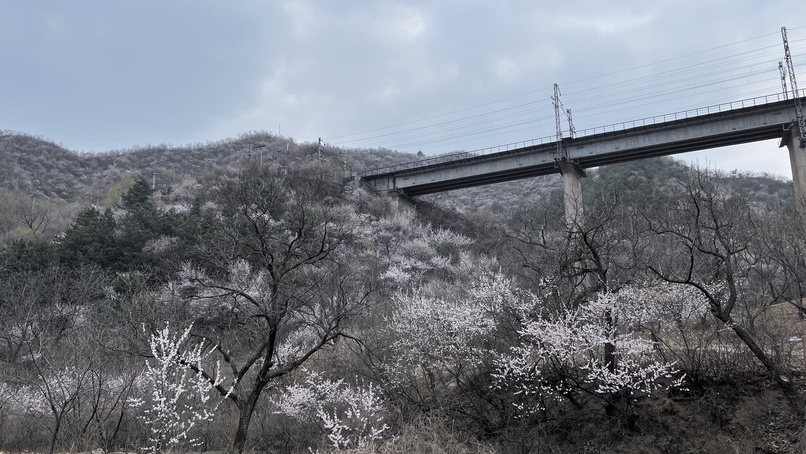
The comparison results of applying 5000K and 10000K color temperature to the picture are shown in the figure below:
color temperature code
import math import cv2 import numpy as np def __kelvin_to_rgb(kelvin: int) -> (int, int, int): kelvin = np.clip(kelvin, min_val=1000, max_val=40000) temperature = kelvin / 100.0 # 红色通道if temperature < 66.0: red = 255 else: # a + bx + c Log[x] /. # {a -> 351.97690566805693`, # b -> 0.114206453784165`, # c -> -40.25366309332127 # x -> (kelvin/100) - 55} red = temperature - 55.0 red = 351.97690566805693 + 0.114206453784165 * red \ - 40.25366309332127 * math.log(red) # 绿色通道if temperature < 66.0: # a + bx + c Log[x] /. # {a -> -155.25485562709179`, # b -> -0.44596950469579133`, # c -> 104.49216199393888`, # x -> (kelvin/100) - 2} green = temperature - 2 green = -155.25485562709179 - 0.44596950469579133 * green \ + 104.49216199393888 * math.log(green) else: # a + bx + c Log[x] /. # {a -> 325.4494125711974`, # b -> 0.07943456536662342`, # c -> -28.0852963507957`, # x -> (kelvin/100) - 50} green = temperature - 50.0 green = 325.4494125711974 + 0.07943456536662342 * green \ - 28.0852963507957 * math.log(green) # 蓝色通道if temperature >= 66.0: blue = 255 elif temperature <= 20.0: blue = 0 else: # a + bx + c Log[x] /. # {a -> -254.76935184120902`, # b -> 0.8274096064007395`, # c -> 115.67994401066147`, # x -> kelvin/100 - 10} blue = temperature - 10.0 blue = -254.76935184120902 + 0.8274096064007395 * blue \ + 115.67994401066147 * math.log(blue) return np.clip(red, 0, 255), np.clip(green, 0, 255), np.clip(blue, 0, 255) def __mix_color(v1, v2, ratio: float): return np.array((1.0 - ratio) * v1 + 0.5).astype(np.uint8) \ + np.array(ratio * v2).astype(np.uint8) def __keep_original_lightness(original_image, image): original_l = cv2.cvtColor(original_image, cv2.COLOR_BGR2HLS)[..., 1] h, l, s = cv2.split(cv2.cvtColor(image, cv2.COLOR_BGR2HLS)) return cv2.cvtColor(cv2.merge([h, original_l, s]), cv2.COLOR_HLS2BGR) def apply_temperature( image, temperature, keep_original_lightness: bool = True): b, g, r = cv2.split(image) n_b = np.clip(b.astype(np.single) - temperature, 0, 255).astype(np.uint8) n_r = np.clip(r.astype(np.single) + temperature, 0, 255).astype(np.uint8) ret_image = cv2.merge([n_b, g, n_r]) return __keep_original_lightness(image, ret_image) \ if keep_original_lightness else ret_image def apply_kelvin( image, kelvin: int, strength: float = 0.6, keep_original_lightness: bool = True): b, g, r = cv2.split(image) k_r, k_g, k_b = __kelvin_to_rgb(kelvin) n_r, n_g, n_b = __mix_color(r, k_r, strength), \ __mix_color(g, k_g, strength), __mix_color(b, k_b, strength) ret_image = cv2.merge([n_b, n_g, n_r]) return __keep_original_lightness(image, ret_image) \ if keep_original_lightness else ret_image img = cv2.imread('demo.jpg') cv2.imwrite('demo-color-temperature-cold.jpg', apply_kelvin(img, 5000)) cv2.imwrite('demo-color-temperature-cold.jpg', apply_kelvin(img, 10000))
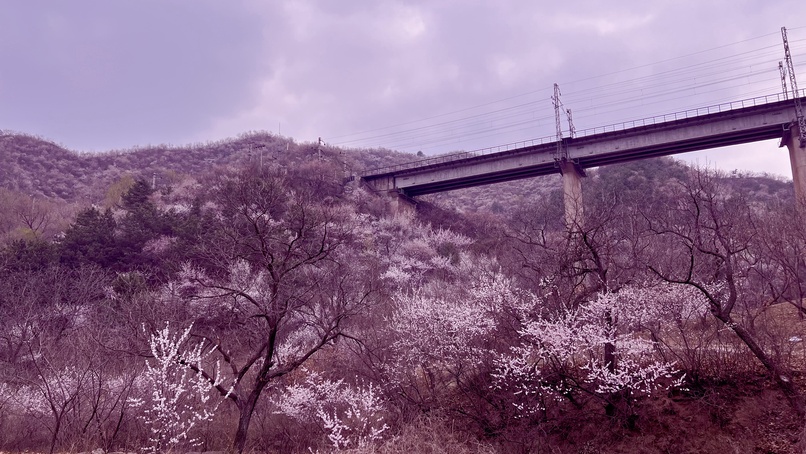
tone
Tint allows us to shift the color cast towards green or magenta for the purpose of neutralizing or increasing the color cast. The comparison results of applying -30 and +30 tones to the picture are shown in the following figure:
hue code
import cv2 import numpy as np def __keep_original_lightness(original_image, image): original_l = cv2.cvtColor(original_image, cv2.COLOR_BGR2HLS)[..., 1] h, l, s = cv2.split(cv2.cvtColor(image, cv2.COLOR_BGR2HLS)) return cv2.cvtColor(cv2.merge([h, original_l, s]), cv2.COLOR_HLS2BGR) def apply_tint(image, tint, keep_original_lightness: bool = True): b, g, r = cv2.split(image) n_g = np.clip(g.astype(np.single) + tint, 0, 255).astype(np.uint8) ret_image = cv2.merge([b, n_g, r]) return __keep_original_lightness(image, ret_image) \ if keep_original_lightness else ret_image img = cv2.imread('demo.jpg') cv2.imwrite('demo-color-tint-negative.jpg', apply_tint(img, -30)) cv2.imwrite('demo-color-tint-positive.jpg', apply_tint(img, +30))
This article is reproduced from: https://leovan.me/cn/2023/04/what-i-talk-about-when-i-talk-about-photo-retouching-colors-part-1/
This site is only for collection, and the copyright belongs to the original author.