Original link: https://mianao.info/2022/09/15/363508
The last blog https://mianao.info/2022/08/25/363507 wrote that I bought SOFFON ZigBee USB Dongle Plus (93 yuan) as a coordinator, a four-piece Jingyu (99 yuan) device, and also bought Got Tuya’s ZigBee zero fire switch single switch (60 yuan).
After installing the add-ons Zigbee2MQTT and Mosquitto broker, you can add ZigBee devices.
Add Peking fish four-piece set
The price-performance ratio of the four-piece set of Jingyu is still quite high, and there are more than 90 sets on Xianyu now. I had a lot of problems when I started to integrate with ZHA, and I switched to Zigbee2MQTT and it was perfect.
Zigbee2MQTT itself supports the Jingyu suite, which can be seen here:
https://github.com/Koenkk/zigbee-herdsman-converters/blob/master/devices/jxuan.js
But I don’t know why there are still some problems. Fortunately, some netizens have made patches:
-
Download: https://share.mianao.info/Blog/jingxuan.js
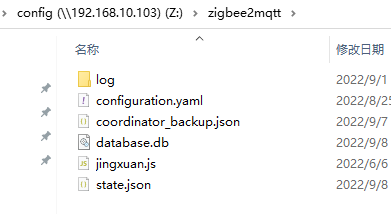
Its code is as follows:const fz = require('zigbee-herdsman-converters/converters/fromZigbee'); const tz = require('zigbee-herdsman-converters/converters/toZigbee'); const exposes = require('zigbee-herdsman-converters/lib/exposes'); const reporting = require('zigbee-herdsman-converters/lib/reporting'); const extend = require('zigbee-herdsman-converters/lib/extend'); const e = exposes.presets; const ea = exposes.access; const fzLocal = { WSZ01_on_off_action: { cluster: '65029', type: ['attributeReport'], convert: (model, msg, publish, options, meta) => { const clickMapping = {0: 'release', 1: 'single', 2: 'double', 3: 'hold'}; return {action: `${clickMapping[msg.data[1]]}`}; }, }, }; module.exports = [ // 人体传感器// 人传配对方式:长按重置键,网关发现后,每隔一秒按一次重置键{ zigbeeModel: ['wall pir'], model: 'PRZ01', vendor: 'J.XUAN', description: 'Human body movement sensor', fromZigbee: [fz.ias_occupancy_alarm_1_with_timeout, fz.battery], toZigbee: [], exposes: [e.occupancy(), e.battery_low(), e.battery()], }, // 无线开关{ zigbeeModel: ['JD-SWITCH\u000002'], model: 'WSZ01', vendor: 'J.XUAN', description: 'Wireless switch', supports: "action, battery, linkquality", fromZigbee: [fzLocal.WSZ01_on_off_action,fz.battery], toZigbee: [], exposes: [e.action(['release', 'single', 'double', 'hold']), e.battery()], }, // 插座{ zigbeeModel: ['00090bdc'], model: 'SPZ01', vendor: 'J.XUAN', description: 'plug', fromZigbee: [fz.on_off, fz.electrical_measurement, fz.metering], exposes: [e.switch(), e.power(), e.power_outage_memory().withAccess(ea.STATE_SET), e.energy()], toZigbee: [tz.on_off, tz.SPZ01_power_outage_memory], configure: async (device, coordinatorEndpoint, logger) => { const endpoint = device.getEndpoint(1); await reporting.bind(endpoint, coordinatorEndpoint, ['genOnOff', 'haElectricalMeasurement']); }, }, ] - Put the file into
config\zigbee2mqttin the Zigbee2MQTT configuration directory.
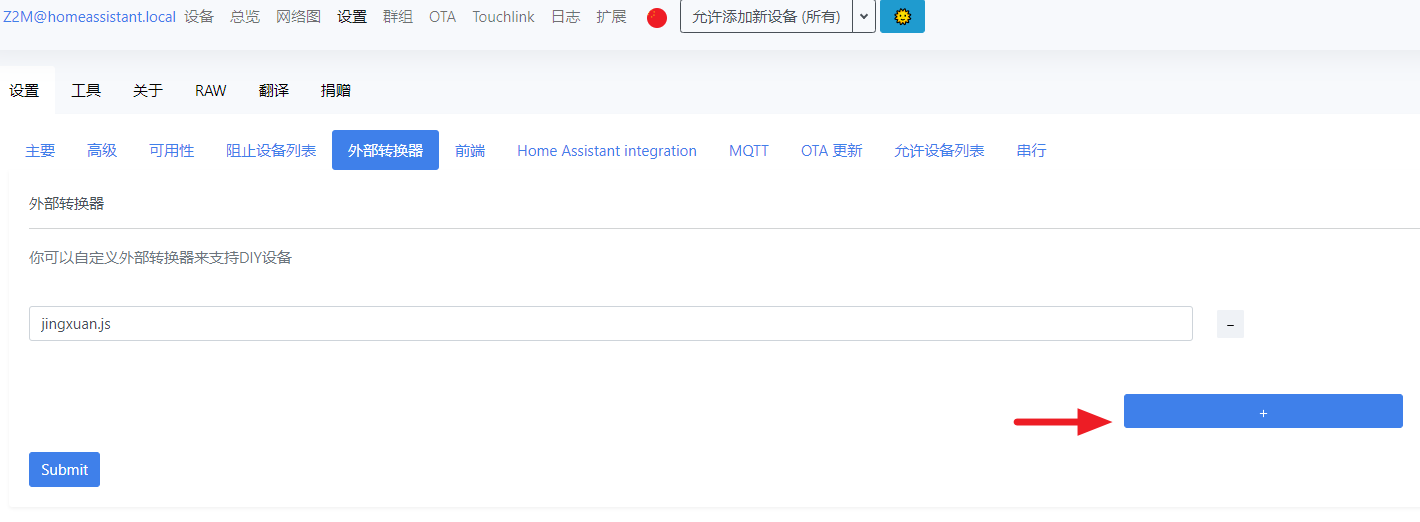
- Open the settings of the Zigbee2MQTT add-in and add
jingxuan.js.
- Add ZigBee devices.
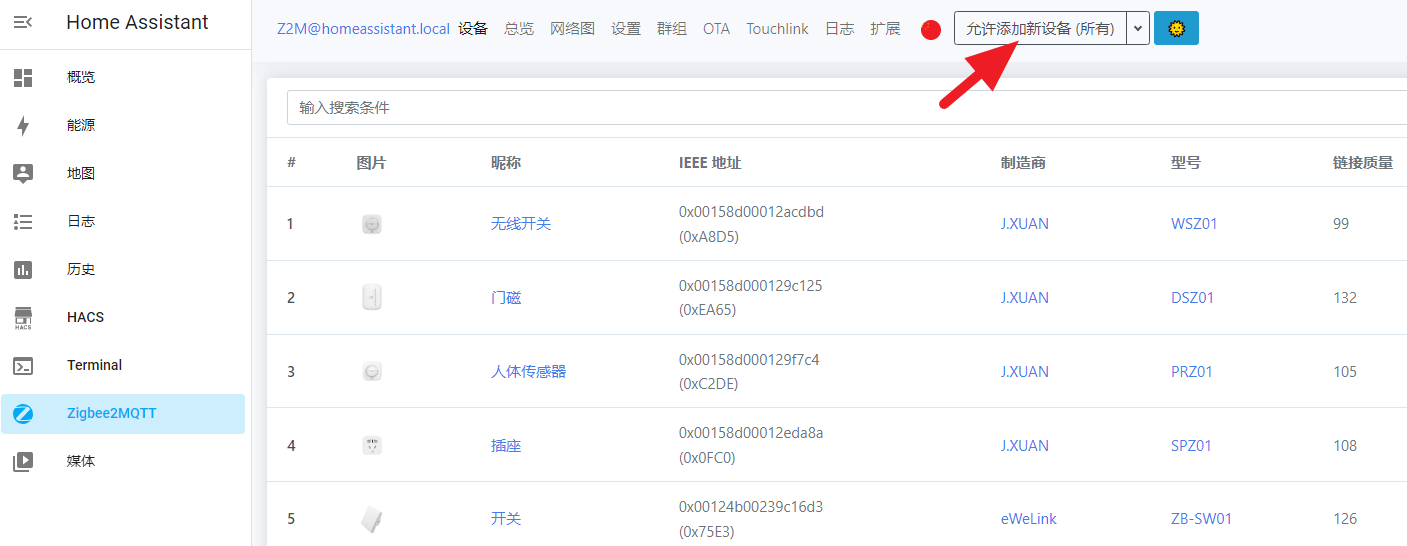
Open Zigbee2MQTT and click允许添加新设备;
Press the reset button or pairing button of the device and wait for the gateway Zigbee2MQTT to automatically discover; it is necessary to pay attention to the human body sensor. After the gateway is discovered, press the reset button every second until the pairing is completed.
Add another device
Open Zigbee2MQTT and click允许添加新设备; 
Tuya’s ZigBee zero-fire switch pairing is very simple, long press the switch, wait for the gateway Zigbee2MQTT to automatically discover, and the pairing is complete.
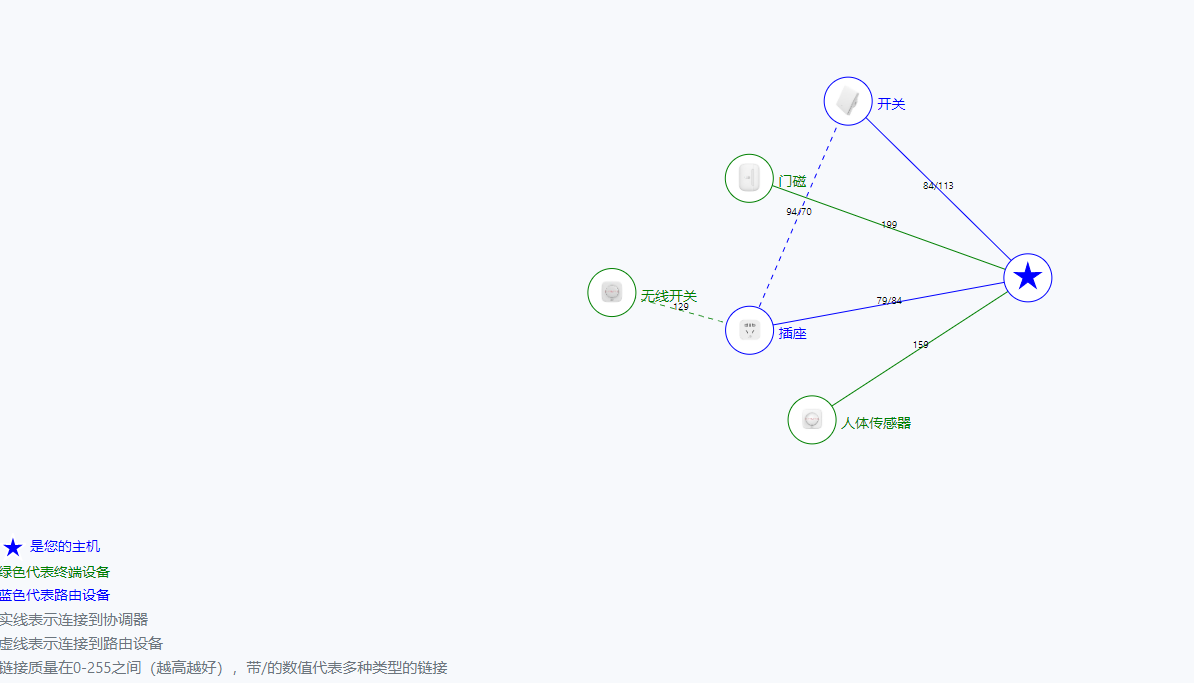
The Zigbee2MQTT network diagram shows the connection status of end devices, routing devices, and coordinators. 
Although there are many devices supported by Zigbee2MQTT, there are always new devices developed, and there are ways to add devices that are not currently supported on the official website:
https://www.zigbee2mqtt.io/advanced/support-new-devices/01_support_new_devices.html#_3-adding-converter-s-for-your-device
Add weather integration
Weather forecast is a very basic integration, but HomeAssistant doesn’t have one built in by default, so add it yourself.
The first is to go to the weather website to apply for a developer account and get an API. I applied for Caiyun Weather, which feels relatively simple.
https://dashboard.caiyunapp.com/
A brief introduction to the installation of Caiyun Weather Forecast:
- Enter the integration of HACS, click + in the lower right corner to search for
彩云天气, restart HomeAssistant after installation; - Enter the front-end of HACS, click the lower right corner + search for Colorfulclouds Weather Card, restart HomeAssistant after installation;
- Click System Configuration to enter Devices and Services , add integration in the lower right corner, search for
colorfulclouds, fill in the key applied for on the Caiyun website, and fill in your own location with latitude and longitude;
Check here: https://jingweidu.bmcx.com - Add a weather forecast card to the overview .
renew
Now HomeAssistant update is relatively simple, as long as you access the foreign network smoothly, whether it is the system, integration, add-ons, etc., there will be a prompt when there is an update, just click to install it. 
The system is updated frequently in the first half of each month, and it is recommended to update the system at least once in the second half of each month.
Modify the transmit power of SOFFON ZigBee USB Dongle Plus
The default transmission power of SOFFON ZigBee USB Dongle Plus is 5. We always hope that the signal is better, so we need to modify the transmission power. In fact, I have it in the last article, but I didn’t write it separately.
SOFFON officially gave a manual, which specifically wrote how to modify the transmit power, but I found it inconvenient to read:
Method 1: Download the firmware, modify the transmit power value of znp.syscfg, and then burn it to the device. The firmware given is hex, I don’t know what software can be used to open the modification, and the document does not say;
Method 2: Modify through serial port commands, but only give the 4-bit value sent: 01 21 14 power value, I don’t know if there are function commands, and the document doesn’t say it;
It’s a bit risky, so I didn’t try it.
Zigbee2MQTT officially gave the configuration to modify the transmit power, it is very convenient to just add it in the Zigbee2MQTT configuration options:
zigbee2mqtt.io/guide/configuration/adapter-settings.html#transmitter-power
advanced: # Optional: Transmit power setting in dBm (default: 5). # This will set the transmit power for devices that bring an inbuilt amplifier. # It can't go over the maximum of the respective hardware and might be limited # by firmware (for example to migrate heat, or by using an unsupported firmware). # For the CC2652R(B) this is 5 dBm, CC2652P/CC1352P-2 20 dBm. transmit_power: 5
This article is reprinted from: https://mianao.info/2022/09/15/363508
This site is for inclusion only, and the copyright belongs to the original author.