Now is the time to explain how to install Ubuntu 22.04 (LTS), Webmin, Nginx, MariaDB, PHP-FPM, Perl-Fastcgi to DigitalOcean’s VPS.
In 2015, I released Install Nginx, MySQL, PHP-FPM, Perl-Fastcgi to Ubuntu 14.04 LTS
In 2017 I released a VPS with Ubuntu 16.04, Webmin, Nginx, MariaDB, PHP7.1-FPM, Perl-Fastcgi to Vultr.com
In 2018, it released VPS to install Ubuntu 18.04, Webmin, Nginx, MariaDB, PHP7.2-FPM, Perl-Fastcgi to Linode
In 2020, released VPS to install Ubuntu 20.04, Webmin, Nginx, MariaDB, PHP7.4-FPM, Perl-Fastcgi to DigitalOcean
The host where this site is located is placed on DigitalOcean , and the new Ubuntu 22.04 has been released for almost a month, so DavidYin will introduce the installation process of the new VPS server. The software included is as follows:
- Ubuntu 22.04 LTS
- Webmin 1.991
- Mariadb 10.6.7
- Nginx 1.18.0
- php8.1-FPM
- Perl Fastcgi
- SSL
- HTTP2
- ZeroSSL
Disclaimer: The entire installation process is just personal experience and does not contain any guarantees. The user is responsible for the security of the server and data.
first part
DigitalOcean VPS Selection and Installation
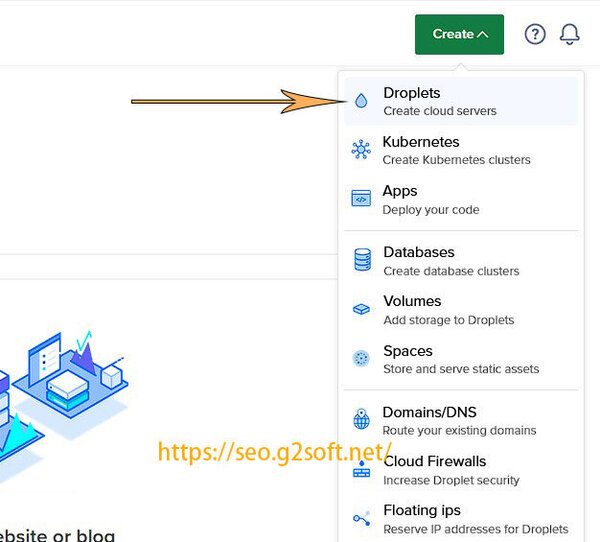
Log in to the backend of DigitalOcean , and then select one in Projecs, if not, create a new one. Project is used to organize resources, such as multiple vps, and various other services. Click Create in the upper right corner to open the drop-down menu and select Droplets. Droplets is the nickname for DigitalOcean’s VPS. The name of this service provider is called Digital Ocean, so each VPS is like a drop of water in the ocean. That’s what it means. Then the option to create a new VPS will appear.
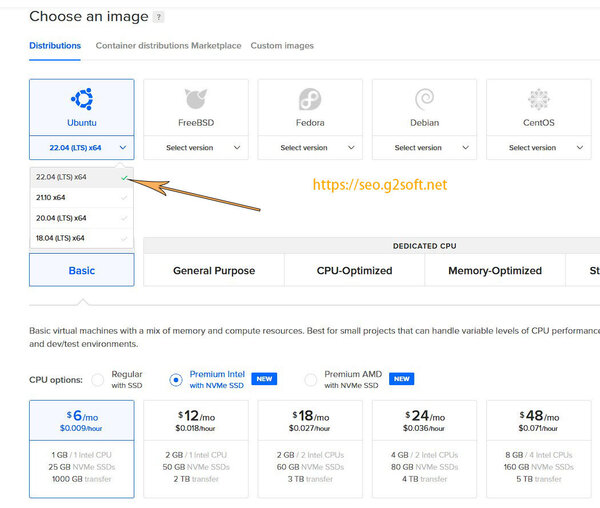
 First, in the image selection section, click the Ubuntu version selection drop-down menu, select the Ubuntu 22.04 (LTS) x64 version, then Plan, select the basic plan, Basic, there are three different types of CPU, I usually choose Premium CPU ( There are comparisons before, Premium CPU performance is better ), both Intel and AMD can, see your own preferences. After that, choose the smallest one among different configurations, which is fine for the time being, including 1CPU, 1GB RAM, 25GB of NVMe SSD storage, and 1000GB of traffic. If you need to expand in the future, you can directly upgrade the plan without reinstalling.
After that, I choose the location of the computer room. For example, I chose the No. 3 computer room in San Francisco here. VPC network options are default. In terms of authentication, the default is to use SSH Key to authenticate. For simplicity, I chose a password, and then entered the root password of my choice below. There will be ways to enhance security later.
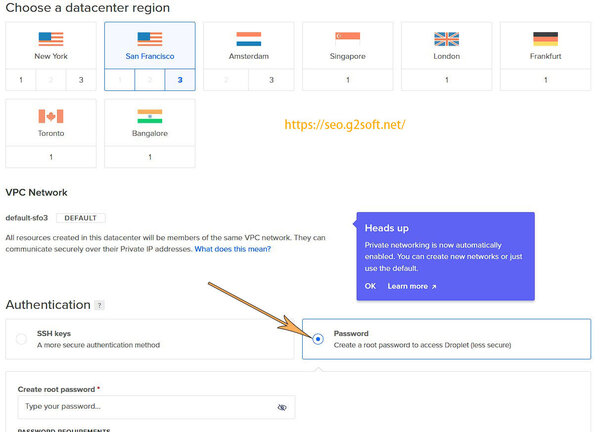 There are some additional installation options to choose from later, I chose IPv6 support, and Monitoring, both free service options. The last part is to ask how many VPS with the same configuration you want to generate, of course, choose 1, and then I gave a host name, fig, meaning fig. DigitalOcean can use tags to manage VPS, but I didn’t use it, so I used Project to organize. Here I chose the Fruit plan that I preset before. For now, no backup is needed, so just leave it alone and click the Create Droplet button.
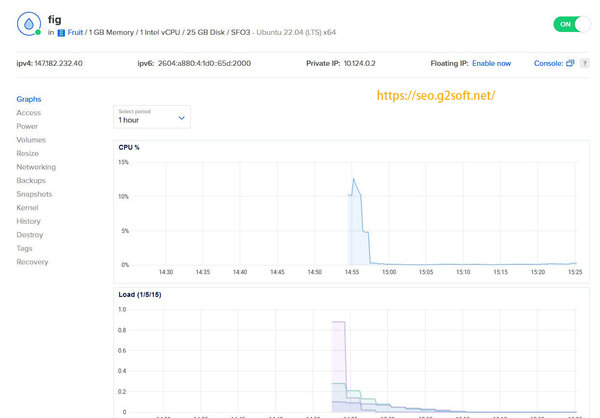
After about ten seconds of waiting, the VPS is ready and ready to use. You can see this is the case in the Fruit Project.
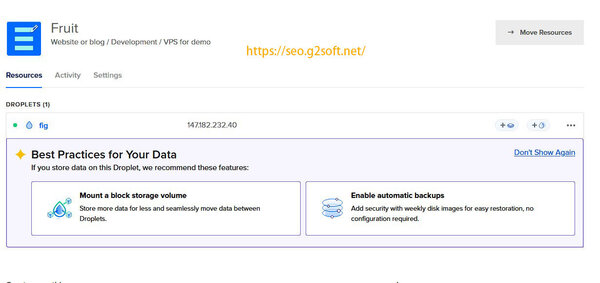 Click on this VPS to see detailed information. These statistics such as CPU, Load, Memory, Disk I/O, Disk Usage, Bandwidth, etc. are the result of selecting the Monitoring option above. If not selected, these monitoring information will not be seen here.
Note: The IP address of 147.182.232.40 is only used for example and is not used in practice. The following introduction will use this IP address as an example, please do not try to access it.
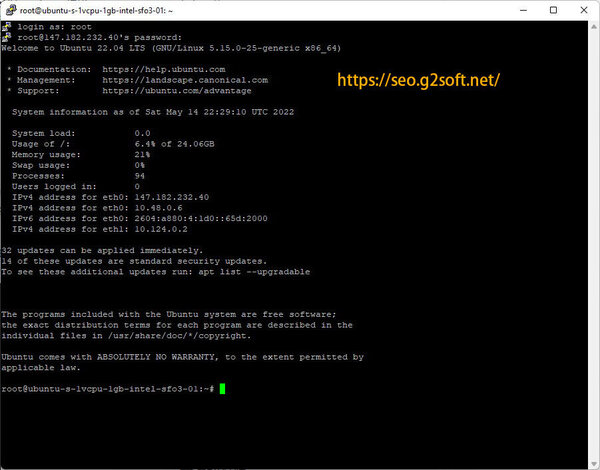
With this information, it’s time to connect to the VPS, I’m using the Putty tool. Just use the root password you set before. After logging in successfully, restart once.
At present, this VPS is a clean server system of DigitalOcean , and only SSH service is installed on it.
Next, DavidYin will introduce in four parts, how to install Webmin control panel, Nginx Web server, MariaDB database server, php8.1-FPM, Perl-Fastcgi and configure SSL certificate on Ubuntu 22.04 LTS server system.
- The first part installs the DigitalOcean VPS bare system
- The second part installs the Webmin control panel, SSH security settings
- The third part installs the Nginx web server, installs the MariaDB server
- The fourth part installs php8.1-fpm, sets up the host, and issues a free SSL certificate
- The fifth part configures the https host and installs perl-fastcgi
This article is reprinted from: https://seo.g2soft.net/2022/05/14/ubuntu-2204-lts-webmin-nginx-part1.html
This site is for inclusion only, and the copyright belongs to the original author.
