Install Ubuntu 22.04 LTS, Webmin, Nginx, MariaDB, PHP-FPM, Perl-Fastcgi to DigitalOcean VPS.
In the first part, David Yin explained how to create a new VPS at DigitalOcean. And complete the basic Ubuntu 22.04 LTS system.
The second part describes how to install the Webmin hosting control panel, SSH security settings, time zone settings and adding new users.
The following DavidYin will explain how to install the Nginx web server and the MairaDB database server with the newly added user before.
the third part
Install Nginx web server
The current Nginx version of the Ubuntu 22.04 LTS server version is still the Legacy version, which can be installed directly. The latest version is 1.18.0.
Enter the command to install.
sudo apt install nginx
After the installation is complete, you can look at the installed version and compilation information
davidyin@fig:~$ nginx -V nginx version: nginx/1.18.0 (Ubuntu) built with OpenSSL 3.0.2 15 Mar 2022 TLS SNI support enabled configure arguments: --with-cc-opt='-g -O2 -ffile-prefix-map=/build/nginx-9P0wNJ/nginx-1.18.0=. -flto=auto -ffat-lto-objects -flto=auto -ffat-lto-objects -fstack-protector-strong -Wformat -Werror=format-security -fPIC -Wdate-time -D_FORTIFY_SOURCE=2' --with-ld-opt='-Wl,-Bsymbolic-functions -flto=auto -ffat-lto-objects -flto=auto -Wl,-z,relro -Wl,-z,now -fPIC' --prefix=/usr/share/nginx --conf-path=/etc/nginx/nginx.conf --http-log-path=/var/log/nginx/access.log --error-log-path=/var/log/nginx/error.log --lock-path=/var/lock/nginx.lock --pid-path=/run/nginx.pid --modules-path=/usr/lib/nginx/modules --http-client-body-temp-path=/var/lib/nginx/body --http-fastcgi-temp-path=/var/lib/nginx/fastcgi --http-proxy-temp-path=/var/lib/nginx/proxy --http-scgi-temp-path=/var/lib/nginx/scgi --http-uwsgi-temp-path=/var/lib/nginx/uwsgi --with-compat --with-debug --with-pcre-jit --with-http_ssl_module --with-http_stub_status_module --with-http_realip_module --with-http_auth_request_module --with-http_v2_module --with-http_dav_module --with-http_slice_module --with-threads --add-dynamic-module=/build/nginx-9P0wNJ/nginx-1.18.0/debian/modules/http-geoip2 --with-http_addition_module --with-http_gunzip_module --with-http_gzip_static_module --with-http_sub_module
Enter the IP address in your browser and you will see the default Nginx web page.
Install MariaDB database server
It is actually a MySQL server. Currently, the default MariaDB version included in the Ubuntu 22.04 LTS software repository is 10.6.7. This version is one of the stable versions maintained by MariaDB. In my superficial opinion, these versions above 10.4 All are stable versions.
So it can be installed directly.
Enter the install command.
sudo apt install mariadb-server
After the installation is complete, you need to modify the MySQL default root user password. The default is an empty password.
sudo mysql_secure_installation
The settings during command execution are as follows:
davidyin@fig:~$ sudo mysql_secure_installation NOTE: RUNNING ALL PARTS OF THIS SCRIPT IS RECOMMENDED FOR ALL MariaDB SERVERS IN PRODUCTION USE! PLEASE READ EACH STEP CAREFULLY! In order to log into MariaDB to secure it, we'll need the current password for the root user. If you've just installed MariaDB, and haven't set the root password yet, you should just press enter here. Enter current password for root (enter for none): OK, successfully used password, moving on... Setting the root password or using the unix_socket ensures that nobody can log into the MariaDB root user without the proper authorisation. You already have your root account protected, so you can safely answer 'n'. Switch to unix_socket authentication [Y/n] n ... skipping. You already have your root account protected, so you can safely answer 'n'. Change the root password? [Y/n] New password: Re-enter new password: Password updated successfully! Reloading privilege tables.. ... Success! By default, a MariaDB installation has an anonymous user, allowing anyone to log into MariaDB without having to have a user account created for them. This is intended only for testing, and to make the installation go a bit smoother. You should remove them before moving into a production environment. Remove anonymous users? [Y/n] ... Success! Normally, root should only be allowed to connect from 'localhost'. This ensures that someone cannot guess at the root password from the network. Disallow root login remotely? [Y/n] ... Success! By default, MariaDB comes with a database named 'test' that anyone can access. This is also intended only for testing, and should be removed before moving into a production environment. Remove test database and access to it? [Y/n] - Dropping test database... ... Success! - Removing privileges on test database... ... Success! Reloading the privilege tables will ensure that all changes made so far will take effect immediately. Reload privilege tables now? [Y/n] ... Success! Cleaning up... All done! If you've completed all of the above steps, your MariaDB installation should now be secure. Thanks for using MariaDB!
In the above process, you need to set your own password. Then go back to the Webmin control panel, on the left: Refresh Modules , after a little time, the Webmin system automatically found that I have installed MySQL Databse Server .
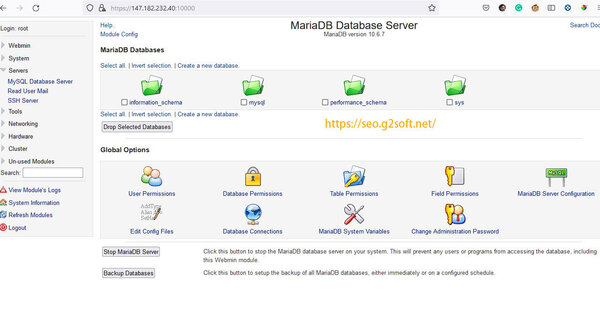
Here, it can be used to add new databases, new Mysql users, etc., all of which are used when adding websites, such as WordPress, in the future.
So far the installation of the two servers has been completed, the next step is to introduce the installation of php8.1-fpm and Perl-fastcgi.
- The first part installs the DigitalOcean VPS bare system
- The second part installs the Webmin control panel, SSH security settings
- The third part installs the Nginx web server, installs the MariaDB server
- The fourth part installs php8.1-fpm, sets up the host, and issues a free SSL certificate
- The fifth part configures the https host and installs perl-fastcgi
This article is reprinted from: https://seo.g2soft.net/2022/05/15/ubuntu-2204-lts-webmin-nginx-part3.html
This site is for inclusion only, and the copyright belongs to the original author.