Original link: https://lepture.com/zh/2023/free-email-provider
Cloudflare Email Routing has been around for a while. I switched my personal email ([email protected]) from Google Workspace to Cloudflare Email Routing today and saved $6/month.
We know that Cloudflare Email Routing can receive emails and forward them to another email address you specify, but it cannot send emails. In this case, we cannot use our own personal domain name mailbox. So we need to match a plan so that we can use our own domain name to send emails. So I registered another Gmail to send emails.
Here is the whole process of my migration:
backup mail
First of all, we need to back up the emails in the mailbox of the personal domain name. If you don’t have any important emails, you don’t need to back them up. It’s best to make a backup, though. Here I choose to import emails into my newly registered Gmail. If you already have a @gmail.com email address, this step can be omitted. But I still signed up for a brand new Gmail, which is more refreshing.
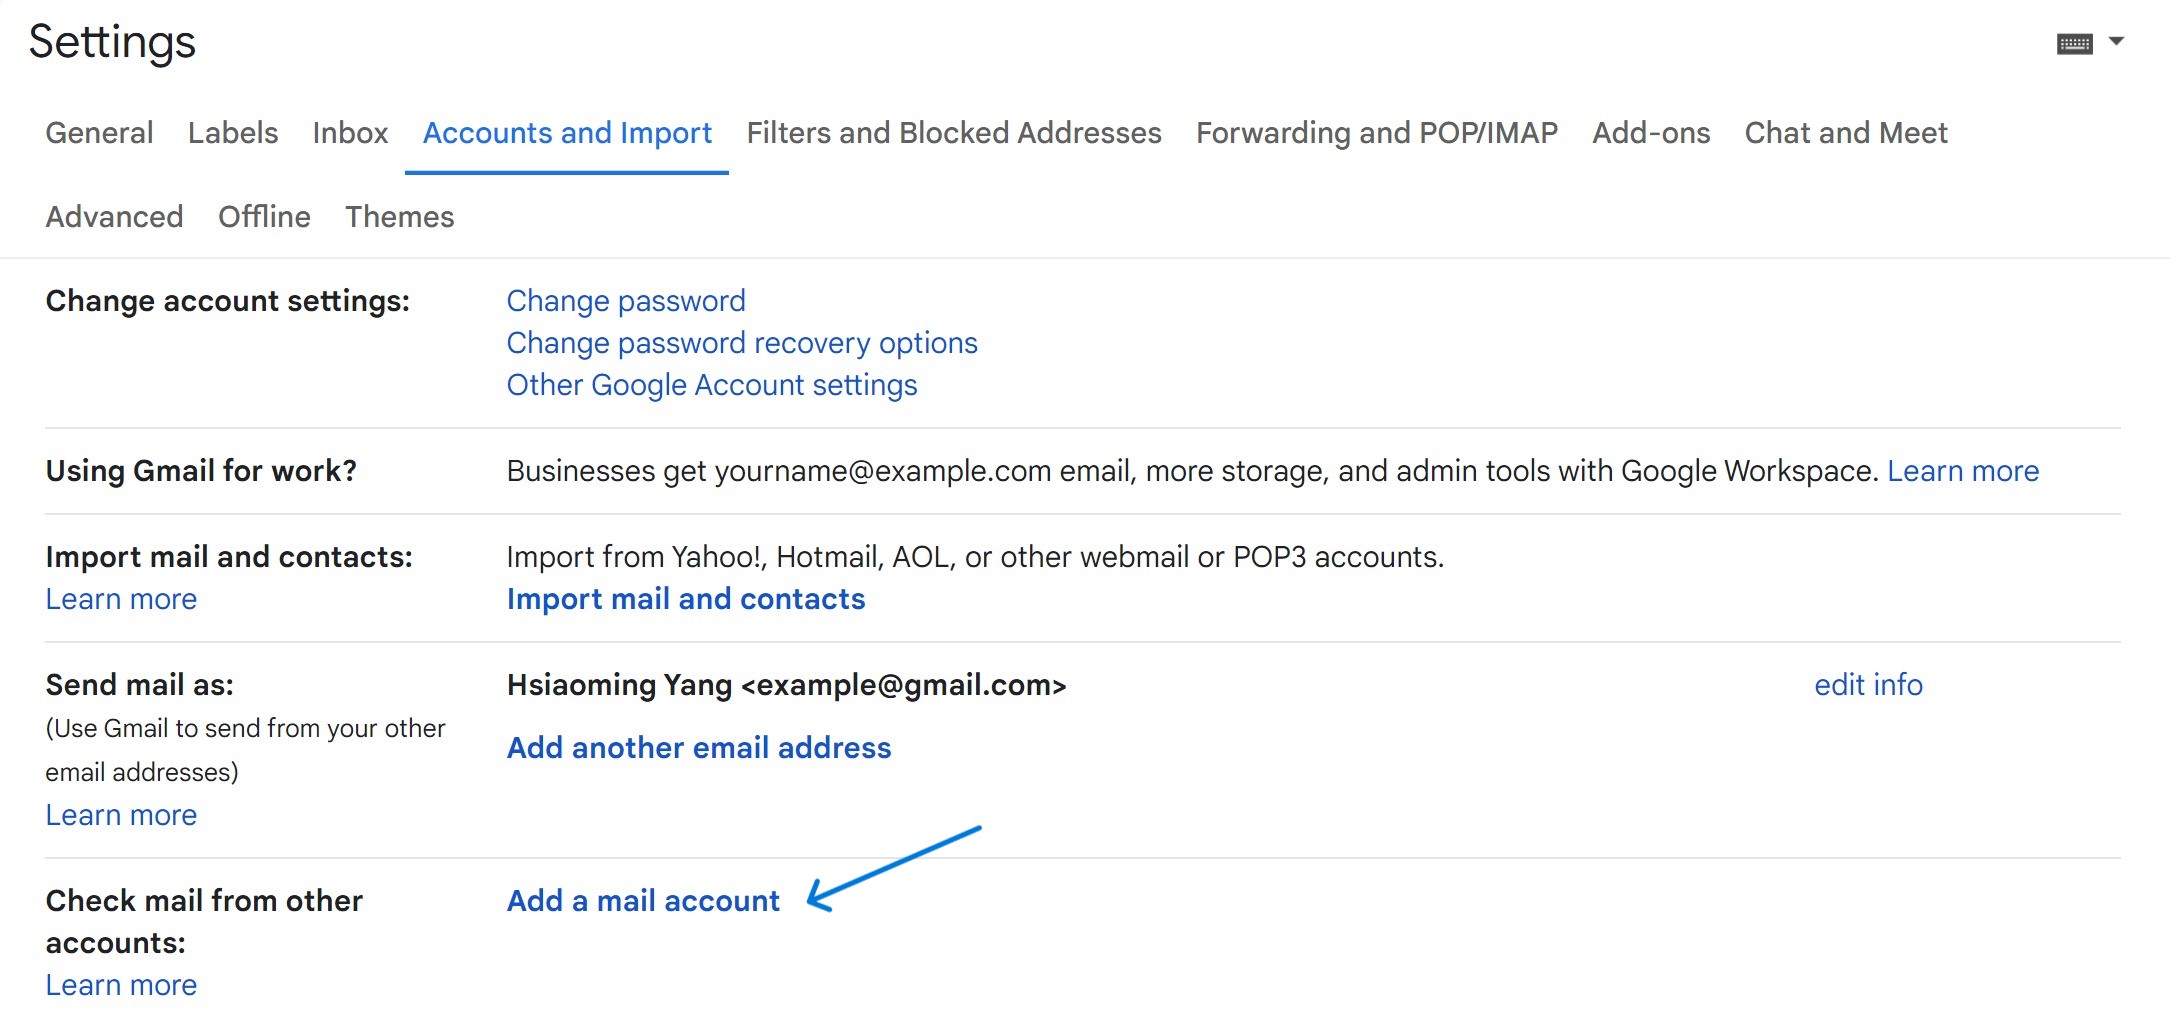
Enter Gmail settings, select Accounts and Import , find Check mail from other accounts below, and click Add a mail account . Enter your own email address in the pop-up dialog box, and follow the guidance to enter the page for filling in the POP service.
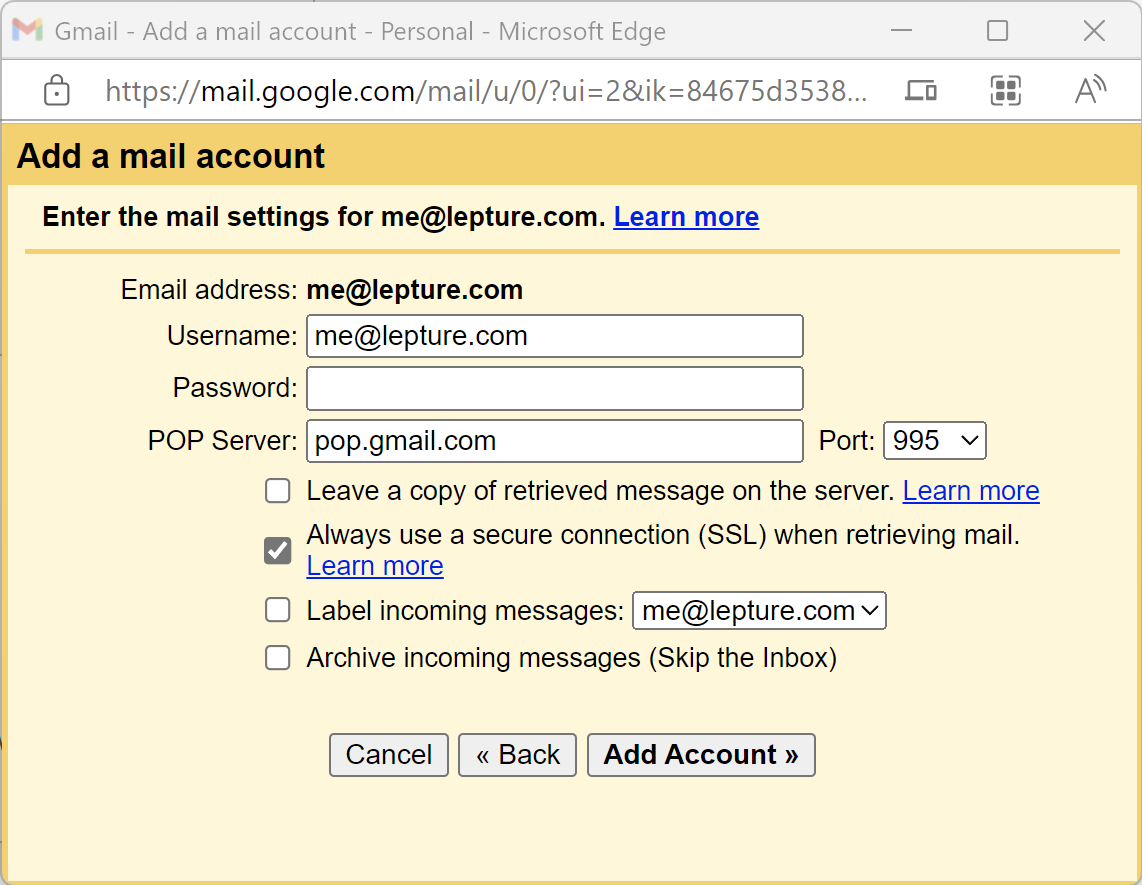
According to the official documentation , the information you need to fill in:
- Username: your email
- Password: your email password
- POP server: pop.gmail.com
- Port: 995
- SSL Required: Yes
important
You may not be able to successfully add the email account. Error messages may appear here:
Server denied POP3 access for the given username and password.
We need to enable the POP3 function in the personal domain mailbox (Google Workspace Gmail) first. Go to your personal mailbox settings, select Forwarding and POP/IMAP , and then enable the POP service.

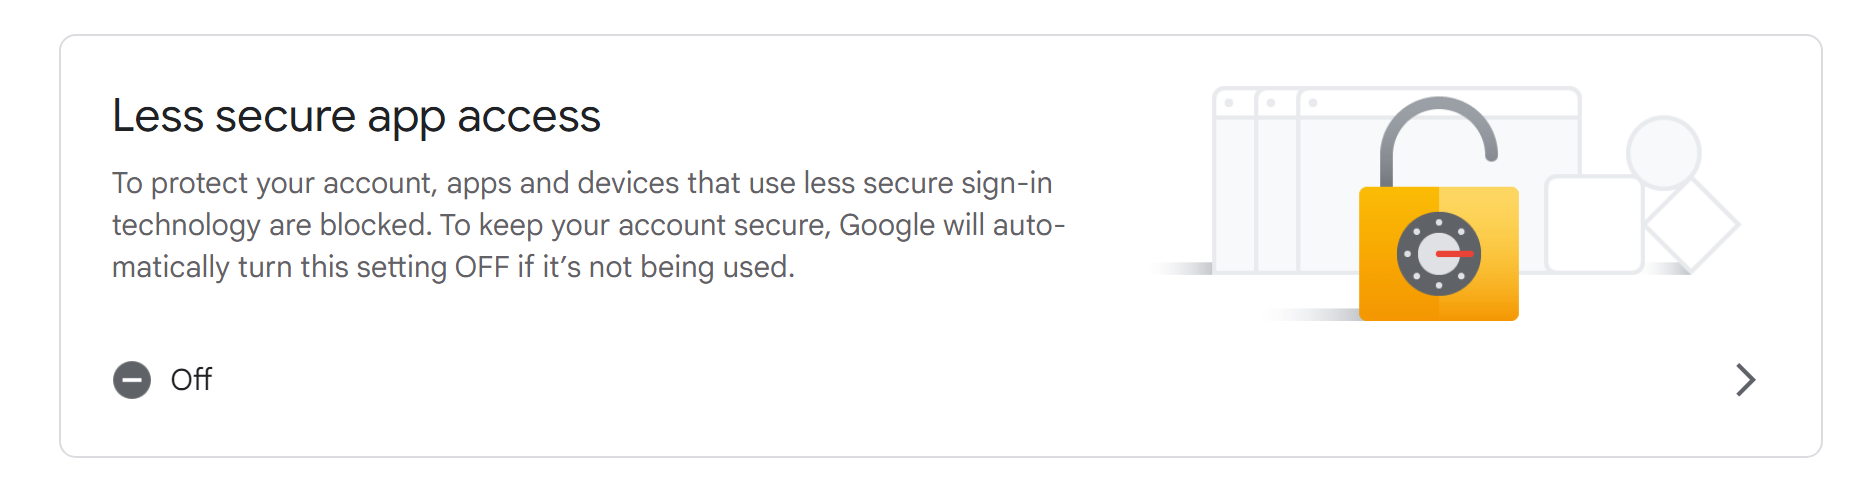
But it may still not be successful, which is caused by Gmail’s security mechanism. Although the official document says that the login password of the email address is sufficient for the password, it is not. Here are two solutions:
- Use App password
- Modify account security level
In the following chapters, we will introduce how to create an App password. Here we will first introduce how to modify the account security level. Because our Google workspace account will eventually be canceled, so modifying the account security level has no effect. Enter the account security center and activate the Less secure app access .
Try adding the POP email account again and it should work. You may need to wait a while for all emails to be backed up. Maybe get some sleep and continue tomorrow?
Enable Cloudflare Email Routing
After the email is backed up, you can start Cloudflare Email Routing. Go into Cloudflare, select your domain name, and go to the Email Routing settings.
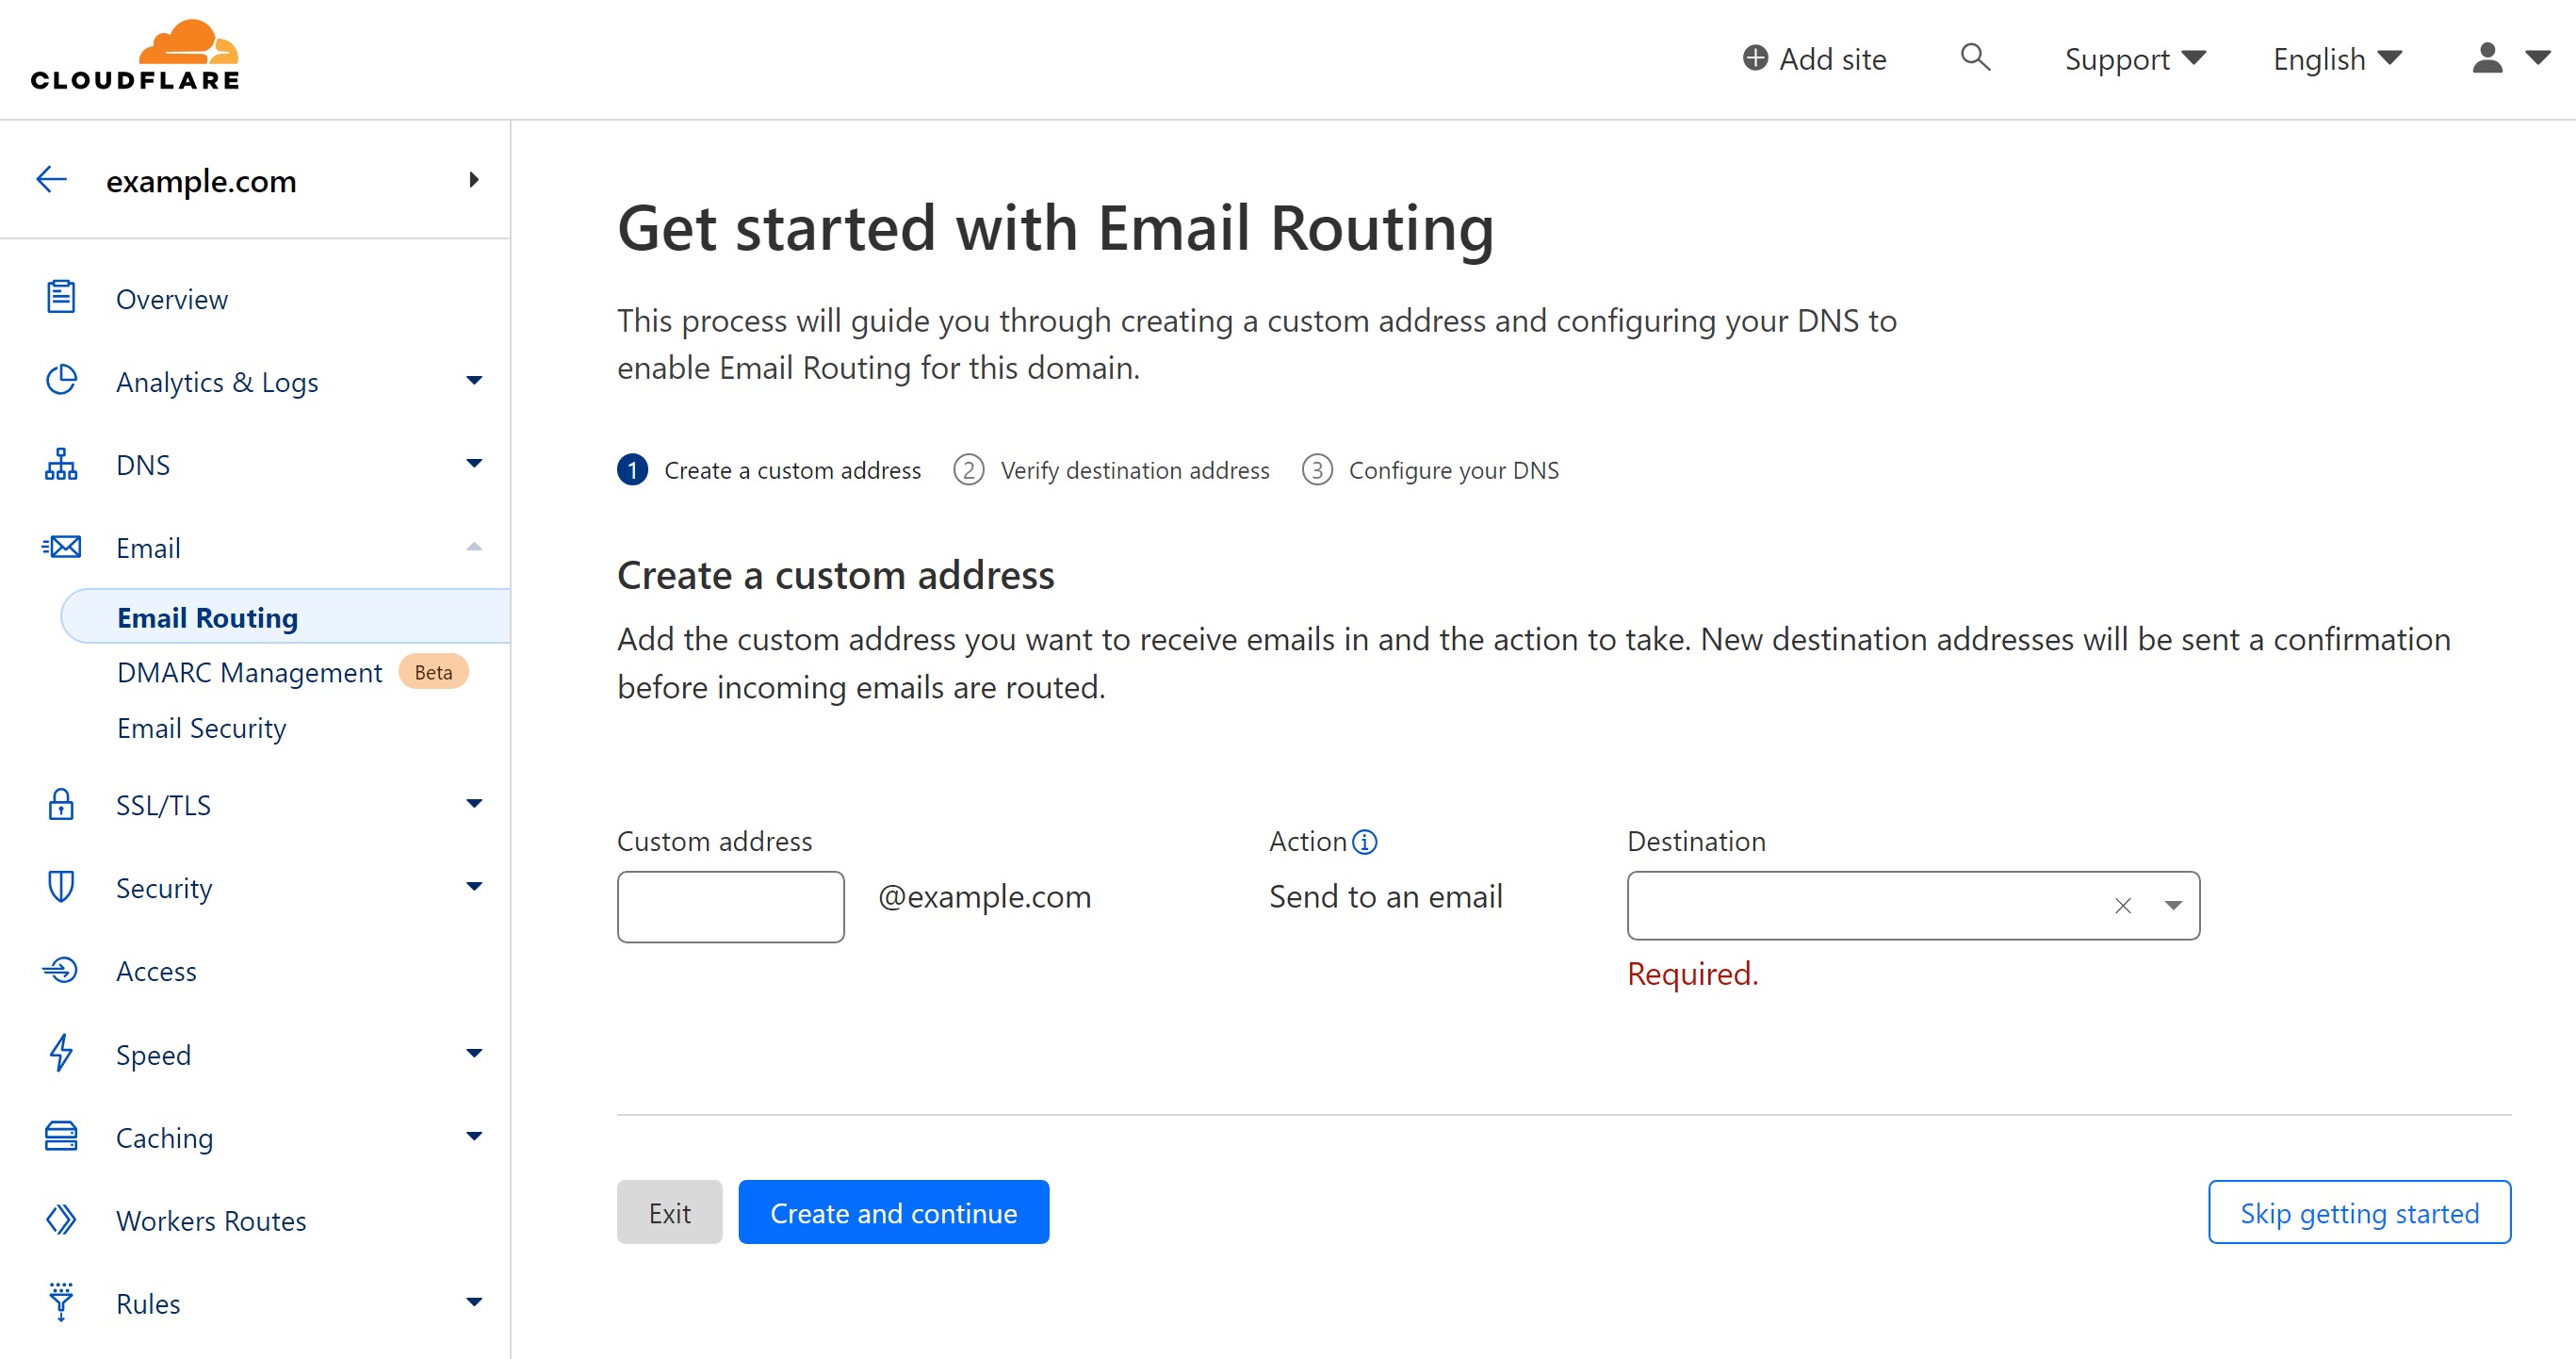
For example, the Gmail you registered is called [email protected] , and your personal domain email address is [email protected] . The above form can be filled in:
- Custom address:
me - Destination:
[email protected]
Then according to Cloudflare’s prompt, Cloudflare Email Routing can be enabled after three steps. Now, when someone sends an email to [email protected] , your [email protected] mailbox will receive the email.
Hint
Remember to modify the SPF information and add the SPF of Gmail:
v=spf1 include:_spf.google.com include:_spf.mx.cloudflare.net ~all
Personal domain sender
Finally we need to get the sender to use our own domain name. This step is somewhat similar to the spare parts mailing above. Go to Gmail’s settings center and select Accounts and Import . Choose to add a new mailbox in Send mail as .
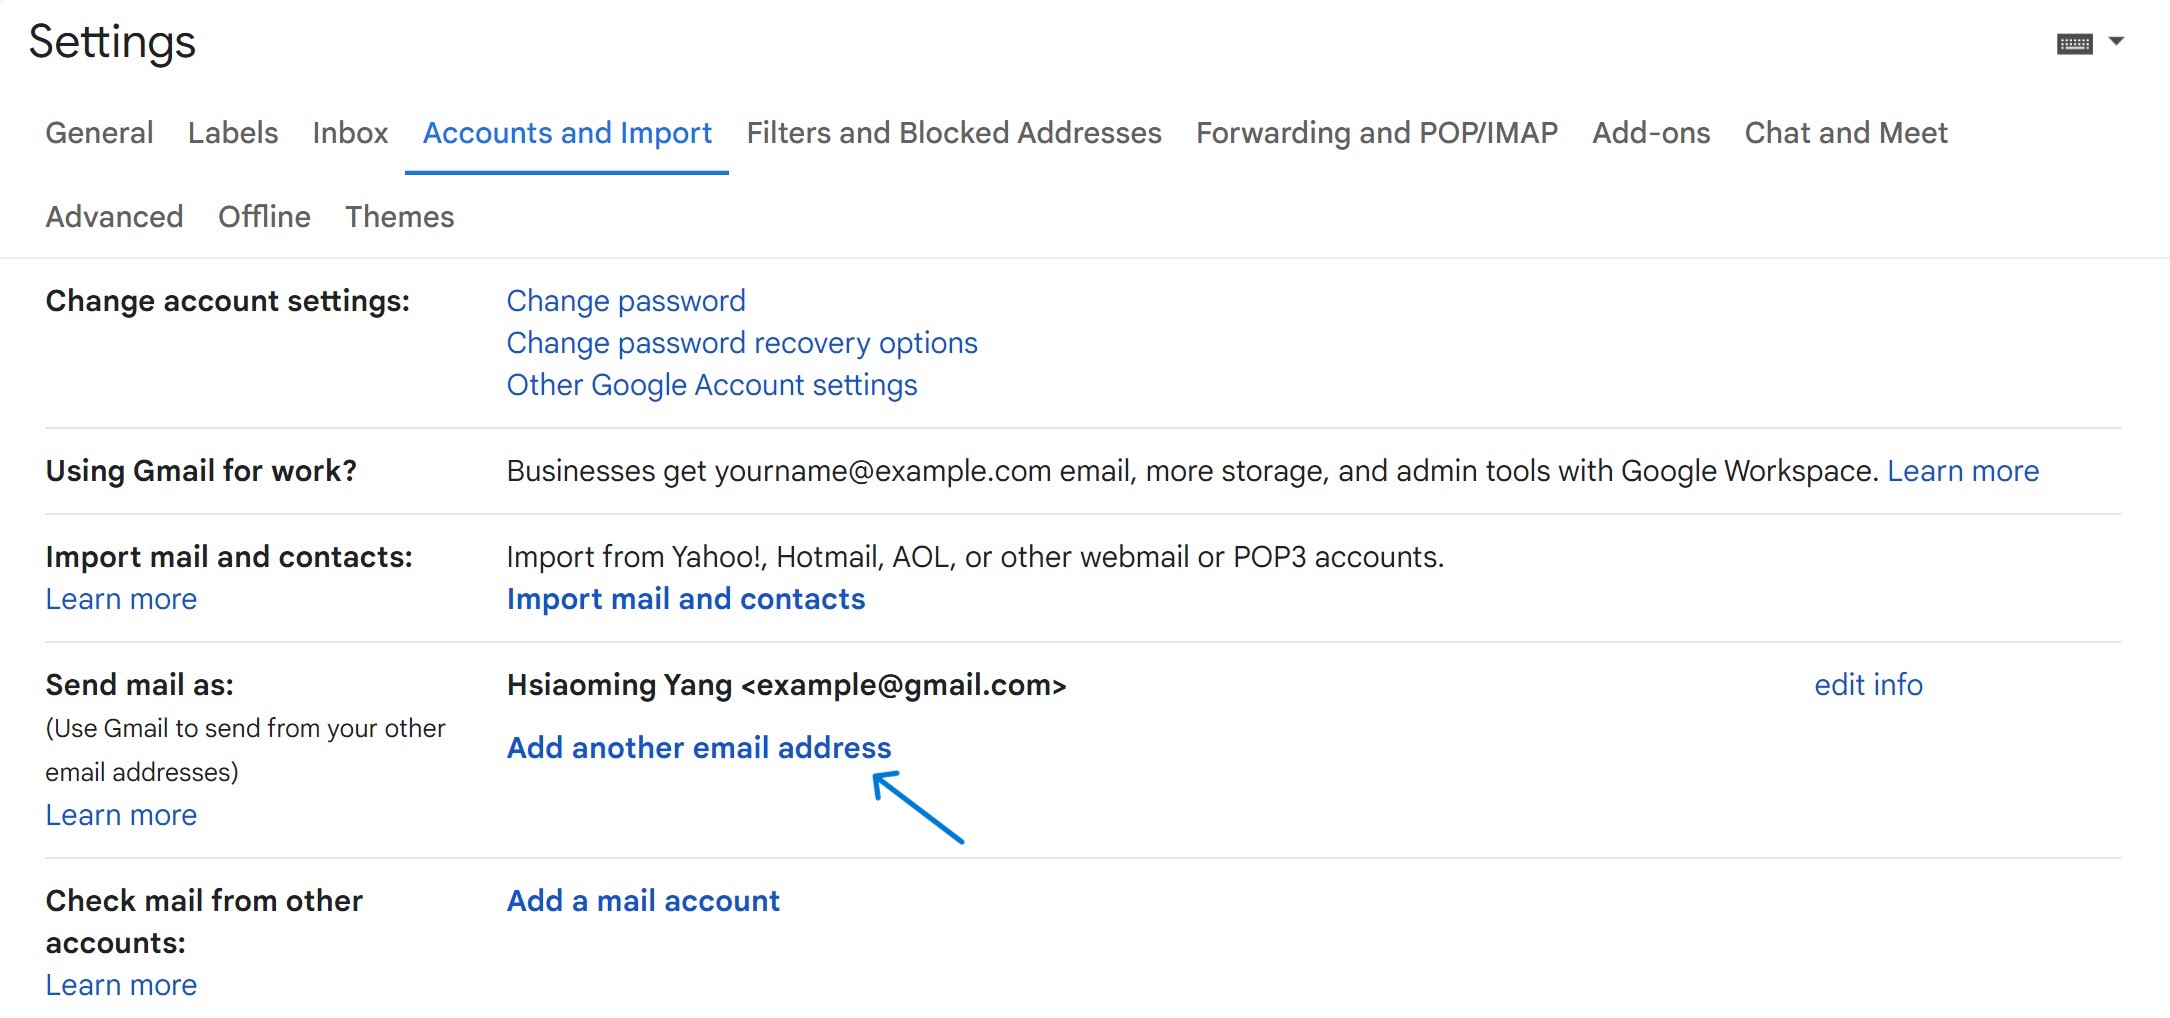
For example, if I add my own email address [email protected] , and follow the prompts step by step, I will enter the final SMTP server settings:
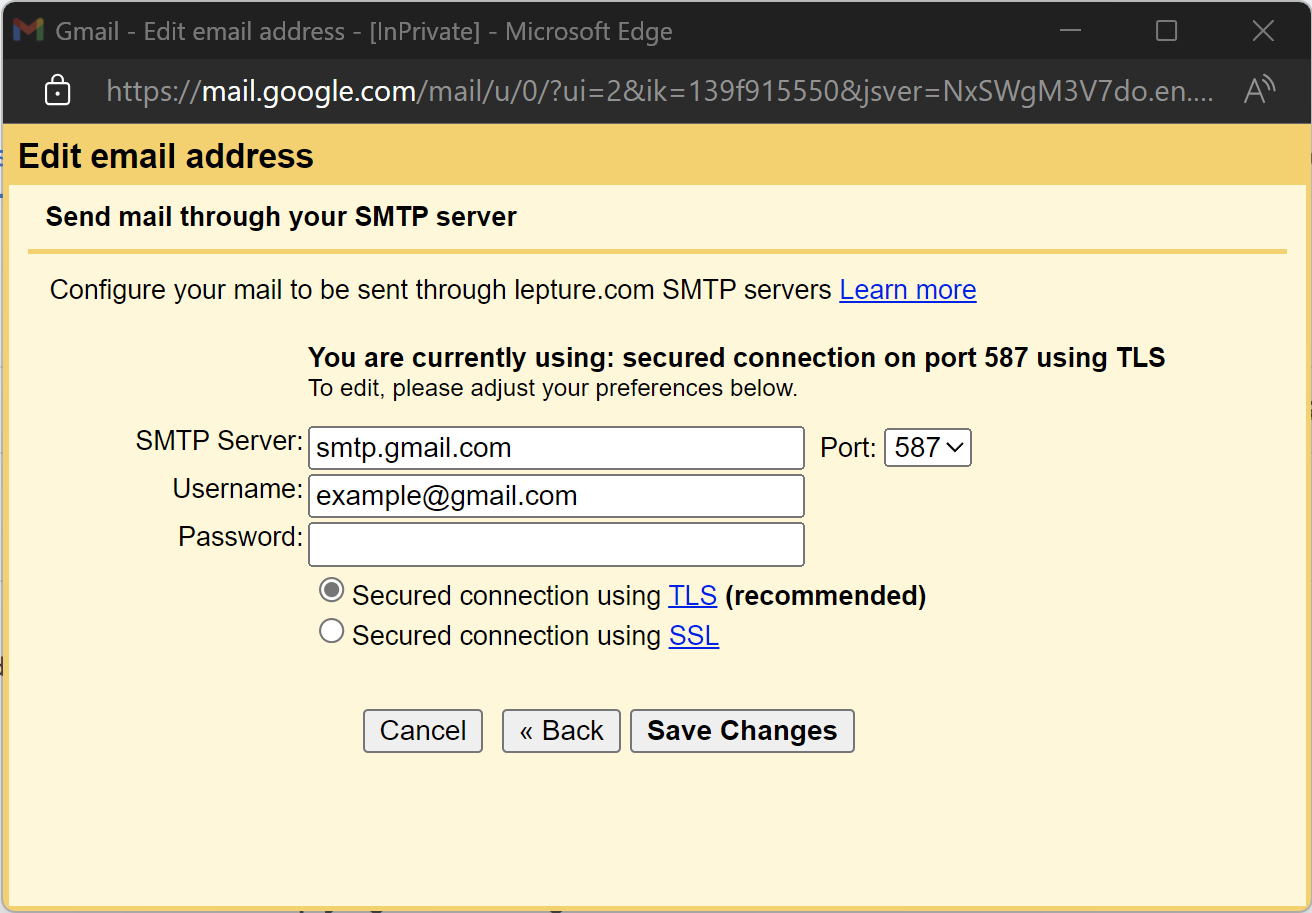
We need to set:
- SMTP Server: smtp.gmail.com
- Port: 587
- Username: your Gmail mailbox (the mailbox you are currently using)
- Password: Wait a minute, you need to create an App password here
App passwords
In the last step above, you need to fill in a password. Due to the security mechanism of Gmail, you cannot directly fill in the account password. Here you need to use an App password.
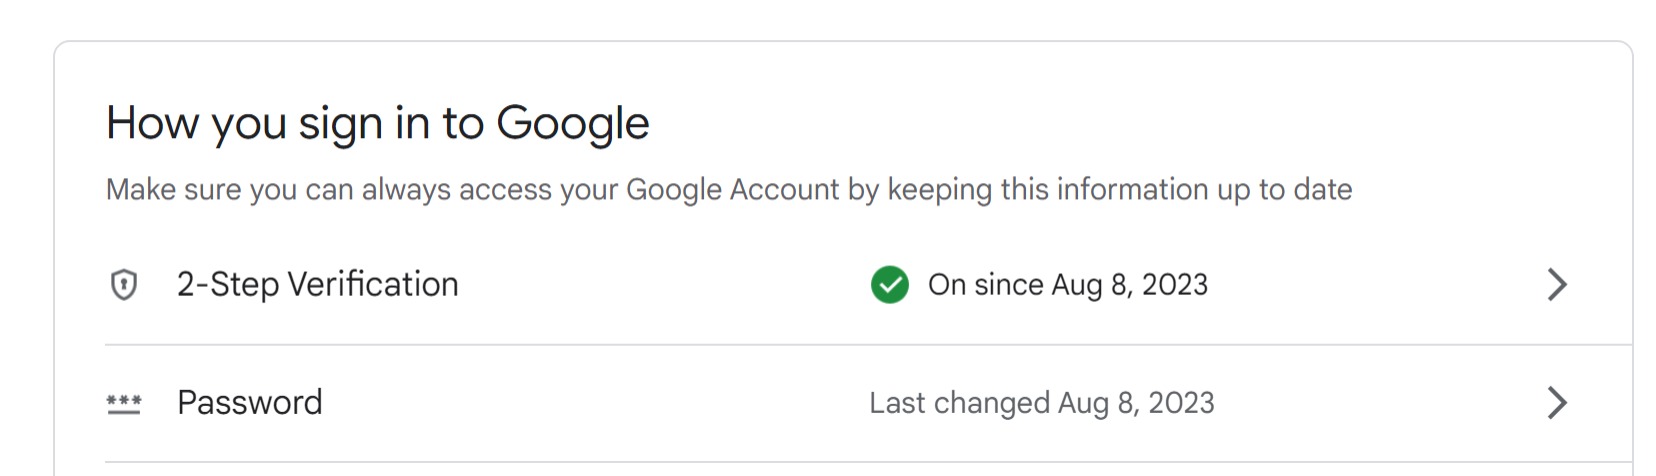
- Enter Account Security Center
- Activate 2-Step Verification:
After activation, enter 2-Step Verification, there is an App passwords at the bottom of the page, after entering, create a Mail App password.
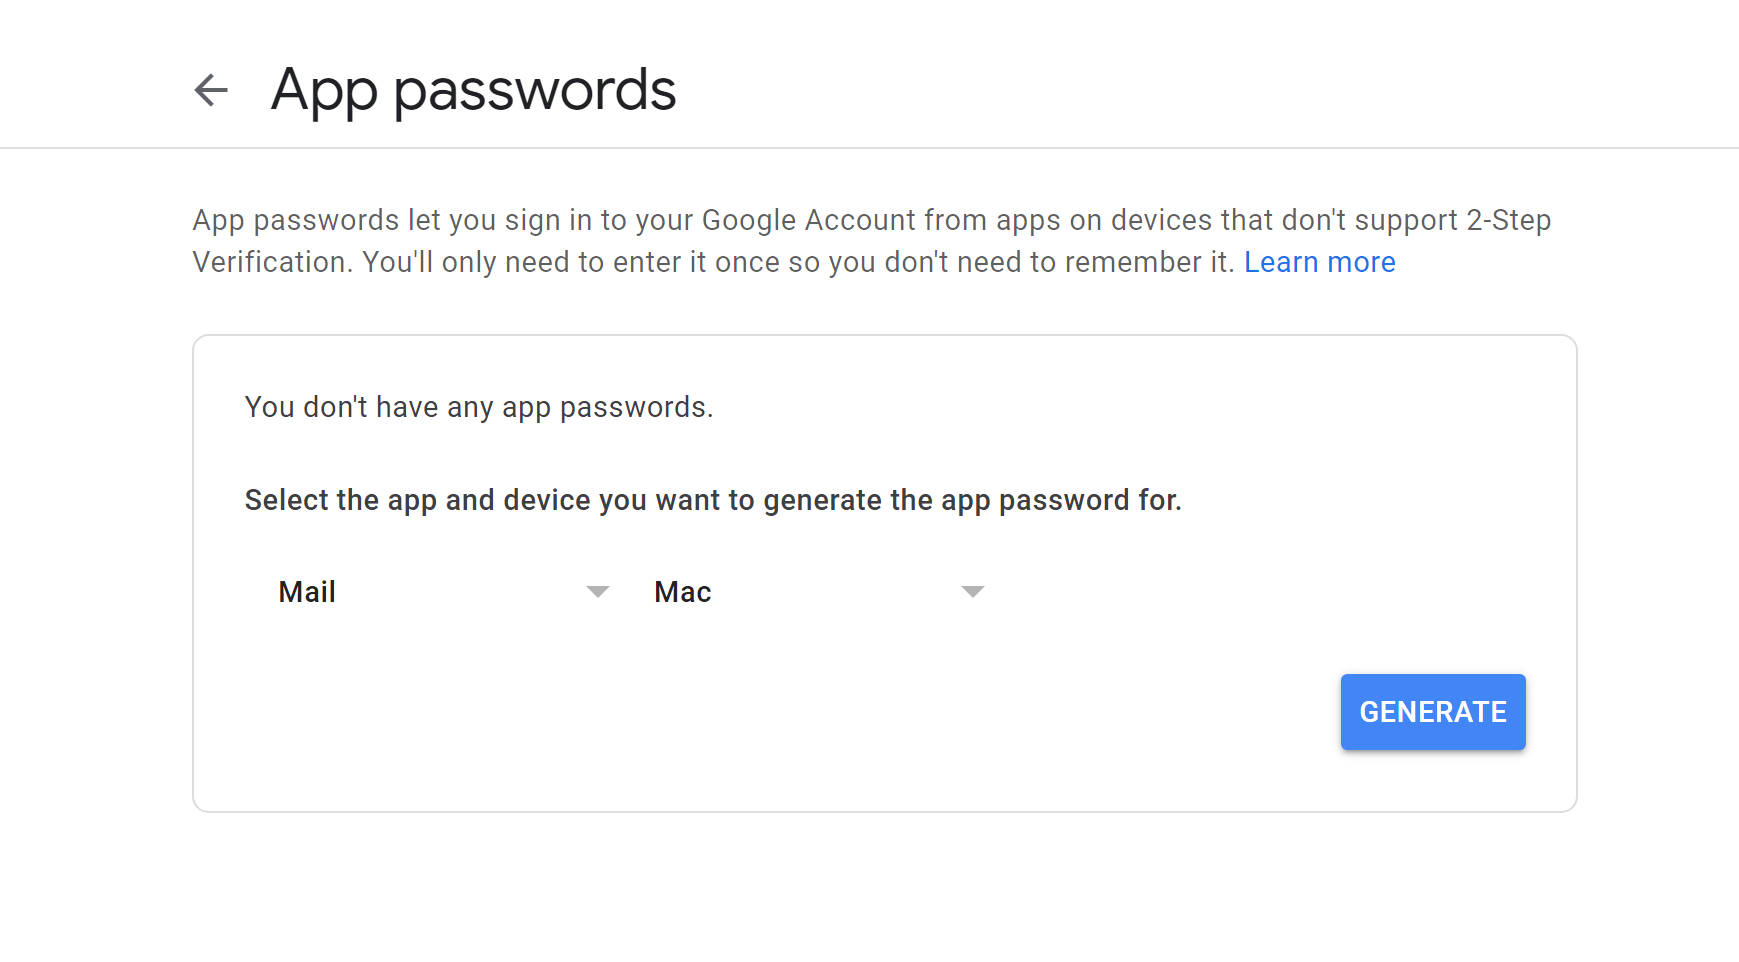
Then use the generated password in the password filling box in the previous chapter. After completion, you can set the personal domain name mailbox as the default sender in the settings page.
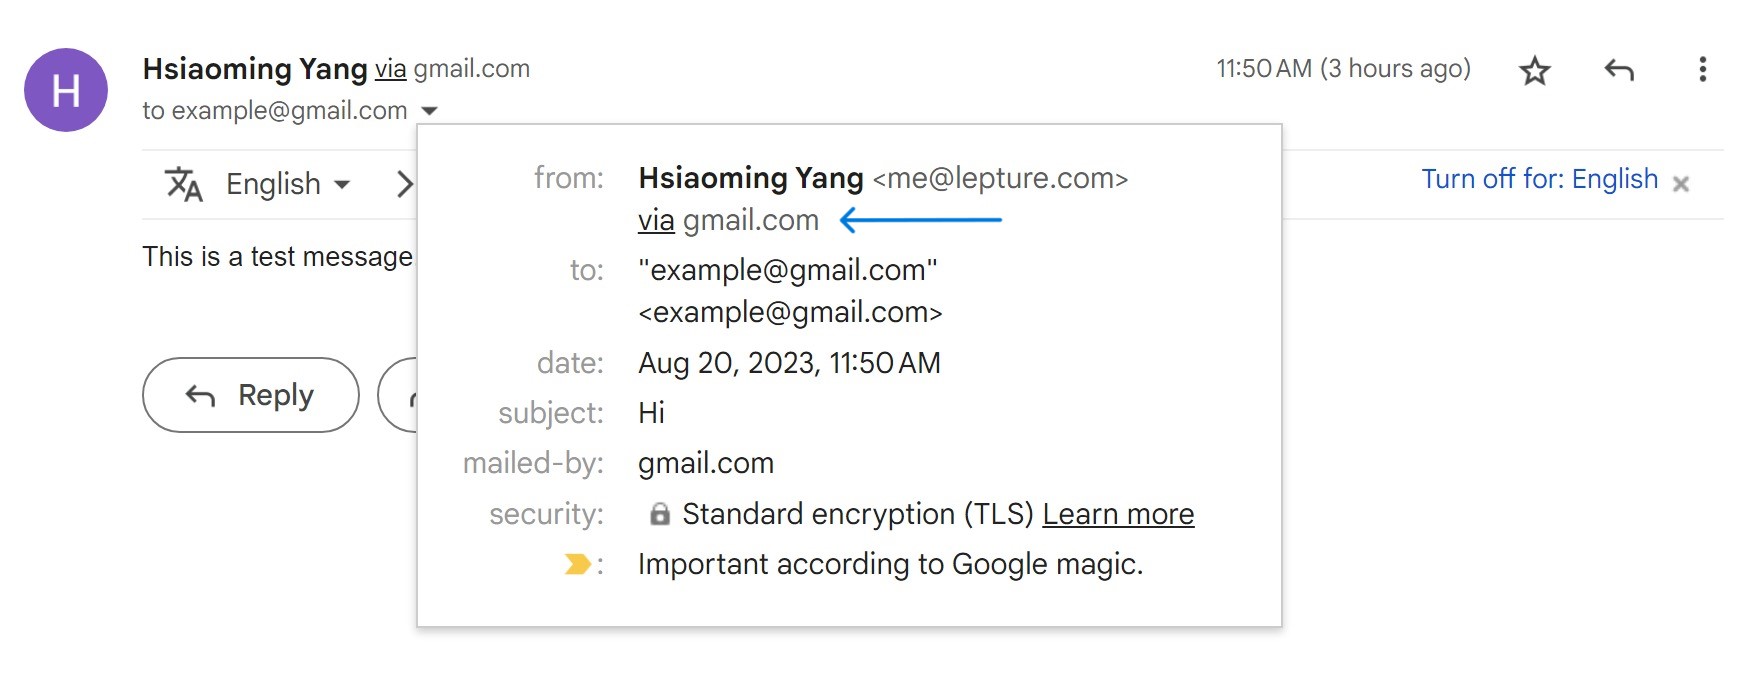
test
Finally, try to send a test email, and the received email will appear “via gmail.com”.
note
Finally, don’t forget to cancel your Google Workspace package.
This article is transferred from: https://lepture.com/zh/2023/free-email-provider
This site is only for collection, and the copyright belongs to the original author.