Original link: https://www.kxit.net/blog/626.html
Many friends want to play MacOS after playing with the Windows system, but don’t want to spend money on an Apple device, so let’s try the water with a VMware virtual machine!
Prepare materials:
(Attach download link) VMware Workstation 16 software (versions 14 and 15 are also possible), MacOS Big Sur 11.2.3 (20D91) ISO file, VMware unlock MacOS system software;
Tutorial:
1. Install and configure VMware software
Click the link in “Preparation Materials” to download the VMware Workstation 16 software , and then enter the registration code. The installation is very simple, and I won’t explain it here. If you don’t want to download the registration machine, you can search for the registration code on Baidu , which is also very convenient.
2. Unlock the MacOS installation option in VMware
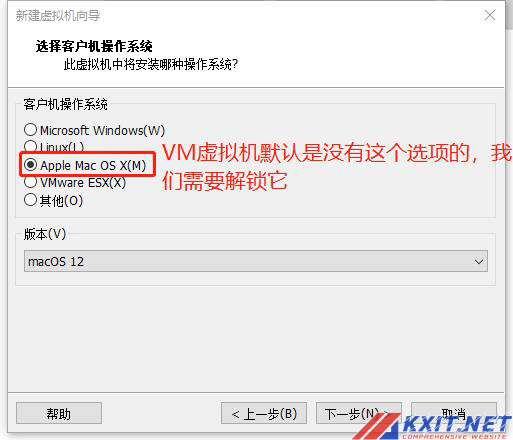
Those who have used VMware software should know that there is no MacOS system installation option in the “New Virtual Machine Wizard” in VMware, so we need the MacOS system unlocking software to get it done.
The first step is to unzip the compressed package we downloaded, click to unzip, and then get an exe file, we double-click to open it, as shown below:
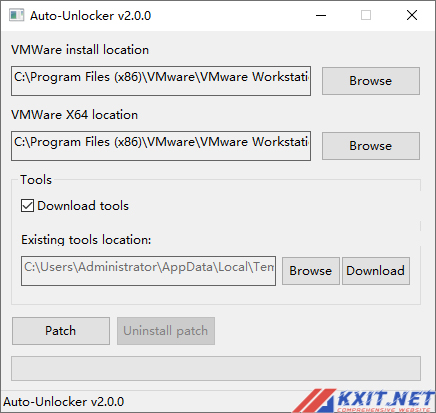
Let’s first check whether the two paths of “VMWare install location” and ”VMWare X64 location’ in the software correspond to the installation directory of the VMWare software we installed (generally correct, do not need to be changed). If it is correct, then continue to watch the tutorial:
First click the “download” option in the software, let the software download the required patch files by itself, wait for the download to complete, click the “Patch” button, and wait for the unlocking to complete. After completion, open our VMWare software, and you will find that there is an additional MacOS system!
3. Formal installation
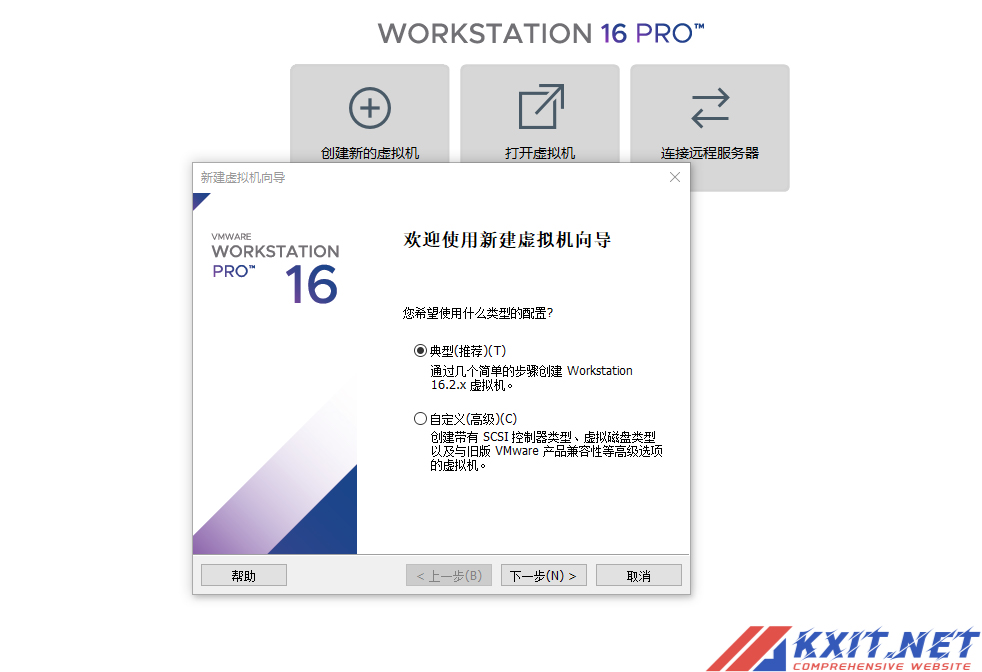
Open the VMWare software, click “Create a new virtual machine” > select “Typical”, “Next” >
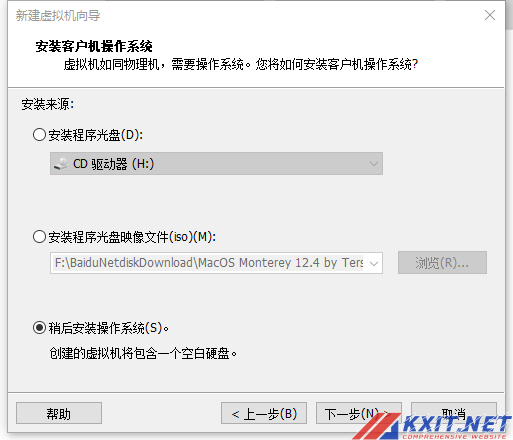
Click “Install the operating system later”, “Next” >
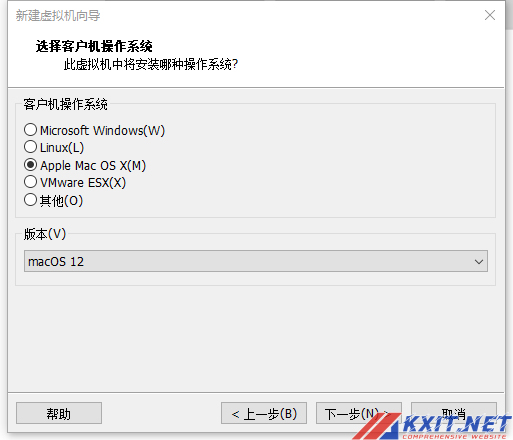
In “Guest Operating System”, we select “Apple MacOS X”, the version corresponds to the image version we downloaded, select “MacOS12” version, “Next” >
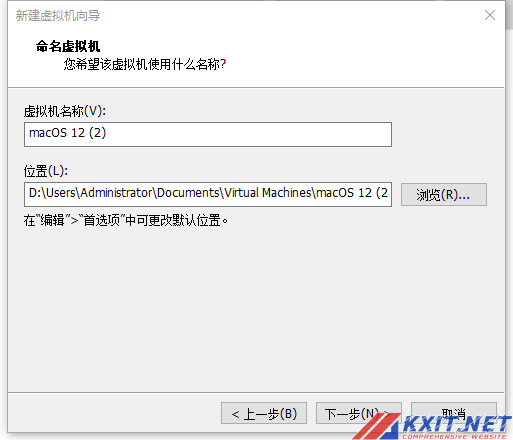
The virtual machine name and location can be changed or not, the next step>
It is recommended to set the maximum disk size above 60G. Note that the selected virtual machine location has enough hard disk space. It is best to ensure that there is 80GB of free space to store our virtual machine. Next>

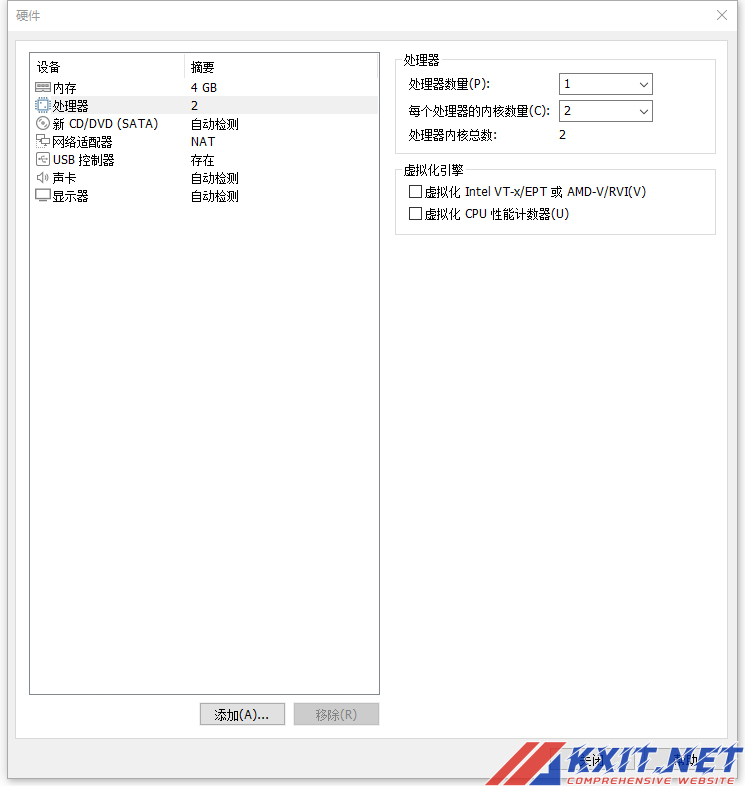
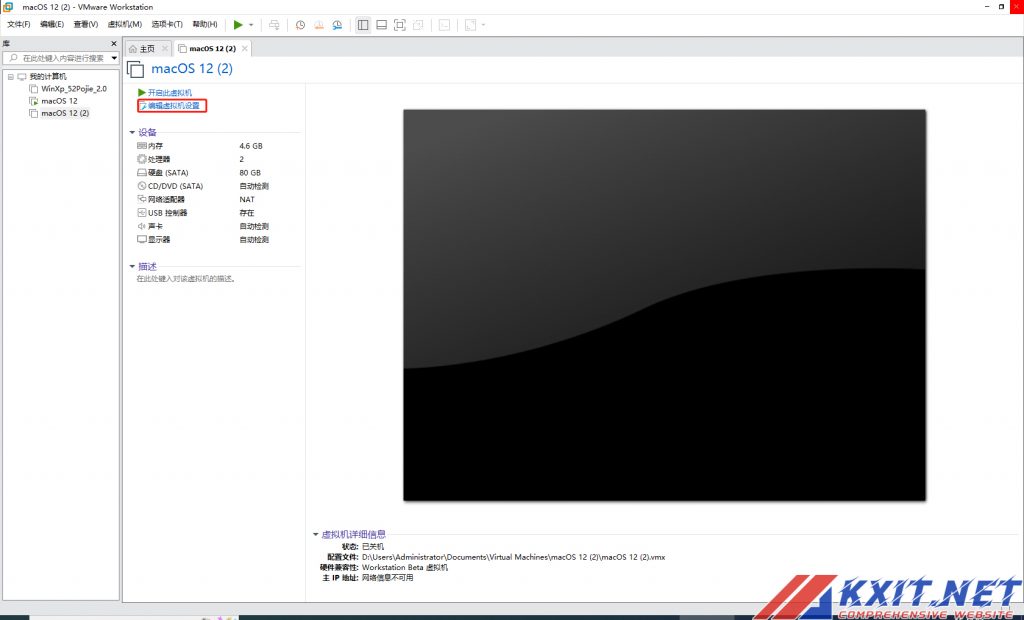
Click “Customize Hardware”, the memory (4G and above is recommended), CPU and other settings are set to high-profile, otherwise it will be very stuck when running. After setting, click “”Finish”.

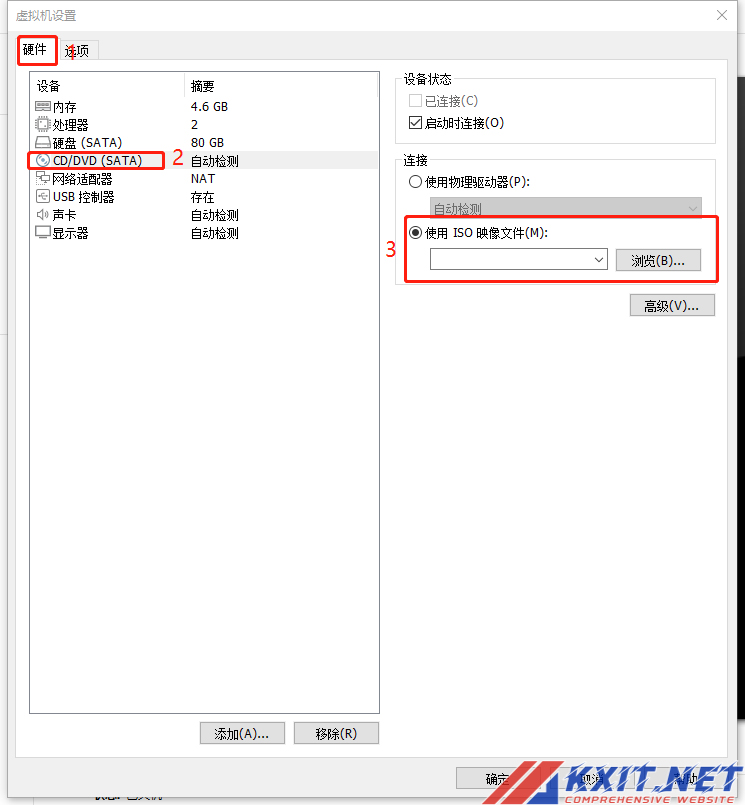
Don’t rush to open the virtual machine after the setting is completed, because the image has not been mounted: click “Edit virtual machine configuration” > Hardware > CD/DVD (SATA) option > select the image file we downloaded, and click OK when finished.
At this point, open our virtual machine:
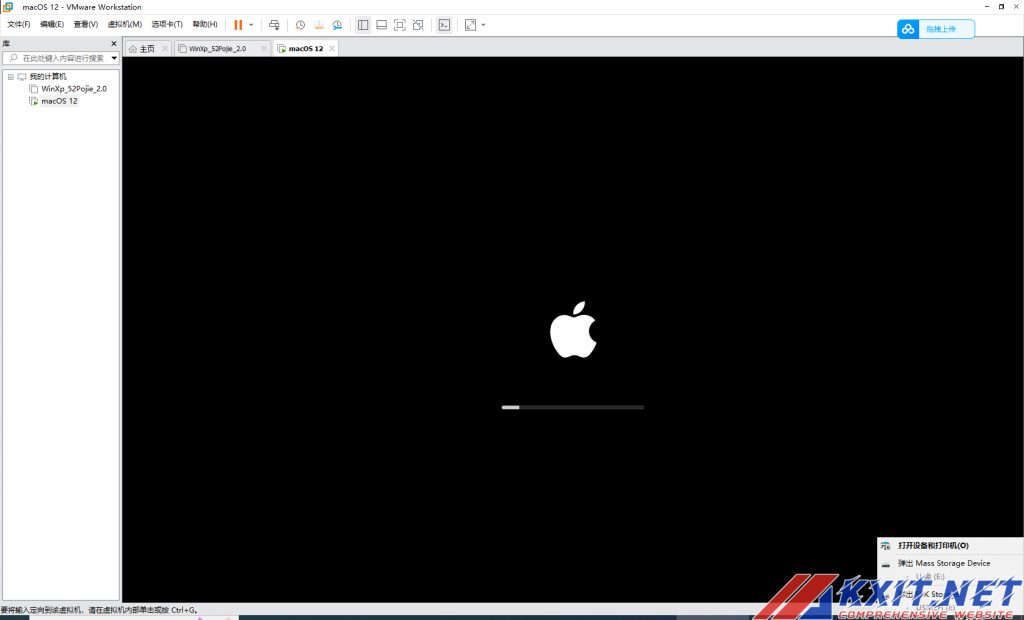
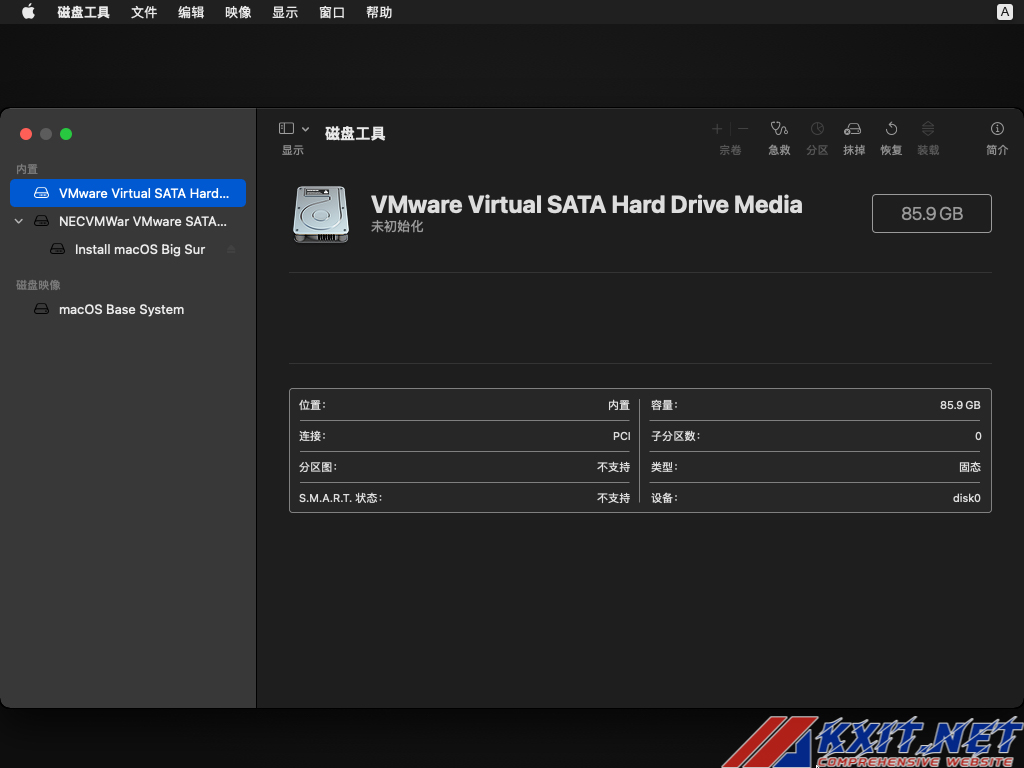
After the loading is complete, don’t rush to click Install, let’s click Disk Utility first

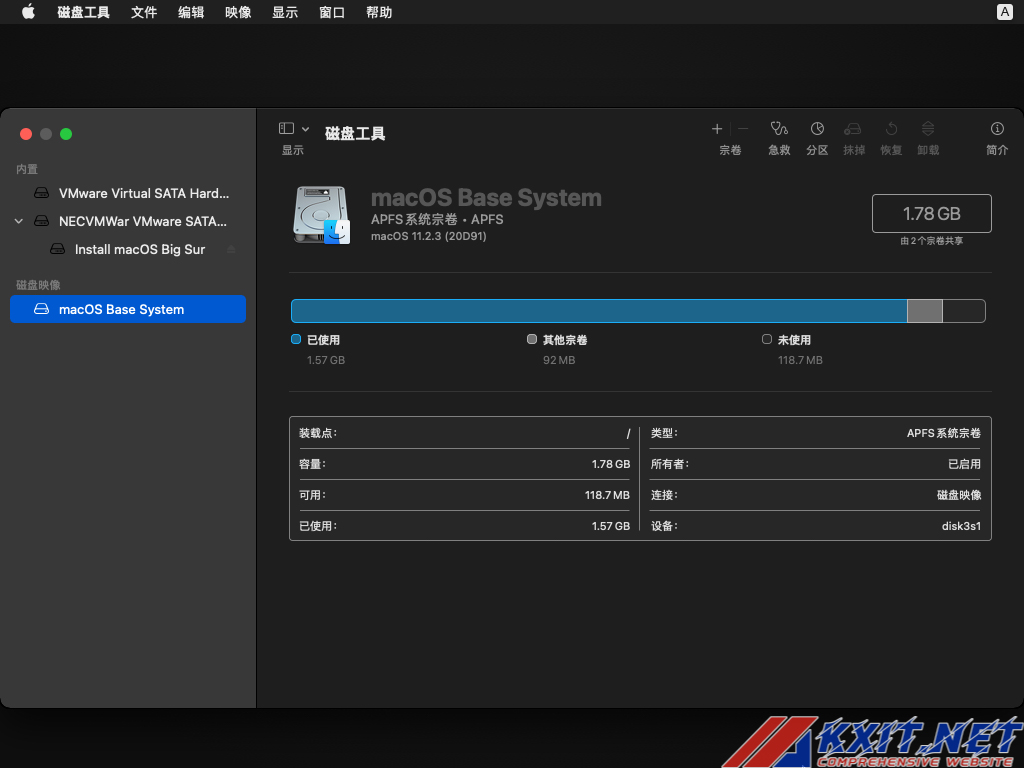
Select the disk starting with VMWare and click “Erase”

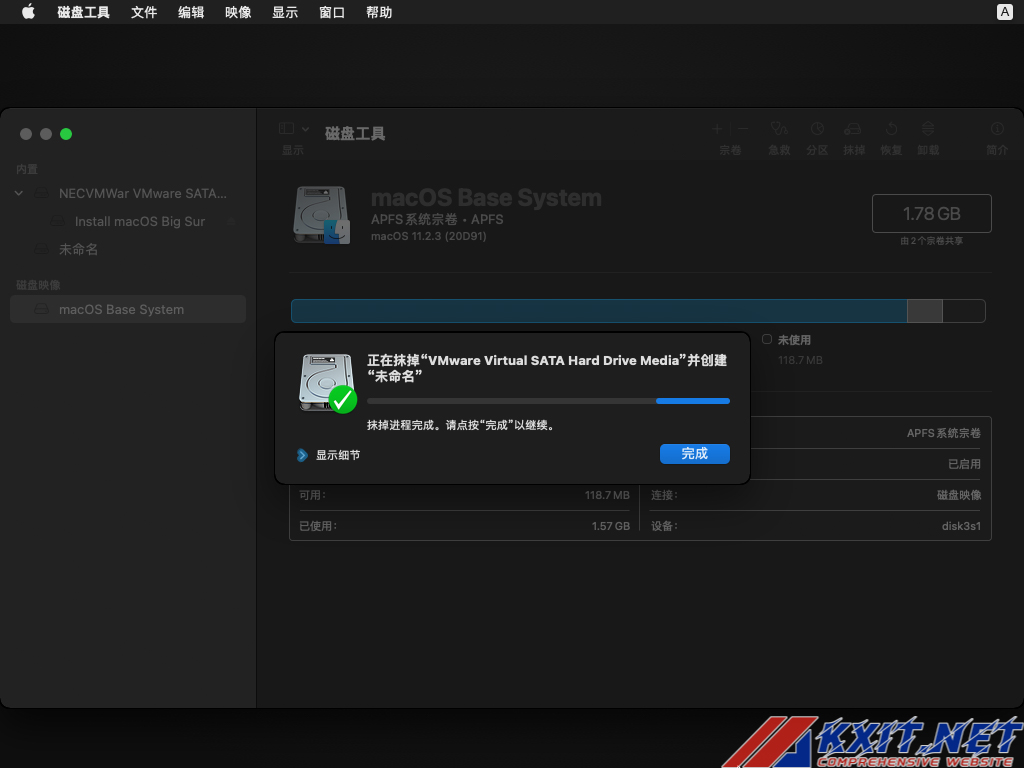
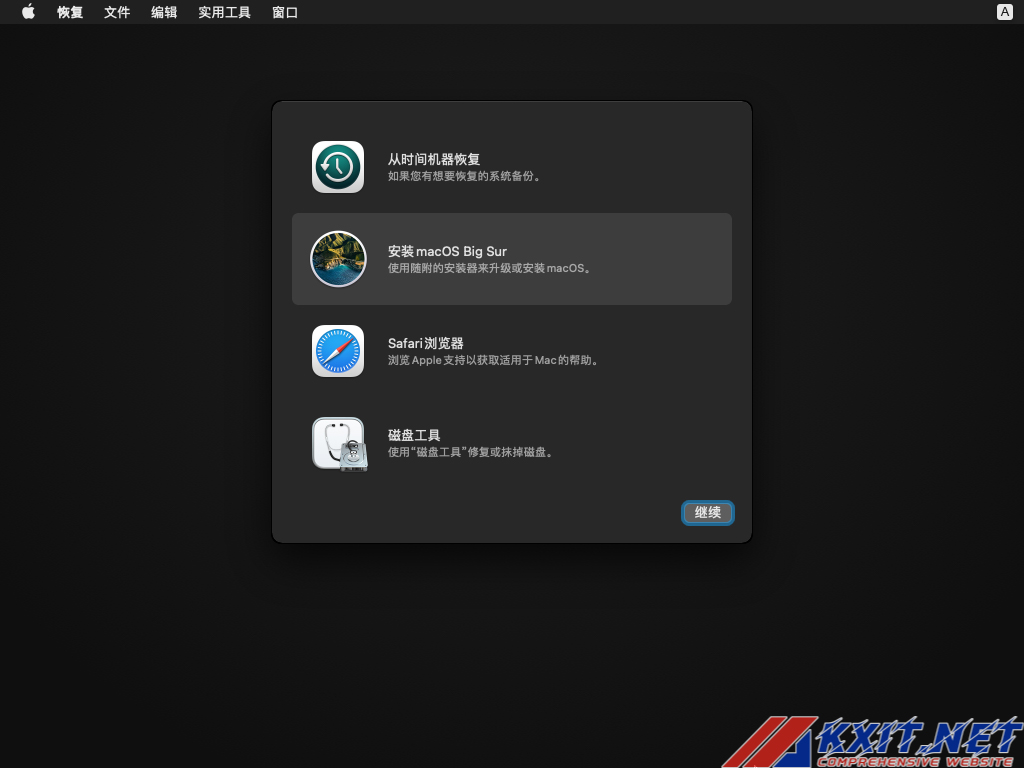
Then exit Disk Utility and click Install MacOS Big Sur:
Next is a brainless operation, as shown in the figure
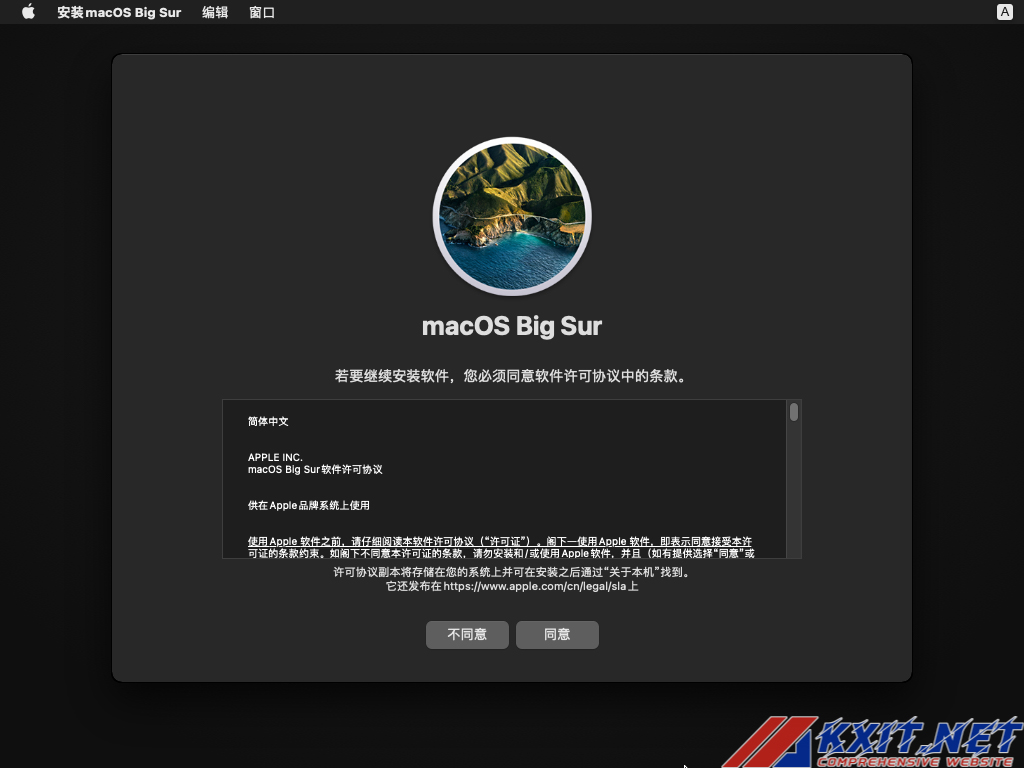
After clicking Continue, wait for the installation to complete.

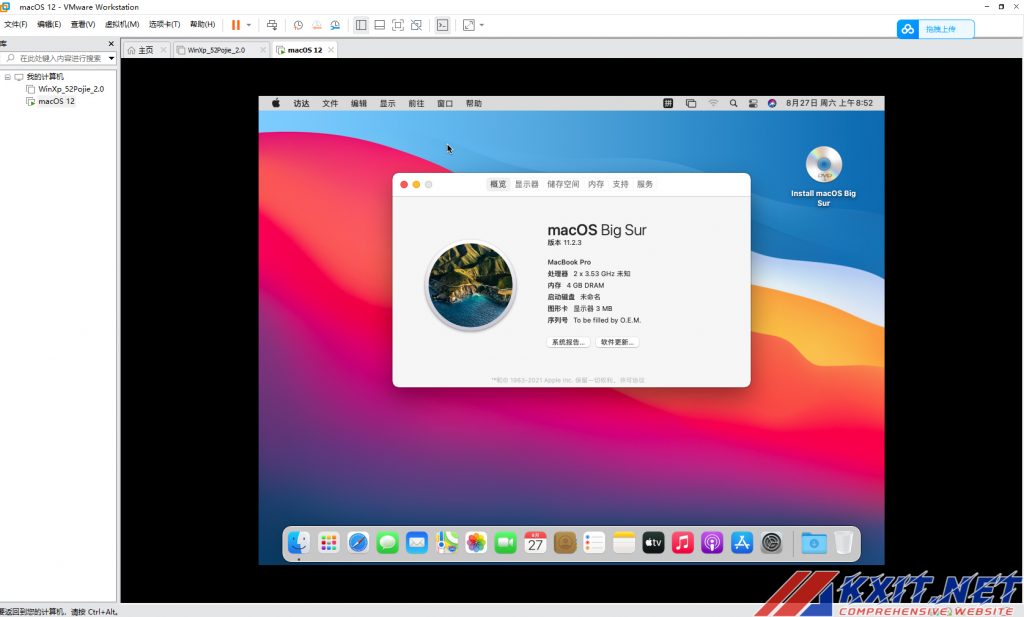
After the installation is complete, configure the country and language, and the installation is complete!
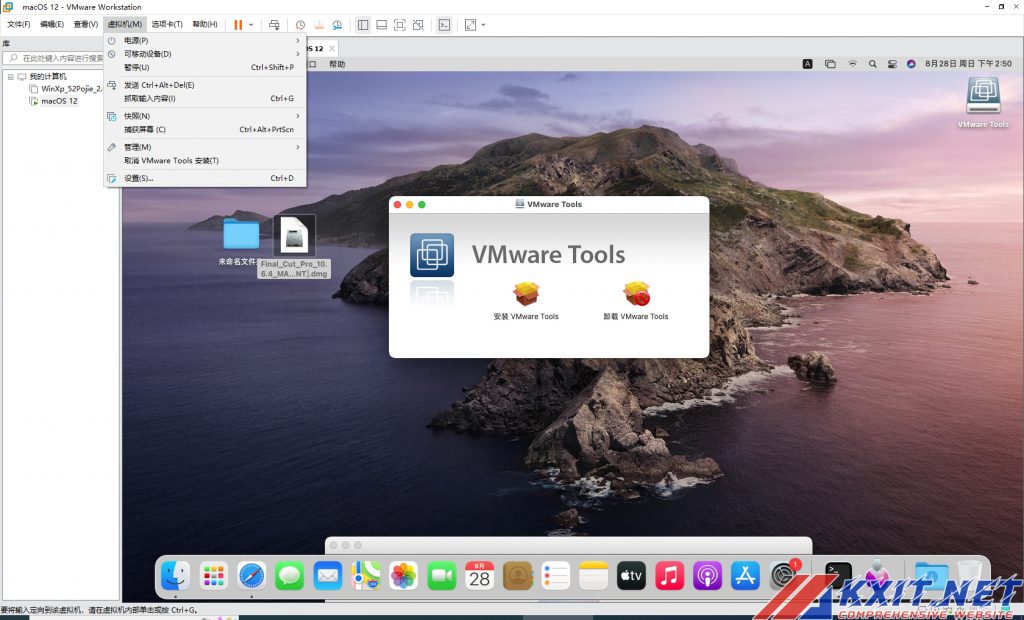
At this point, you will find that the screen of the system does not cover the entire virtual machine, then you should install VMware tools. After the installation is complete, restart it, and you will find it more comfortable:
At this point, the tutorial is over!
Common bug fixes:
One: In the AMD client environment, VMware prompts “The operating system has disabled the CPU. Please shut down or reset the virtual machine.” Solution:
We need to open the macOS xxx.vmx generated in the virtual machine installation directory with Notepad, and add the following code at the bottom to save it:
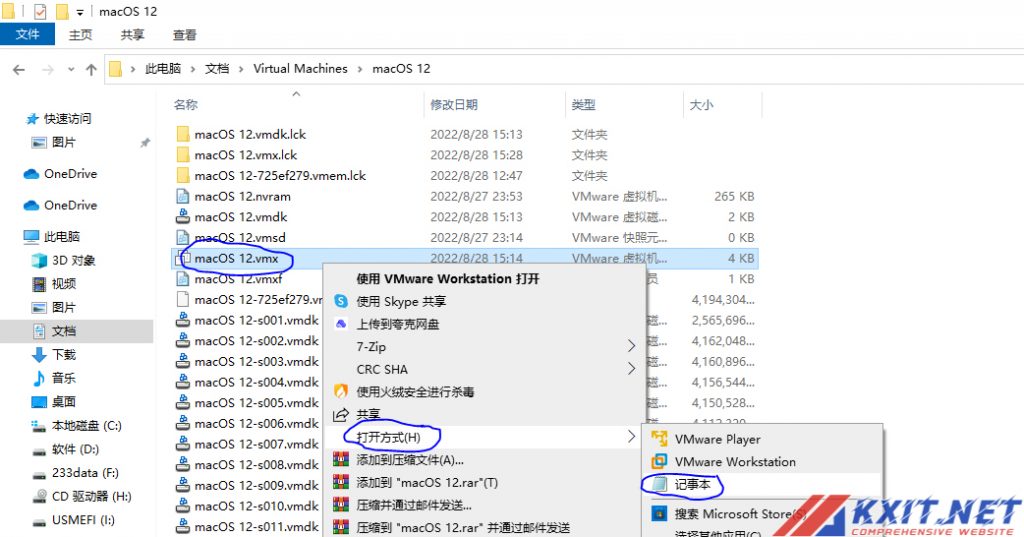
cpuid.0.eax = "0000:0000:0000:0000:0000:0000:0000:1011" cpuid.0.ebx = "0111:0101:0110:1110:0110:0101:0100:0111" cpuid.0.ecx = "0110:1100:0110:0101:0111:0100:0110:1110" cpuid.0.edx = "0100:1001:0110:0101:0110:1110:0110:1001" cpuid.1.eax = "0000:0000:0000:0001:0000:0110:0111:0001" cpuid.1.ebx = "0000:0010:0000:0001:0000:1000:0000:0000" cpuid.1.ecx = "1000:0010:1001:1000:0010:0010:0000:0011" cpuid.1.edx = "0000:0111:1000:1011:1111:1011:1111:1111" smbios.reflectHost = "TRUE" hw.model = "MacBookPro14,3" board-id = "Mac-551B86E5744E2388" keyboard.vusb.enable = "TRUE" mouse.vusb.enable = "TRUE"
2. If the following error occurs:
(vcpu-0) vcpu-0:VERIFY vmcoremrrVmain/physMem一monitor.c:1279 曰志文件位于”D:\MacOS 12\vmware.log”中
Similarly, use Notepad to open the macOS xxx.vmx file generated in the virtual machine installation directory, use the search tool to find the field “smc.present = “TRUE”, add “smc.version=0” below, and save it .
This article is reprinted from: https://www.kxit.net/blog/626.html
This site is for inclusion only, and the copyright belongs to the original author.